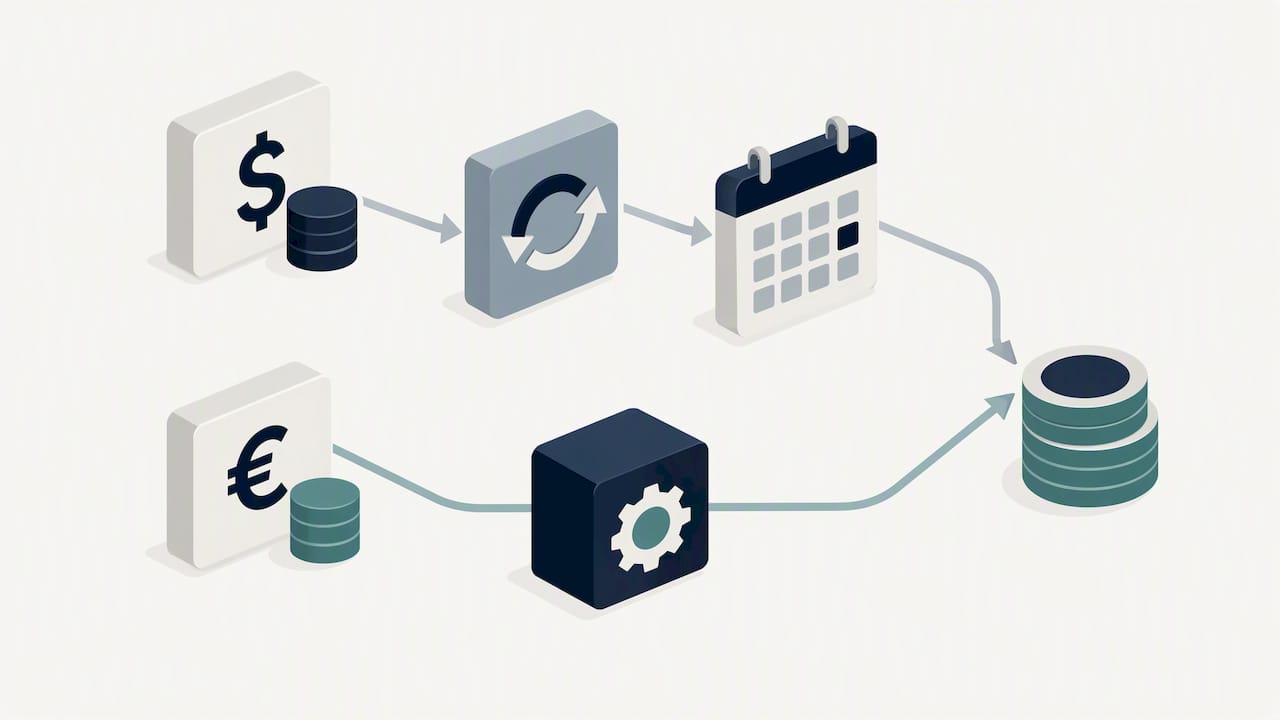
Debt Payoff Plan: Find Cash Leaks and Automate a Small Extra Payment

Start your debt payoff plan today with three steps: list every debt with its balance and rate, pick a repayment method you can stick with, and automate your minimum payments plus one small extra payment. That single sequence, done this week, puts you ahead of most people who stay stuck in planning mode. The rest of this guide shows you how to do each step well.


TL;DR:

  • Use current account portals to record each balance, APR, minimum, due date, collateral status, and any early payment penalty before choosing a payoff order.
  • Avalanche minimizes interest by targeting the highest APR, while snowball closes small balances sooner; choose the method you can sustain, or combine them.
  • Keep extra payments affordable and preserve a small emergency buffer; schedule them after payday, then raise the amount by $10 to $20 after raises or account closures.
  • Balance transfers and consolidation can add fees or trigger retroactive interest, so compare total costs and confirm you can clear transferred balances before promotions end.
  • If payments become unmanageable, ask creditors about hardship terms or contact a nonprofit credit counselor; avoid debt relief firms demanding upfront fees.

Valapoint
valapoint.com
Find Cash Leaks to Support Your Plan
Vala identifies recurring charges and subscriptions, helping you spot expenses you may choose to redirect toward debt payments.

Visit Vala

Table of Contents

Gather and organize every debt: what to record and how to capture it quickly

You can’t build a real plan on guesswork. Before you choose a strategy, pull every account into one place so you’re working from accurate numbers, not memory.

For each debt, record:

  • Creditor name and account type (credit card, auto loan, student loan, personal loan).
  • Current balance as of your most recent statement.
  • Interest rate (APR), since this drives how fast balances grow if left unpaid.
  • Minimum payment and due date for each account.
  • Secured or unsecured status, since secured debt (like a car loan) carries repossession risk if missed.
  • Prepayment penalties, if any, since some loans charge a fee for paying early.

The fastest way to gather this is to log into each account directly rather than relying on old statements, since balances and rates shift. A one-sheet spreadsheet works fine, or you can plug your numbers into our debt payoff calculator to see a rough payoff timeline as soon as your list is complete.

Each field matters for a reason. The APR tells you which debts are costing you the most. The minimum payment tells you your baseline monthly obligation. The due dates let you build a payment calendar that avoids late fees. Once this list exists, choosing a strategy becomes a matter of running the numbers instead of guessing.

Choose a repayment strategy: avalanche, snowball, or a hybrid

Two repayment methods dominate the research, and Fidelity lays out the trade-off clearly: avalanche saves the most money in interest, while snowball tends to keep people motivated longer. Neither is universally “better.” The right one is the one you’ll actually follow through on.

  • Debt avalanche: pay minimums on everything, then put extra money toward the highest-APR debt first. This minimizes total interest paid over time and suits people who are motivated by numbers and long-term savings.
  • Debt snowball: pay minimums on everything, then put extra money toward the smallest balance first. This delivers faster wins, since you close out an account sooner, and suits people who need visible progress to stay engaged.
  • Hybrid approach: knock out one or two small balances first for quick momentum, then switch to attacking the highest-rate debt. This blends motivation with savings and works well if you have one tiny account dragging down your confidence.

Pro Tip: If you’re not sure which method fits you, try the decision rule: if your highest-rate debt is also one of your smaller balances, avalanche and snowball point the same direction, so just start there.

Even modest extra payments make a measurable dent in what you owe. FDIC guidance confirms that paying more than the minimum on credit cards significantly cuts long-term interest costs, which is why the extra-payment habit matters more than which debt you target first.

Budget moves to free consistent extra cash without breaking essentials

The strategy only works if you consistently have extra money to apply. Start with an amount you know you can sustain every month, even if it’s small, and build from there rather than committing to a number that collapses the first time an unexpected bill shows up.

  1. Set a starting extra payment of a fixed dollar amount you won’t miss, even $25 or $50, and automate it alongside your minimums.
  2. Review recurring charges like streaming services, app subscriptions, and memberships you forgot you had.
  3. Check your insurance premiums for auto, renters, or home coverage, since rates often drift upward without you noticing.
  4. Pause discretionary spending in one category for 30 days, such as dining out or impulse online orders, and redirect that amount to debt.
  5. Align payment dates with payday so extra payments go out right after you’re paid, before the money gets absorbed elsewhere.

Keep a small emergency buffer untouched while you pay down debt. The CFPB’s reducing debt worksheet recommends documenting your plan with specific priorities so a sudden expense doesn’t knock you off track entirely. Our monthly budget planner walks through this balance in more detail if you want a template to start from.

Pro Tip: Increase your extra payment by $10 to $20 every time you get a raise or finish paying off a smaller account, so your progress compounds without feeling like a sacrifice.

Automate and track progress: calculators, spreadsheets and what to visualize

Automation removes the willpower problem. Once your minimums and extra payment are scheduled to go out automatically, you only need to check in periodically rather than make the same decision every month.

  • Set automatic minimum payments on every account so nothing is ever missed, then schedule your extra payment as a separate automatic transfer right after payday.
  • Run your numbers through a calculator or spreadsheet to estimate your payoff date and total interest saved. Key inputs are your balance, APR, minimum payment, and planned extra payment.
  • Track three numbers monthly: total principal paid down, accounts fully closed, and monthly interest charges, since watching interest drop is often more motivating than watching the balance shrink.
  • Consider consolidation or a balance transfer only after checking the math. FDIC guidance warns that balance transfer fees and retroactive interest can erase the savings if you don’t pay off the transferred balance during the introductory period.

If you’re weighing consolidation against a longer-term loan, Lending Gurus walks through strategies for lowering total loan cost that are worth reading before you commit to any refinancing option.

How money-leak detection and a payoff calculator keep your plan on track

Finding extra dollars for debt payments gets a lot easier when you can see exactly where your money is leaking. We built Vala around that idea: it reviews your recurring charges and subscriptions and flags the ones quietly draining your account.

  • Money-leak detection surfaces forgotten subscriptions and recurring fees you can redirect straight into debt payments.
  • Our debt payoff calculator and family budget planner help you see your payoff date and adjust your extra payment as your budget changes.
  • All of this runs on bank-level encryption through Plaid, so your account data stays private while you work.

Set checkpoints and revise: milestones and when to seek outside help

A plan without checkpoints drifts.

  • Revisit your budget monthly and adjust your extra payment up or down if your income or expenses shift, keeping your automation aligned with reality.
  • If a debt feels permanently unmanageable, a nonprofit credit counselor can review your full picture at low or no cost, a route the FTC recommends over companies charging upfront fees for debt relief.
  • Contact creditors directly if you’re facing a hardship. Many offer temporary payment plans or reduced rates, but expect them to ask about your situation before agreeing to anything.

Typical costs and timeline considerations

Interest is the real cost of carrying debt, and it compounds quietly while you focus on the balance alone. The FDIC notes that even small extra payments meaningfully reduce the total interest you pay over the life of a credit card balance, which is why timeline estimates should always factor in your planned extra payment, not just your minimums.

Fees deserve equal attention. Balance transfer offers often carry an upfront fee, and the FDIC points out that if you don’t clear the transferred balance before the promotional period ends, retroactive interest can apply to the full original amount. Consolidation loans can simplify multiple payments into one, but they don’t erase the underlying balance or guarantee a lower effective cost once origination fees are factored in.

Timelines also shift with your repayment method. Avalanche typically produces the lowest total interest cost over the life of your debts, according to Fidelity, while snowball may take slightly longer to clear the same total balance but delivers closed accounts sooner. Either way, run your specific numbers through a calculator before assuming one approach will save you a set amount, since the result depends entirely on your actual balances and rates.

Treat consolidation as a tool for simplifying payments, not a fix for spending habits. The FDIC cautions that consolidation without a change in spending behavior often leads borrowers right back into debt, sometimes with a fresh available balance on the accounts they just paid off.

Strategies to increase income or free cash flow to accelerate debt payoff

Extra payments accelerate every method, so finding more cash flow is often more valuable than switching strategies. A few approaches work for most budgets without requiring a second job.

Review your recurring subscriptions first, since forgotten memberships and auto-renewing services are some of the easiest dollars to recover. Our subscription cost calculator can help you see the total monthly drain from recurring charges you may have stopped noticing.
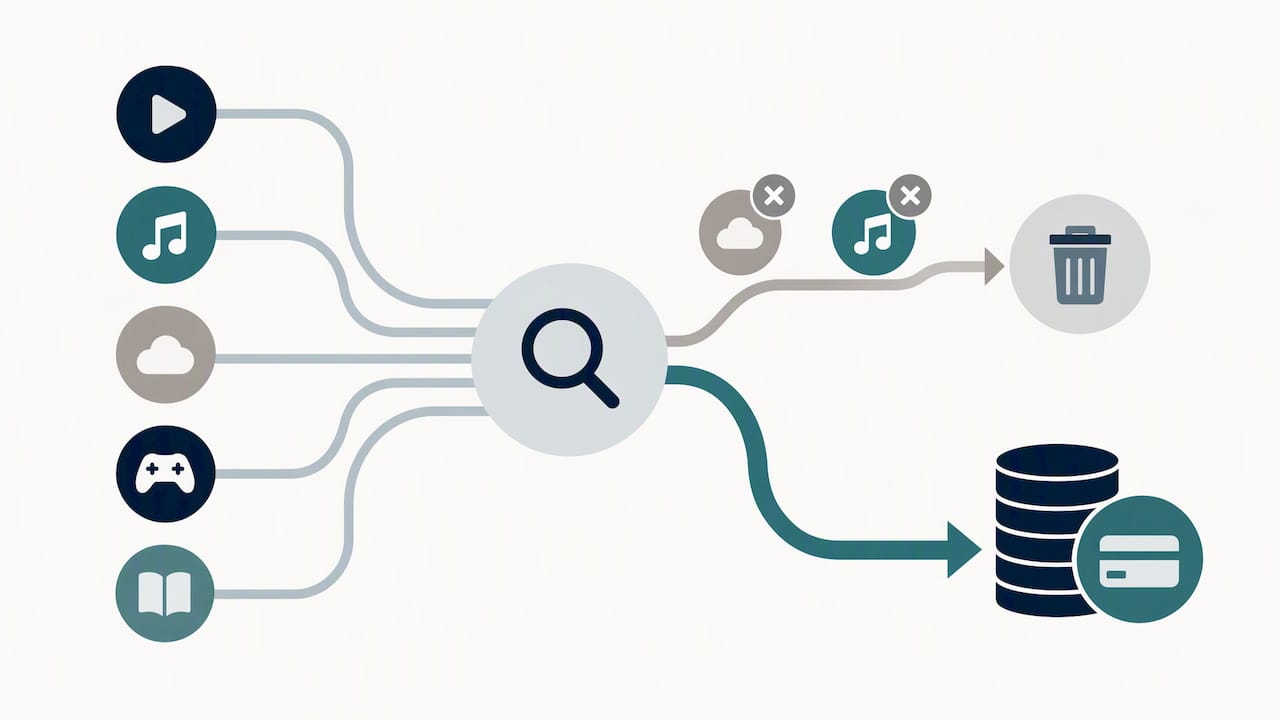
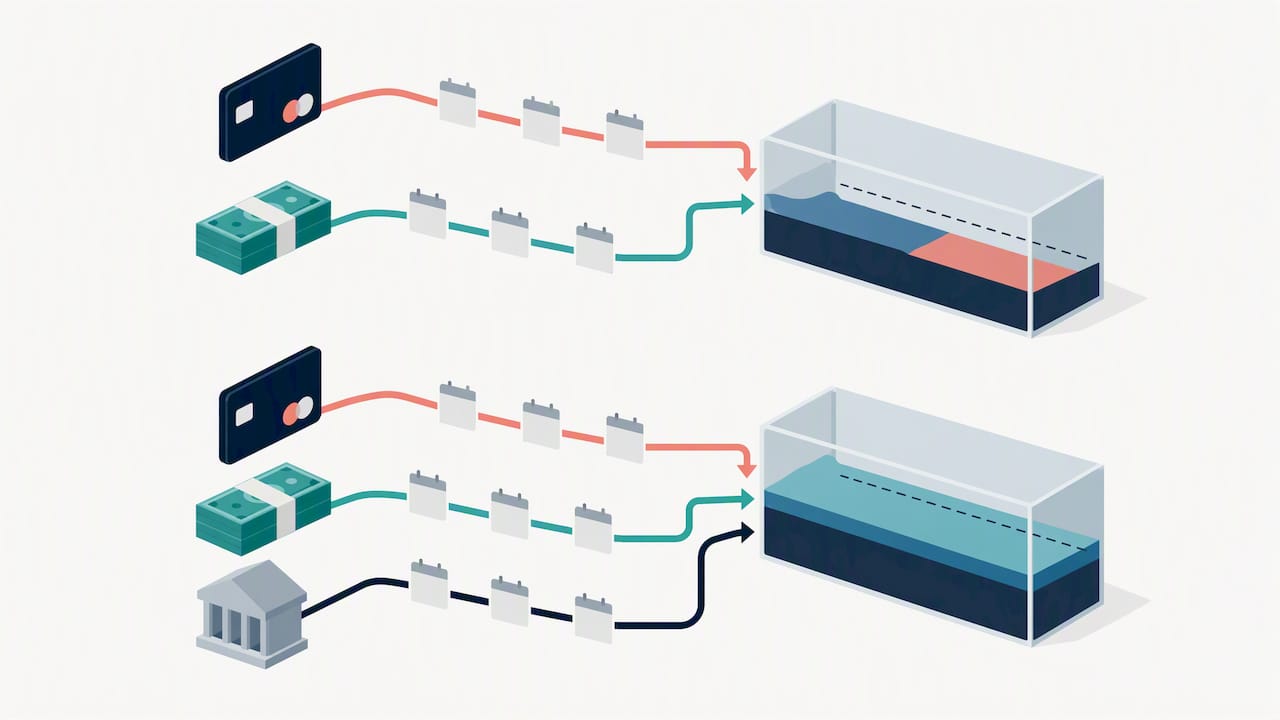
Subscription charges redirected to debt payment

Selling unused items, picking up occasional freelance or gig work, or redirecting a tax refund or work bonus toward your highest-priority debt all create one-time boosts you can apply immediately. For ongoing income, a short-term side job in a flexible field like rideshare driving, tutoring, or freelance writing adds a repeatable monthly amount you can automate into your extra payment.

Smaller, steady boosts tend to hold up better than big one-time pushes. Reporting from CBS News notes that overly aggressive payoff plans often fail because they’re hard to sustain, while modest, consistent extra payments are easier to keep up month after month. Whatever extra income you find, the key move is automating it into your debt payment the same day it arrives, before it gets absorbed into everyday spending.

How to negotiate with creditors for lower interest rates or payment plans

Calling your creditor directly is one of the most underused tools in a payoff plan. Card issuers and lenders sometimes lower your rate or adjust your payment terms if you ask, particularly if you have a solid payment history.

Before you call, know your account’s current APR, your payment history, and a specific ask, such as a lower rate or a temporary reduced payment. Mention competing offers if you have them, since issuers sometimes match a lower rate to keep your business.

If you’re already struggling, say so clearly and ask about hardship programs. Many creditors offer temporary reduced payments or waived fees for customers facing a documented hardship, though terms vary by issuer and are not guaranteed.

Be cautious with companies that promise debt relief for an upfront fee. The FTC warns that credible credit counseling organizations typically review your finances thoroughly and don’t charge fees before providing help, which is a useful test when comparing any debt-relief offer that lands in your inbox.

Psychological and motivational tips to stay committed to a debt payoff plan

Staying motivated matters as much as choosing the right math. Tracking more than just your total balance helps, since watching several signals move in the right direction keeps progress visible even when the big number drops slowly.

Reporting from CBS News suggests tracking principal paid down, accounts closed, and monthly interest charges reduced, not just your remaining balance, since each of these shows movement even in months when the total feels stuck.

Celebrate small wins deliberately. Closing one account, even a small one, is worth marking, since it reduces the number of monthly payments you’re juggling and builds confidence for the next stretch. Pair that with a visual tracker, whether a spreadsheet, a printed chart, or an app, so progress stays in view instead of living only in your memory.

Finally, build in slack. A plan that assumes everything goes perfectly tends to break at the first unexpected expense. Keep your extra payment modest enough that a tight month doesn’t feel like failure, since consistency over many months beats intensity for a few weeks.

Favor sustainable habits over hero moves

The biggest mistake we see in debt payoff plans isn’t picking the wrong strategy. It’s picking an extra payment amount too aggressive to maintain. Commit to one small automation this week, not a dramatic one-time sacrifice, and revisit your tracker monthly. Small and steady wins the stretch that matters.

— SaverStride

Optional help: try our money-leak check and debt payoff calculator

Finding extra cash for debt payments gets easier when you’re not hunting for it manually every month. Our tools are built around exactly that problem.

  • Run a free Money Leak Check to see which recurring charges are quietly draining your account.
  • All of it connects through secure, bank-level encryption via Plaid, so your financial data stays private while you work.
Valapoint

If you want a closer look at how the detection works, our money leak detector page breaks down what it flags and why.

This article is general information, not a substitute for advice from a qualified financial advisor. Consult a qualified financial professional about your own circumstances before acting on anything here.

FAQ

How can I make fast money to pay off debt?

Selling unused items, picking up short-term gig work, and redirecting a tax refund or bonus toward your highest-priority debt are the fastest ways to free up cash. Reviewing recurring subscriptions for forgotten charges is also a quick, low-effort source of extra funds you can redirect immediately.

What two debts cannot be erased through bankruptcy?

Most student loans and certain tax debts are generally very difficult to discharge through bankruptcy, though exact rules depend on the type of debt and individual circumstances. Anyone considering bankruptcy should speak with a qualified attorney about their specific situation rather than relying on general rules.

Are debt payoff planners free to use?

Many debt payoff calculators and spreadsheet templates, including the CFPB’s reducing debt worksheet, are available at no cost. Our own debt payoff calculator is also free to use for estimating your payoff timeline.

Is it a good idea to open a new credit card to pay off debt?

A balance transfer card can lower interest temporarily, but the FDIC warns that transfer fees and retroactive interest can erase the savings if the balance isn’t paid off before the promotional period ends. Review the fee structure and intro period carefully before deciding, since the math only works if you can clear the balance in time.

Sources

Split Transactions: 5 Steps to Safer Household Payments

A split transaction is simply a shared expense divided among two or more people, whether that’s rent, a dinner bill, or a group trip. The fastest way to handle one cleanly: agree on the split method out loud, write down the exact amounts, set a due date, then send or request payment through a trusted app after you’ve verified who’s actually on the other end.


TL;DR:

  • Use equal splits for single occasion costs, proportional shares for rent based on income or room size, and itemized totals when consumption differs.
  • Record amounts, payment direction, deadlines, and late or partial payment rules in a shared message, then settle within 48 hours of the expense.
  • Payment app transfers are hard to reverse, so verify recipients, turn on a PIN and extra verification, and use bank transfers for larger sums.
  • Document rent shares, utility duties, deposit division, late fees, and move out terms in a roommate agreement, then track each expense in a shared ledger.
  • Recurring rent, utility, and subscription balances can shift each month, so automate requests and reminders or keep a shared ledger visible to everyone.

Valapoint
Find Room in Your Shared Budget
Vala helps uncover recurring charges and subscriptions, so you can make informed choices about expenses that affect your household budget.

Explore Vala

Table of Contents

Common Ways to Split a Shared Expense

Most groups default to one of a few split methods, and picking the right one up front saves everyone a headache later.

An equal split works best for one-off social costs like a group dinner or concert tickets, where everyone got roughly the same value. Divide the total by the number of people and you’re done.

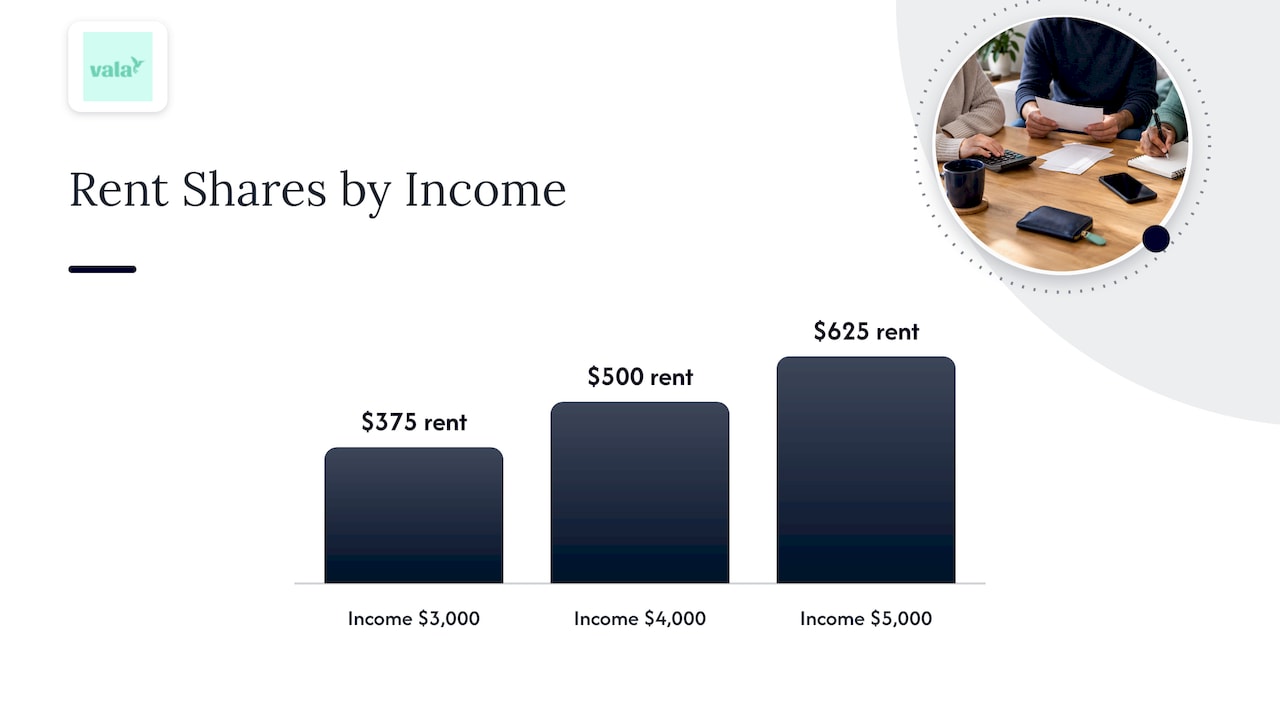
A proportional split fits ongoing shared costs like rent, where incomes or room sizes differ. Say three roommates earn $3,000, $4,000, and $5,000 a month. On a $1,500 rent bill, that’s $375, $500, and $625.

Three incomes paired with proportional rent shares

An itemized split makes sense when people order or use different amounts, like a restaurant tab where one person skipped drinks. Everyone pays for exactly what they consumed, plus their share of tax and tip.

Many households land on a hybrid: rent split proportionally by income or room size, but utilities and streaming subscriptions split evenly since everyone uses them about the same. This combination shows up often in shared housing, where proportional and shared-expense methods are common choices that groups adapt to their own dynamics.

  • Equal split: best for one-time social costs everyone shares equally.
  • Proportional split: best for recurring costs like rent, based on income or room size.
  • Itemized split: best when people consume different amounts.
  • Hybrid split: best for households mixing fixed and shared recurring costs.

If you want copyable math for rent scenarios like the one above, our guide on splitting rent with roommates walks through more examples.

A Step-by-Step Workflow for Creating and Settling a Split

Once you’ve picked a method, the actual process of creating, requesting, and settling a split transaction follows a consistent pattern.

  1. Agree on the method, the exact dollar amounts, and a due date, all in one message thread so nobody has to dig for context later.
  2. Record the split somewhere shared, whether that’s an app, a spreadsheet, or the same group chat, listing amounts and who owes what.
  3. Choose a settlement channel and spell out who sends money to whom and by when.
  4. Send the payment request with a clear deadline, and agree ahead of time what happens if someone pays late or only partially.
  5. Confirm receipt once payment lands, then mark the split closed so it doesn’t resurface in a month.

Partial payments are where splits usually fall apart. Agree in advance whether a partial payment is acceptable or whether the full amount is expected by the due date, and write that rule down once so it never needs repeating.

Pro Tip: Settle splits within 48 hours of the triggering expense. The longer a balance sits open, the easier it is to forget who owes what.

For recurring splits like rent or a shared streaming plan, our split bills and expenses walkthrough covers how to automate this workflow instead of repeating it manually every month.

Keeping Your Money Safe When You Send a Split Payment

Payment apps make settling a split fast, but speed cuts both ways. Mobile payment apps function like cash: once money is sent, it’s typically hard to recover, so verifying the recipient before you hit send matters more than almost any other step in the process.

A few habits reduce that risk substantially:

  • Double-check the recipient’s username, phone number, or email before confirming a transfer, especially with someone new to the group.
  • Turn on PIN protection and two-factor authentication in your payment app’s security settings, since these features exist specifically to protect against unauthorized access.
  • Use a bank transfer instead of a payment app for larger sums, since bank transfers typically carry stronger dispute protections.
  • Walk away from anyone who insists on gift cards or irreversible wire transfers to settle a shared expense. That’s a classic scam pattern, not a normal roommate request.

Verifying the recipient before every transfer is the single habit that prevents most payment-app losses, according to federal consumer-protection guidance.

Keep a screenshot of the payment confirmation and the original request message. If something looks off, like a payment that never shows up or a recipient who claims they never received it, that paper trail is what you’ll need to dispute the transaction or report it.

Written Agreements and Recordkeeping That Prevent Disputes

A short written agreement won’t change who’s legally on the lease, but it does set clear expectations before money gets involved. A non-legal roommate agreement that documents rent, utilities, chores, and payment timing reduces conflict even without changing lease liability.

A workable agreement should cover:

  • Exact rent shares and the due date each month.
  • How utilities are split and who’s responsible for paying the provider.
  • How the security deposit will be divided at move-out.
  • Late-fee handling if someone pays past the due date.
  • Replacement rules if someone moves out mid-lease.

Sample agreements, like the example living agreement template, spell out these clauses with specific amounts and deadlines rather than vague language, which is exactly what makes them useful later. A roommate agreement template can give you a starting structure if you’re drafting from scratch.

Pair the agreement with a simple ledger: one row per expense, with the date, amount, who paid, and who still owes, and consider using a probate document checklist to organize essential estate documents alongside your financial records. A shared spreadsheet or app log works fine, as long as everyone can see it.

Why Recurring Splits Keep Causing Friction

Most disputes over split transactions aren’t about dishonesty. They’re about forgetting who paid what three weeks ago. Recurring splits like rent, utilities, and shared subscriptions are especially prone to this because the amounts shift slightly month to month and nobody wants to be the one chasing a roommate for $12.

The real fix isn’t a stricter agreement. It’s removing the memory problem entirely, which is where automated, privacy-first tracking does more than a spreadsheet ever could. We built Vala around AI-driven detection of recurring charges and subscription costs, the same category of expense that quietly causes most split disputes, and we connect bank data through Plaid’s encryption so that tracking shared costs doesn’t mean handing over sensitive financial details to a group chat.

— SaverStride

Let Vala Handle the Repeat Splits for You

Split-expense tracking tools can help avoid recreating the same group chat every month. Automated split requests, a shared ledger, and payment reminders can help recurring costs like rent or a joint subscription settle themselves instead of needing manual nudges.

Valapoint

What you get Why it helps with splits
Automated split requests No more manually texting amounts each month
Shared ledger Everyone sees who paid and who still owes
Recurring split handling Rent and subscriptions split automatically each cycle
SaverPro plan $2.99 per month for full-featured tracking (Valapoint)

If you manage shared costs with roommates or a partner, try our split expenses tools or start a free trial to see your recurring splits in one place.

FAQ

What is the easiest way to split a bill fairly?

For one-time shared costs like a dinner or group outing, an equal split is usually fairest since everyone got similar value. For recurring costs like rent, a proportional split based on income or room size tends to feel fairer over time.

How do I split expenses in a group without arguments?

Agree on the method and exact amounts in writing before anyone pays, and keep a shared record of what’s owed. A short roommate agreement covering rent, utilities, and payment timing reduces most disputes before they start.

Is it safe to send money through apps like Venmo or Zelle?

Payment apps are generally safe when you verify the recipient first, since transfers are treated like cash and are hard to reverse once sent. Enable PIN protection and two-factor authentication, and use a bank transfer instead for larger amounts.

What should I do if someone can’t pay their share on time?

Agree in advance on your household’s rule for late or partial payments, such as a short grace period or a flat late fee. Document the shortfall in your shared ledger so it’s resolved at the next settlement instead of forgotten.

Can an app help manage split transactions automatically?

Yes. Tools like Vala can automate split requests, maintain a shared ledger, and send payment reminders so recurring costs like rent or subscriptions don’t require manual tracking each month.

Sources

Two Bills or an Audit: Negotiate Your Internet Bill With Proof

You can usually lower your internet bill today. Call your provider prepared with one clear ask and evidence of a better deal, or run a quick audit first to surface fees you didn’t know you were paying. The strongest moves are asking for a retention discount, dropping equipment rental, moving your due date, or adding autopay savings. Grab your last two bills and a competitor’s price before you dial.


TL;DR:

  • Compare broadband consumer labels for similar speed tiers, then bring your last two bills, a competitor’s offer, and a target price to the call.
  • Ask to be transferred to retention if the first representative cannot help, and get the new price, effective date, and promotion’s end date in writing.
  • Equipment rental fees typically add between $5 and $15 monthly, and buying your own modem and router usually recovers its cost within a year.
  • Lifeline offers up to $9.25 monthly, or $34.25 on qualifying Tribal lands; eligibility depends on income or participation in SNAP, Medicaid, or SSI.
  • Downgrade only when your household does not need the extra speed, and check for data caps or overage fees that could erase savings.

Valapoint
Find More Room in Your Budget
Valapoint helps uncover recurring charges and subscriptions, so you can spot potential savings beyond your internet bill.

Table of Contents

How to negotiate your internet bill step by step

A successful call comes down to four things: knowing your bill, knowing the market, having a script, and following up in writing. Skip any one of these and you leave money on the table.

Start by reading your actual bill line by line. Look for:

  • Your base monthly price before taxes and fees
  • The date your promotional or introductory rate ends
  • Equipment rental charges for your modem or router
  • Any add-on fees for extra data, premium channels, or “service” charges
  • The remaining length of your contract, if you have one

Once you know what you’re paying, compare it to what’s actually available. Every provider is required to post a broadband consumer label showing base price, promotional pricing, speeds, data allowances, and fees, which makes it easy to line up offers side by side instead of comparing vague marketing claims. Consumer Reports points to these labels as one of the clearest ways to avoid being misled by a temporary teaser rate. Pull up a competitor’s label for a similar speed tier in your area and take a screenshot.

Before you call, assemble a short checklist:

  1. Your account number and the name on the account
  2. Your last one or two bills showing the current price
  3. A specific target price you want to reach
  4. A screenshot or printout of a competitor’s offer
  5. A one-line opening statement and a fallback ask if the first one is declined

Structure the call itself in four parts: open with your request, present your evidence, state your target price, and have a fallback ready if the first offer falls short. A typical opener sounds like, “I’ve been a customer for a while and I’m comparing plans. I’d like to see what you can do on price before I consider switching.” Keep your tone calm and specific. Reps are trained to handle complaints, not calm, informed comparisons.

If the first person you reach can’t help, ask to be transferred to the retention or loyalty department, where agents usually have more room to offer discounts. Note the name of each person you speak with and the time of the call.

Whatever you’re offered, get it in writing before you hang up. Ask for an email or text confirming the new monthly price, the effective date, and what happens when any promotional period ends.

Pro Tip: Set a calendar reminder for one month before your new promotional rate expires, so you’re never caught off guard by a sudden price jump.

After the call, check your next bill against what you were promised. If the price doesn’t match, you have your documentation ready to call back and fix it.

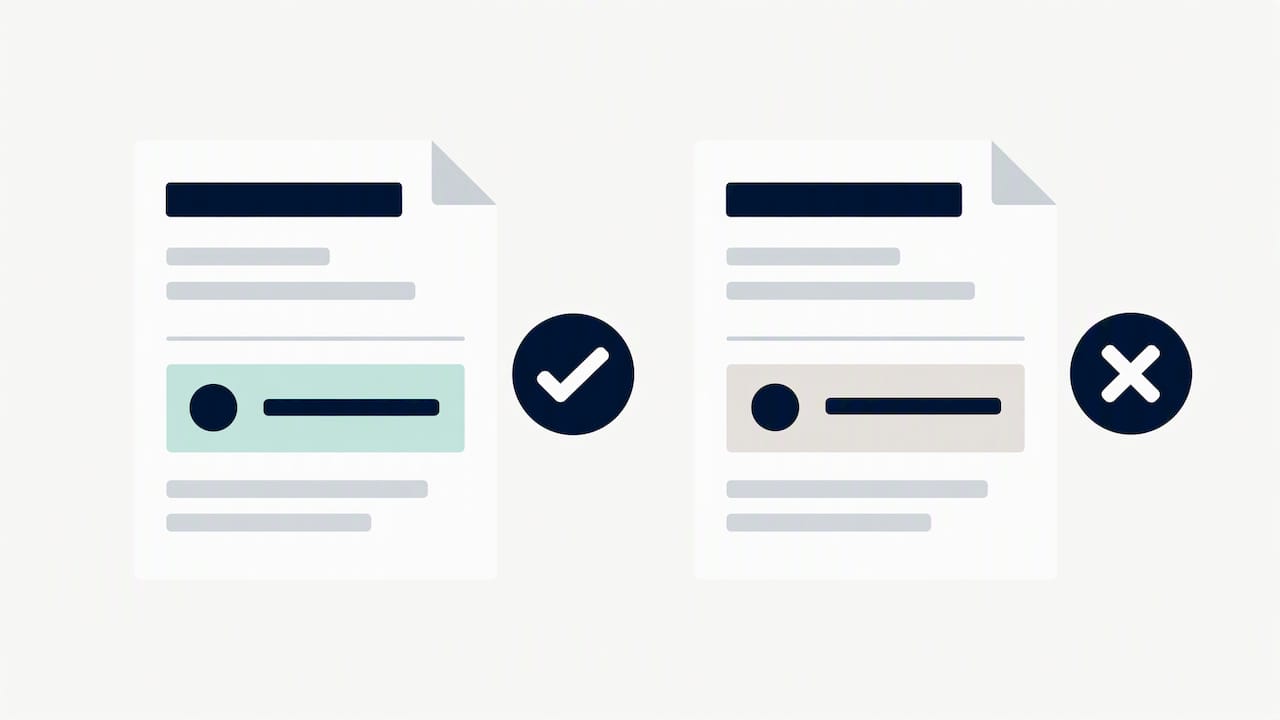
Promised internet rate compared with next bill

Quick tactics that cut your bill without a long negotiation

Some savings don’t require any back-and-forth at all. A few small changes can shave real money off your bill every month.

  • Buying your own modem and router instead of renting one from your provider
  • Enrolling in autopay or paperless billing, which many providers still discount
  • Dropping to a lower speed tier if you don’t stream in 4K or game online regularly
  • Bundling internet with another service only when the combined price beats paying separately
  • Asking directly, “Are there any loyalty discounts or promotions on my account right now?”

Modem and router rental fees typically add $5 to $15 a month to your bill, and buying your own equipment usually pays for itself within a year.

Autopay discounts are easy money, but they can disappear quietly once a promotional period ends, so check your bill a few months after enrolling to confirm the discount is still applied. Downgrading speed works well if your current plan is overkill, but be careful: dropping too low can trigger data caps or overage fees on some plans, which erases any savings. Bundling can help if you were already planning to add a second service, but it can also bundle in equipment or activation fees that offset the discount, so always ask for the all-in price before agreeing.

Payment help and programs if money is tight right now

If paying your bill on time is the real problem, your provider has more flexibility than you might expect. Ask directly for a change in your due date or a short-term hardship payment plan. The CFPB recommends contacting your provider proactively as soon as you know you’ll have trouble paying, and documenting whatever arrangement you agree to.

  • Ask: “Can we shift my due date to align with my paycheck schedule?”
  • Ask: “Do you have a hardship plan or temporary payment arrangement available?”
  • Request written confirmation of any new due date, payment schedule, or waived late fee

If your household income qualifies, the federal Lifeline program provides a monthly discount of up to $9.25 on internet or bundled service, or up to $34.25 on qualifying Tribal lands. Eligibility is based on income at or below 135% of the Federal Poverty Guidelines, or participation in programs like SNAP, Medicaid, or SSI, and you apply or recertify through the National Verifier. The Affordable Connectivity Program that once supplemented Lifeline ended in June 2024, so Lifeline remains the main federal discount still active.

Scripts you can use word for word on your next call

Having the right phrase ready removes the awkwardness and keeps the conversation moving toward a yes.

  1. For a loyalty discount: “I’ve been a customer for a while and I’m reviewing my options. Competitors are offering similar speeds for [target price]. What can you do to get me closer to that?”
  2. For removing equipment rental: “I’d like to use my own modem and router and have the rental fee removed starting this billing cycle. Can you confirm that change and the new total?”
  3. For a payment plan or due-date change: “I need to adjust my due date to the [day] of the month going forward. Can you set that up and send written confirmation?”
  4. For a retention offer when canceling: “I’m planning to cancel unless there’s a better rate available. If you have a retention offer, I’d like the details in writing, including how long the price is locked in.”

Pro Tip: Always ask “is that confirmed in writing?” before ending the call. A verbal promise with no record is hard to enforce later.

What to do if the provider says no

Sometimes a rep genuinely can’t offer more, and that’s your signal to use your other options.

  • Cancel cleanly: confirm the exact end date of service and request a final bill showing no further charges
  • Know your rights under the FTC’s click-to-cancel rule, finalized in October 2024, which requires cancellation to be as easy as signing up and bans deceptive tactics that make it hard to quit
  • File a complaint with the FTC or your state attorney general if a provider obstructs cancellation or keeps billing you after you’ve canceled, attaching your call notes and written confirmations
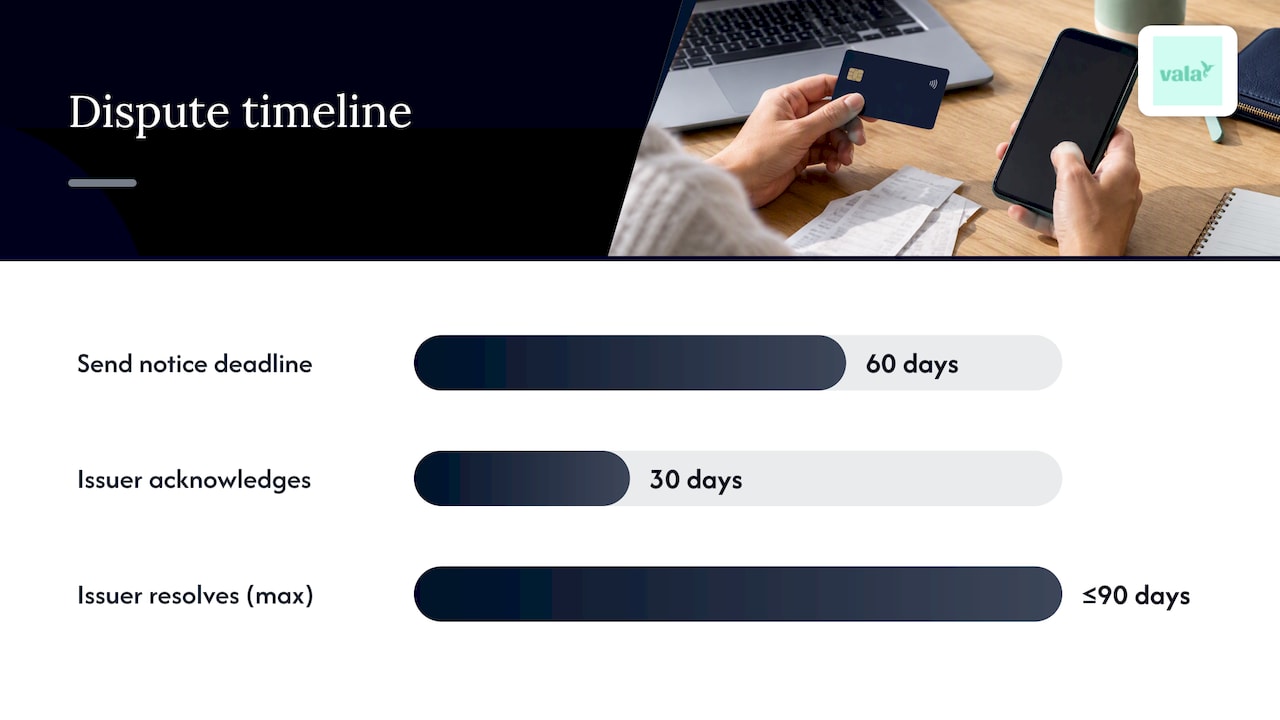
  • Dispute a charge with your bank or card issuer if you’re billed after a confirmed cancellation and the provider won’t correct it

What years of bill reviews have taught us

Persistence is the real lever here. A Consumer Reports survey found that many customers never bother to negotiate at all, while those who do often walk away with a lower price or better terms. Treat your internet bill like a subscription that needs a checkup: review it every three months, especially around the time any promotional rate is set to expire, and keep a simple reminder so it never slips your mind.

— SaverStride

Let an automated audit do the evidence-gathering for you

Before you ever pick up the phone, it helps to know exactly where your money is going, not just on your internet bill but across every recurring charge on your account. That’s where Vala comes in: we scan your linked accounts for forgotten subscriptions, equipment rental fees, and price creep so you walk into your negotiation with real numbers instead of a guess.

Valapoint

  • We flag recurring charges you may have forgotten, including old equipment rental fees
  • We surface duplicate subscriptions that quietly drain your budget alongside your internet bill
  • We connect your accounts with bank-level encryption through Plaid, so your financial data stays private

Running a money leak check before your call means you already know which fees to challenge, which cuts the back-and-forth with a retention agent down to minutes. For $2.99 a month, SaverPro keeps that insight running automatically, so the next price hike or forgotten fee gets caught before it costs you anything. Start your free audit and see what’s hiding in your bills.

This article is general information, not a substitute for advice from a qualified financial advisor. Consult a qualified financial professional about your own circumstances before acting on anything here.

FAQ

What to say to get your internet bill lowered?

Open with a direct, calm statement comparing your price to a competitor’s offer, such as “I’m reviewing my options and found a similar plan for less. What can you do to match that?” Follow up with a specific target price and ask to be transferred to the retention department if the first rep can’t help. Always confirm any new price in writing before ending the call.

What is the 70/30 rule in negotiation?

In a bill negotiation, state your ask clearly, then giving the representative room to respond with their best offer instead of filling the silence yourself.

Is $100 a month a lot for internet?

It depends heavily on your plan speed, region, and whether promotional pricing has expired, so there’s no single answer that applies to every household. If your promotional rate has ended or you’re paying for speed you don’t use, that’s a strong signal to request a broadband consumer label comparison and start negotiating.

How to get internet for $10 a month?

Pricing that low is uncommon outside of qualifying low-income assistance programs, and claims of a flat $10 plan should be checked against your Lifeline eligibility, which offers a monthly discount of up to $9.25, or up to $34.25 on qualifying Tribal lands, for households that meet income or program requirements. Outside of Lifeline, the closest path is combining a loyalty discount, autopay savings, and a lower speed tier through direct negotiation.

Sources

Budget Scenarios for Households: Spot Cash Gaps in 30 to 60 Days

Budget scenario planning means building a few simple versions of your next month’s money, a best case, a base case, and a worst case, so you can see problems before they happen. The most useful version covers just 30 to 60 days, not a full year. Start today by pulling last month’s income and expenses from your bank account or pay stubs. That one step gives you everything you need to build your first scenario.


TL;DR:

  • Annualize each irregular or annual expense by dividing its yearly total by 12, then use bank transactions and recent bills instead of estimates from memory.
  • Build a base case and alter only one or two assumptions for each best or worst case so you can trace each effect.
  • A negative worst case calls for cutting a variable expense before the month starts, while a buffer under five days calls for delaying a nonessential payment.
  • Test one risk at a time by delaying a deposit a week, shifting a bill five days, or adding an unplanned $200 to $400 expense.
  • Review actual spending monthly, refresh the three scenarios with current figures, and spend five minutes each week checking for early bills or timing conflicts.

Valapoint
See Where Your Money Goes
Vala helps you track expenses, manage budgets, and spot spending patterns that can reveal household cash gaps.

Explore Vala

Table of Contents

What numbers to collect before you build a scenario

Good scenarios depend on good inputs. Before you open a spreadsheet or an app, gather the numbers that actually move your cash flow.

  • Recurring income: paychecks, benefits, or any deposit that lands on a predictable schedule.
  • Irregular income: freelance payments, tips, or bonuses, averaged over the last few months.
  • Fixed expenses: rent, insurance, loan payments, anything with a set due date and amount.
  • Variable spending: groceries, gas, entertainment, the categories that shift month to month.
  • Savings contributions: transfers you make on purpose, not what happens to be left over.
  • Lumpy annual costs: car registration, holiday spending, annual subscriptions.

For anything that is not monthly, divide the yearly total by 12 and treat that as a monthly placeholder. Annualizing lumpy expenses this way keeps a single big bill from blowing up an otherwise solid month. Pull your raw numbers from bank transactions, pay stubs, subscription lists, and recent bills rather than guessing from memory.

If you are building this with a partner or roommates, mark each line as shared or personal, and agree ahead of time on who is responsible for recording which category. Our guide to shared budgeting for couples walks through a simple way to split that work.

Build a base, best, and worst case scenario

Once your inputs are in place, build three short versions of next month.

  1. Base case: your normal month, using the numbers you just collected with no changes.
  2. Best case: one or two realistic upgrades, like a bonus arriving on time or a lower grocery bill.
  3. Worst case: one or two realistic setbacks, like a missed freelance payment or a surprise repair.

A single person might build a worst case around a late paycheck and a $150 car repair. A couple might model one partner’s hours getting cut for a week. A shared household might test what happens if one roommate pays rent three days late. Each scenario should change only one or two assumptions from the base case, never everything at once, so you can tell exactly what caused the difference.

Write down the assumption behind every number you change. “Freelance income drops to $0 for 30 days” is a assumption you can test again next month; “things go badly” is not.

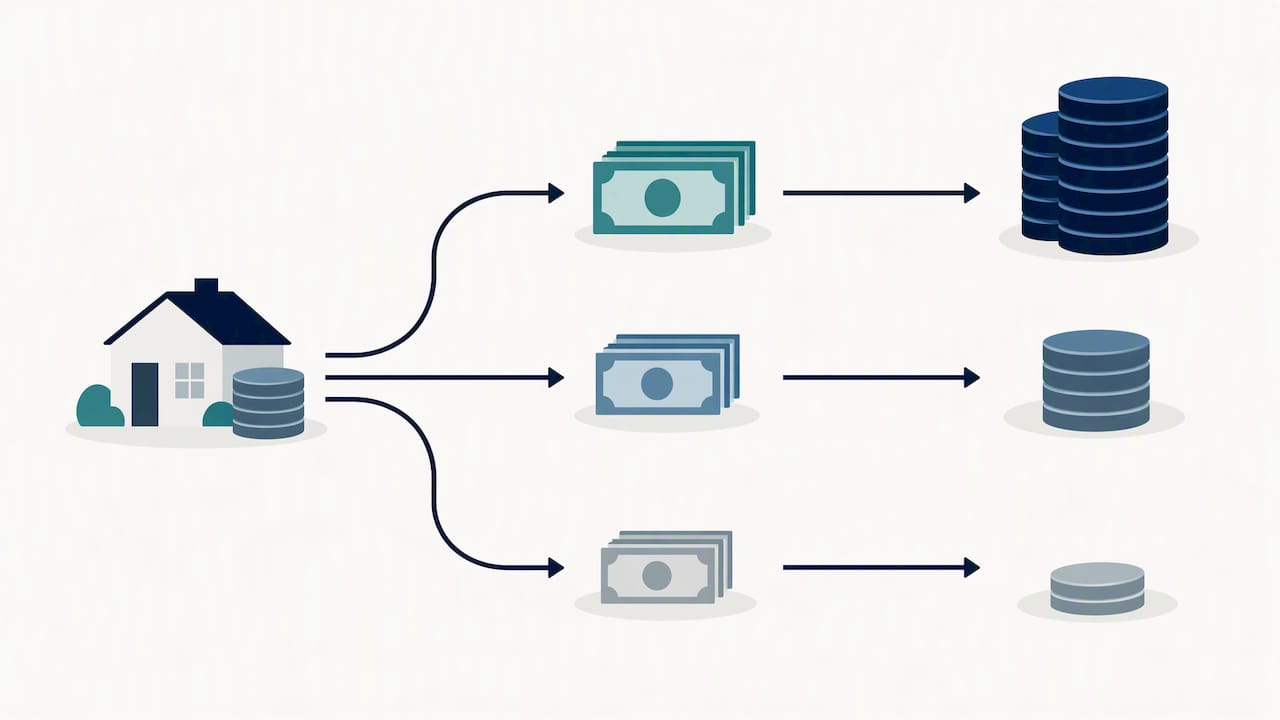
Three household cash scenarios ending at different balances

Pro Tip: Keep your worst case realistic, not catastrophic. A scenario built on your actual bank history is useful; one built on a rare disaster mostly just causes stress.

Reading your results and setting decision rules

A scenario is only useful once it tells you what to do. After you run the numbers, look at three things: your projected ending balance, how many days of buffer you have left before the next paycheck, and whether your essential bills are fully covered in every version.

Set simple threshold rules ahead of time so you are not deciding under pressure.

  • If your worst case ends below $0, cut one variable expense category before the month starts.
  • If your buffer drops under five days in any scenario, delay a non-essential payment.
  • If an essential bill like rent or a loan payment is at risk in more than one scenario, that payment gets priority over discretionary spending.

Rank your bills by consequence, not size: a missed rent payment matters more than a missed streaming charge, even if the streaming bill is smaller. If a scenario shows a real shortfall, contact the creditor or biller before the due date. Adjusting your bill due dates or splitting a large payment into two smaller ones can smooth out a tight week without cutting your actual spending.

Finding your biggest risk with quick stress tests

Not every assumption matters equally. A one-variable sensitivity check, changing a single number and watching how much your ending balance moves, shows you which inputs deserve the most attention.

  1. Missed paycheck: delay one income deposit by a week and see how fast your buffer disappears.
  2. Delayed bill: push a due date back by five days and check whether it collides with another payment.
  3. One-off emergency: add a $200 to $400 unplanned expense and see what gets squeezed.

Whichever change causes the biggest swing is your highest-priority risk; tracking subscription charges can help identify redundant payments you might cut to reduce interest and improve cash flow management (Track subscription charges to cut interest on multiple cards). Fix the cheapest, most feasible issue first, usually a due date or a redundant subscription, before tackling anything that requires a bigger lifestyle change. Building in even a small buffer, a few days of extra cash on hand, absorbs most of these surprises before they turn into missed payments.

A simple monthly rhythm that keeps the plan alive

A 30 to 60 day horizon works because it is long enough to catch real risks but short enough to stay accurate. Forecasting much further out usually just produces guesses dressed up as numbers.

  • Review: compare last month’s actual spending against what you planned.
  • Set: build next month’s base, best, and worst scenarios using fresh numbers.
  • Celebrate: name one thing that went right, even a small one.

Add a short weekly check, five minutes to scan for timing issues or a bill that is about to hit early. For couples or small groups, the full monthly session usually takes 15 to 30 minutes when everyone comes with their numbers ready. Our monthly budget planner and guide to reviewing your finances effectively both walk through this same rhythm in more detail.

Templates and automation that speed up scenario planning

A basic spreadsheet template needs just a few columns: category, base amount, best case adjustment, worst case adjustment, and a note for your assumption. That structure is enough to run your first few months by hand.

Automation removes most of the manual work once you are ready for it.

  • Transaction import pulls your real numbers instead of requiring manual entry.
  • Recurring detection flags subscriptions and bills you might forget to include.
  • Auto-annualizing spreads lumpy costs across months without separate math.
  • Timing insights flag when a due date is about to collide with a low-balance week.
  • Shared budgeting views let couples or groups see the same scenario without passing spreadsheets back and forth.

Vala’s Money Leak Check scans your accounts for the recurring charges and small leaks that quietly throw off a scenario, and the SaverPro plan builds on that with shared expense splitting and timing-aware insights built for couples and groups. Our breakdown of budgeting and expense tracking apps covers more on how automation compares to spreadsheet workflows.

Pro Tip: If you are sharing scenarios with a partner or roommates, set view permissions early so everyone sees the same numbers without accidentally editing someone else’s entries.

Why imperfect scenarios beat perfect forecasts

The biggest mistake we see is treating a budget scenario like a prediction that has to be right. It does not. A scenario is a test, and the point is to learn something from it, not to nail the exact number. Perfectionism here causes paralysis: people wait for complete data instead of running a rough version today.

Start with one month. Adjust once you see what actually happened.

— SaverStride

Run your scenarios faster with Vala

Building scenarios by hand works, but it takes time you could spend on the decisions that actually move your money. We built Vala to pull your real transactions automatically, flag recurring charges before they quietly inflate your worst case, and spread lumpy annual costs across months without manual math.

Valapoint

For couples and small groups, shared views mean everyone works from the same base case instead of comparing separate spreadsheets.

  • Run a free Money Leak Check to see which recurring charges are already distorting your numbers.
  • Upgrade to our premium plan to unlock shared expense splitting and timing-aware insights across every scenario.
  • Use our free versus paid budgeting comparison if you are deciding whether automation is worth it for your situation yet.

Start at Valapoint and build your first scenario with real numbers instead of guesswork.

This article is general information, not a substitute for advice from a qualified financial advisor. Consult a qualified financial professional about your own circumstances before acting on anything here.

FAQ

What is budget scenario planning in simple terms?

Budget scenario planning means building a few versions of your upcoming income and expenses, typically a best case, base case, and worst case, so you can see risks and make decisions before they happen. It works best over a short window, usually 30 to 60 days, rather than a full year.

How far ahead should I plan my budget scenarios?

A 30 to 60 day horizon gives you enough runway to catch real risks like a late paycheck or an upcoming bill, without the guesswork that comes from forecasting a year out. Shorter horizons also make it easier to stick with the habit since you revisit and adjust the numbers every month.

How do I handle irregular or annual expenses in a scenario?

Divide the yearly total by 12 and treat that as a monthly placeholder inside your scenario, a method CFPB’s cash flow budgeting tool recommends for smoothing out lumpy costs. This keeps a single large bill, like car registration or holiday spending, from distorting one month’s results.

What should couples or roommates do differently when building scenarios together?

Mark each expense as shared or personal, and agree ahead of time on who records which category so the numbers stay consistent. Running the monthly review together, even for 15 to 30 minutes, keeps everyone working from the same assumptions instead of separate guesses.

How much of a cash buffer should I build into my worst case scenario?

There is no single number that fits every household, but CFPB’s guidance on building emergency savings points to automating small, regular transfers and monitoring progress as the most reliable way to build one over time. Start with whatever buffer covers your biggest recurring risk, like a late paycheck, and grow it gradually.

Sources

Joint Budgets: Why Couples Keep Some Spending Separate

The real trade-off comes down to this: joint budgeting builds togetherness and transparency, while separate budgeting protects autonomy and privacy. Research links pooling money to higher relationship satisfaction, but a hybrid approach, part joint and part personal, fits most couples best. The right choice depends on your goals, trust level, and how you both like to manage money.


TL;DR:

  • When incomes differ, split shared bills in proportion to earnings; a $4,000 and $2,000 income pair suggests roughly two thirds and one third.
  • Either joint account holder can typically withdraw or close the account without consent, so confirm your bank’s rules before depositing shared savings.
  • FDIC insurance covers eligible joint accounts up to $250,000 per owner at one institution, provided both owners have equal withdrawal rights.
  • Choose separate accounts when privacy or independence matters most; when preferences fall between extremes, test a hybrid arrangement and review it after three months.
  • Pooling’s reported relationship benefit appeared stronger among couples with limited financial resources, but observational and experimental findings do not guarantee results for every couple.

Valapoint
valapoint.com
Keep Shared Spending in View
Vala helps couples track expenses, manage budgets, and split group costs while keeping personal spending easier to understand.

Explore Vala

Table of Contents

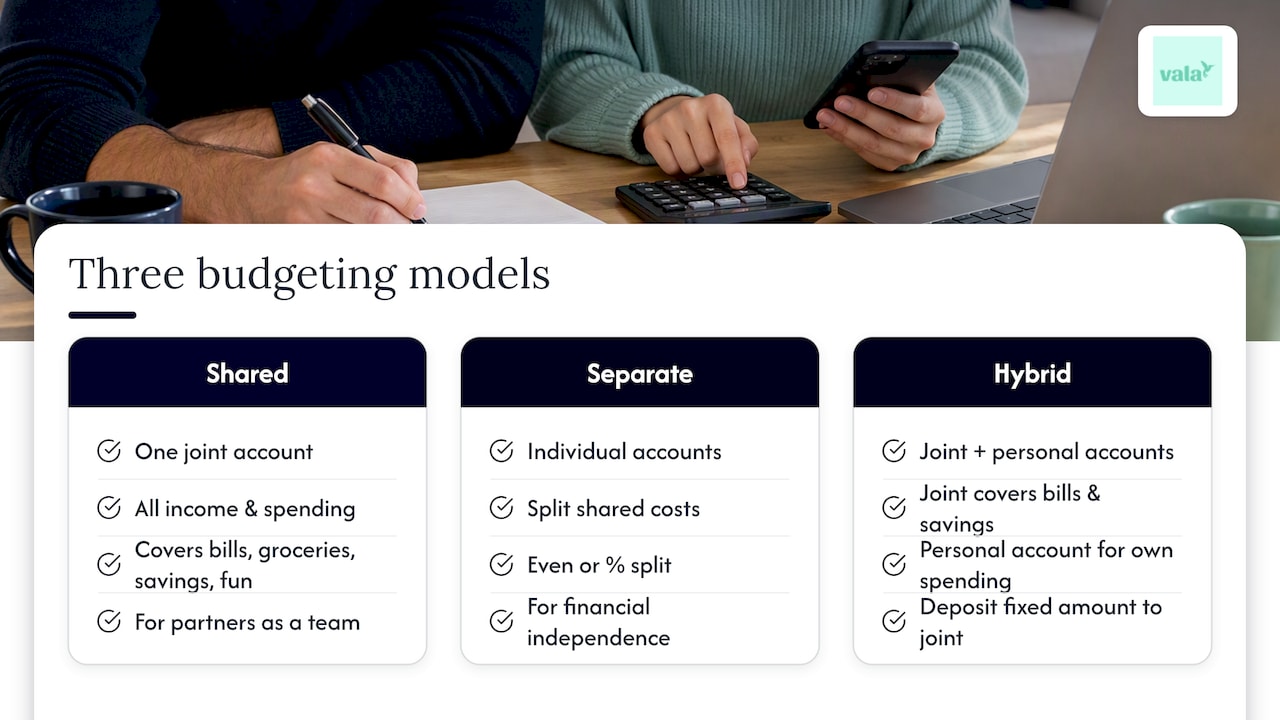
The three budgeting models: fully shared, separate, and hybrid

Before you pick an approach, it helps to know your options.

Fully shared means one joint account holds most or all household income, and both partners spend from it for everything, bills, groceries, savings, and fun money. This works well for couples who see their finances as one team effort.

Separate means each partner keeps individual accounts and splits shared costs, like rent or utilities, using an agreed method such as an even split or a percentage of income. This suits couples who value financial independence or who merged households later in life.

Hybrid combines both: a joint account covers shared bills and savings goals, while each partner keeps a personal account for individual spending. A couple might deposit a fixed amount into the joint account each month and keep the rest for themselves. For many couples, this structure offers the clearest balance between shared responsibility and personal freedom.

Three ways couples can structure budgets

Pros and cons: what joint and separate budgeting trade off

Each model solves different problems, and each creates its own friction points.

  • Joint accounts simplify bill paying, create full transparency, and make it easier to save toward shared goals like a house or vacation.
  • Joint accounts reduce personal spending autonomy, and any co-owner can typically withdraw or close the account without the other’s consent, so confirm your bank’s specific rules.
  • Separate accounts preserve independence, protect privacy around personal purchases, and keep individual spending habits from becoming a shared issue.
  • Separate accounts require more coordination to track shared costs and can create friction if one partner feels the split isn’t fair.

If you combine accounts, know how deposit insurance works. FDIC guidance confirms joint accounts are insured up to $250,000 per co-owner at the same institution, as long as both owners are natural persons with equal withdrawal rights.

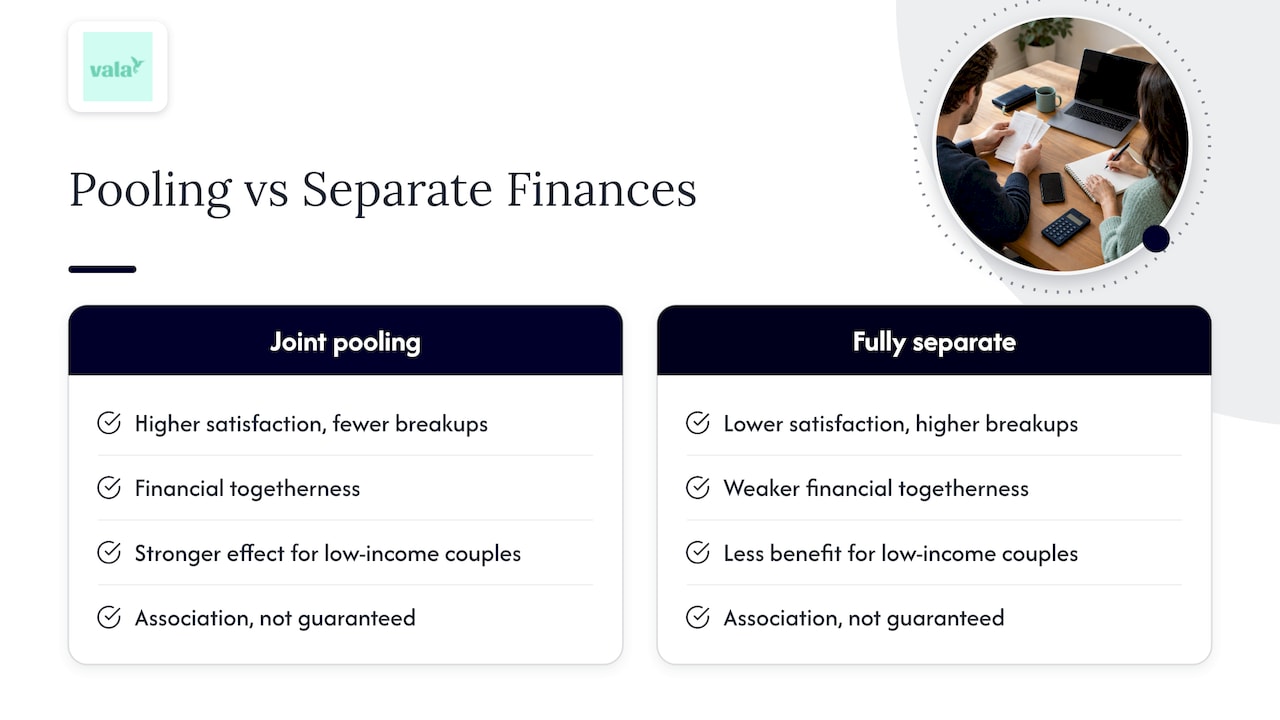
A large body of research backs the togetherness argument for joint accounts. Combined data from multiple studies, covering roughly 38,534 participants, found that couples who pool their money report higher relationship satisfaction and are less likely to break up than couples who keep finances separate.

Practical methods to split bills and allocate shared budget

Once you know your model, you need a formula that feels fair.

  1. Equal split (50/50): works well when both partners earn similar incomes and want simplicity.
  2. Proportional split by income: divide bills based on each partner’s share of combined income. If one partner earns $4,000 a month and the other earns $2,000, the first covers about two-thirds of shared expenses, the second about one-third.
  3. 50/30/20 for couples: the CFPB’s budgeting framework allocates 50% to needs, 30% to wants, and 20% to savings, and couples can apply it to pooled funds, personal funds, or both.
  4. Automate the routine: set scheduled transfers into the joint account, put recurring bills on autopay, and reconcile spending weekly or biweekly.

Pro Tip: Keep a running list of recurring expenses, subscriptions, rent, insurance, so nothing slips through when you divide costs.

What the evidence says about pooling finances and relationship outcomes

The research on joint finances is more consistent than most couples expect. Across experimental, cross-sectional, and longitudinal data, combined pooling-finances research found that couples who merge all their money into joint accounts report greater relationship satisfaction and lower breakup rates than those who keep finances fully separate. The effect appeared to work through a sense of “financial togetherness,” the feeling that both partners are working from the same resources toward the same future.

The benefit showed up more strongly among couples with limited financial resources, where shared visibility into money may reduce stress and conflict. It’s worth noting this evidence blends observational findings with controlled experiments, so it points to a strong association rather than a guarantee for every couple. For the practical mechanics of how joint accounts work, including insurance limits and withdrawal rights, the FDIC remains the most reliable source.

What the evidence says about pooling finances and relationship outcomes — overview diagram

How to choose the right approach: checklist and questions to ask

Before committing to a model, talk through these questions together.

  • Do you share major financial goals, like buying a home or retiring early?
  • How much do you trust each other with full financial visibility?
  • Does either of you have irregular income, debt, or a strong need for privacy?
  • Do you have a plan for emergencies or one partner’s sudden inability to manage money?

Match your answers to a model: shared goals and high trust point toward joint; strong privacy needs or very different incomes point toward separate; anything in between usually points toward hybrid.

Pro Tip: Try a hybrid setup for three months, then sit down together and review what worked and what didn’t before making it permanent.

If debt, major income gaps, or repeated disagreements come up, a financial counselor can help you structure an approach that fits your specific situation.

Step-by-step setup for each model (accounts, automation, and documentation)

Here’s how to put each model into action without the usual pitfalls.

  1. Joint account setup: choose a bank with no-fee joint checking, confirm signatory rules, set a recurring transfer schedule, and put shared bills on autopay.
  2. Separate account workflow: agree on your split method, set up standing transfers or manual payments for shared costs, and use a shared ledger or app to reconcile who paid what. Our 6-step ledger system walks through exactly this process for shared credit card expenses.
  3. Hybrid implementation: set clear rules for what the joint account covers, schedule a monthly reconciliation to review spending, and agree on “fun money” amounts each partner can spend freely.
  4. Security checklist: keep a shared inventory of accounts, passwords, and beneficiaries, and talk through a plan for incapacity or separation before you need one.

For couples weighing values alongside logistics, this biblical budgeting guide offers family discussion prompts worth considering during setup.

A nudge toward communication over perfect math

No formula replaces an honest conversation about money. Pick an approach that fits where you are now, not where you think you should be, and revisit it every few months as income, goals, or life circumstances shift. If you’re unsure, start with hybrid and schedule a three-month check-in. Relationship goals, not spreadsheet precision, should guide the decision.

— SaverStride

Let Vala support whichever budget model you choose

Whatever structure you land on, joint, separate, or hybrid, the daily work is the same: tracking spending, splitting costs fairly, and catching leaks before they add up. We built Vala to handle that part for you, whether you’re managing one shared account or juggling contributions from two.

Valapoint

With Vala, you can:

  • Automate proportional transfers based on each partner’s income share.
  • Reconcile shared spending across joint and personal accounts in one place.
  • Track progress toward shared savings goals without manual spreadsheets.
  • Run a Money Leak Check to spot forgotten subscriptions or recurring charges draining your joint budget.

Our subscription plan unlocks the full set of shared budgeting tools; see our website for current pricing details. Explore how Vala handles expense splitting and see which setup fits your household.

This article is general information, not a substitute for advice from a qualified financial advisor. Consult a qualified financial professional about your own circumstances before acting on anything here.

FAQ

Is it better to have joint or separate accounts for couples?

Research suggests couples who pool their money into joint accounts report higher relationship satisfaction and lower breakup rates than those who keep finances fully separate. That said, separate or hybrid accounts can work well for couples who prioritize independence or have very different financial habits.

What is the 50/30/20 rule for couples?

The 50/30/20 rule allocates 50% of income to needs, 30% to wants, and 20% to savings or debt repayment. Couples can apply this split to a joint account, individual accounts, or a hybrid combination, adjusting the percentages to fit their own income and priorities.

What is a fair way to split household bills between couples?

A common approach is splitting bills evenly when incomes are similar, or proportionally based on each partner’s share of combined income when they differ. For example, a partner earning two-thirds of household income would cover roughly two-thirds of shared expenses under a proportional split.

Can one partner withdraw all the money from a joint account?

Typically, yes. Any co-owner on a standard joint account usually has full withdrawal rights, and account rules vary by bank and state, so it’s worth confirming your specific bank’s terms before relying on shared assumptions.

How much of a joint account is covered by deposit insurance?

FDIC rules insure joint accounts up to $250,000 per co-owner at the same institution, provided both owners are natural persons with equal withdrawal rights. Couples holding larger balances may want to spread funds across institutions or account types to stay fully covered.

Sources

30-Second Habit to Track Receipts for Budgeting for U.S. Taxpayers

The fastest, most reliable way to track receipts for budgeting is to scan them into a budget-aware app that reads the text (OCR), sorts the purchase into a category, and syncs with your bank feed. This matches what the IRS expects for recordkeeping and what the CFPB recommends for spending awareness, and it is the core workflow we built Vala around.


TL;DR:

  • Scan receipts at purchase, then spend 15 to 30 minutes weekly checking OCR totals and categories before errors distort monthly summaries.
  • Export monthly or quarterly summaries as CSV or PDF, and reconcile them with bank statements rather than relying on screenshots.
  • Retain tax records for at least three years, and keep them longer when underreported income or specific deduction rules apply.
  • Keep three to five broad spending categories that match real budget decisions, since excessive subcategories can hide useful patterns during monthly reviews.
  • Small businesses should separate personal and business receipts into distinct categories or accounts from the start, especially when both use one bank account.

Valapoint
Make Spending Easier to Track
Vala helps you track expenses, manage budgets, and uncover spending patterns with automated insights and real-time tracking.

Visit Vala

Table of Contents

What features matter in receipt-tracking tools

Not every receipt app does the same job. Before you commit to one, check it against a short list of capabilities that actually affect your budget accuracy and your stress level come tax time.

Capture matters first. You want a mobile camera that reads a receipt instantly, handles multi-page receipts (think itemized grocery runs), and can pull data from forwarded emails or scanned statements when you do not have the paper in hand.

Data quality comes next. A tool that only photographs a receipt is not much better than a paper folder. Look for line-item extraction, so the app separates “groceries” from “household supplies” on one Target run, plus an easy way to edit or verify what the OCR got wrong.

Automation is where the real time savings show up:

  • Auto-categorization sorts each purchase without you tapping through a menu every time.
  • Recurring charge detection flags subscriptions and bills before they quietly drain your account.
  • Merchant mapping learns that “SQ *CORNER CAFE” means coffee, not “miscellaneous.”

Integration and export decide whether your receipts are actually usable later. You want bank sync so transactions match automatically, plus export options such as CSV or PDF for taxes, loan applications, or a small-business bookkeeper. Forbes Advisor’s review of receipt scanner apps points out that tools integrating with bank feeds or accounting software cut down reconciliation work and improve accuracy, which is exactly the gap that trips up spreadsheet-only budgets.

Storage and retention round out the checklist: a searchable archive, retention settings you control, and access limits if you share an account with a partner or a bookkeeper. If you run a household or a small business with more than one person entering expenses, batch upload and multi-user access save real time every week. Our comparison of budgeting and expense tracking apps breaks down how different tools handle these features if you want to compare before choosing.

Step-by-step workflow to turn receipts into budget summaries

A receipt-tracking habit only works if it fits into a routine you will actually keep. Here is a simple cadence built around daily capture, weekly cleanup, and monthly review.

  1. Capture at the point of sale. Scan the receipt into your app within seconds of paying. If a receipt is not available, note the amount and category before you leave, using what budgeting coaches call the two-second rule.
  2. Set up automated imports. Connect email receipts and bank statements so recurring purchases import themselves instead of waiting for you to type them in.
  3. Run a weekly verification pass. Spend 15 to 30 minutes checking that OCR read the amounts correctly and that categories make sense, especially for shared or split expenses.
  4. Export a monthly summary. Pull a CSV or PDF report, reconcile it against your bank statement, and run a quick check for money leaks like forgotten subscriptions.
  5. Handle cash and mileage separately. Log cash purchases the same day using the two-second rule, and track mileage with a simple note of odometer readings or trip purpose if it affects your budget or taxes.
  6. Tag shared expenses as you go. If you split costs with a partner or roommate, mark them immediately so the split does not have to be reconstructed later.

Each capture should take about 30 seconds. The weekly review is the part people skip, but it is also what keeps small errors from piling into a confusing month-end mess.

Pro Tip: Keep a sticky note or an envelope in your car or bag as a backup for days you forget your phone. A physical fallback means you never lose a receipt to a dead battery.

For a deeper look at building this into a lasting habit rather than a one-month experiment, our guide to expense tracking best practices walks through pacing it for real life.

Recordkeeping, tax readiness, and audit expectations

Budgeting and tax documentation overlap more than most people realize, and the habits that keep your budget clean are the same ones that keep you safe in an audit.

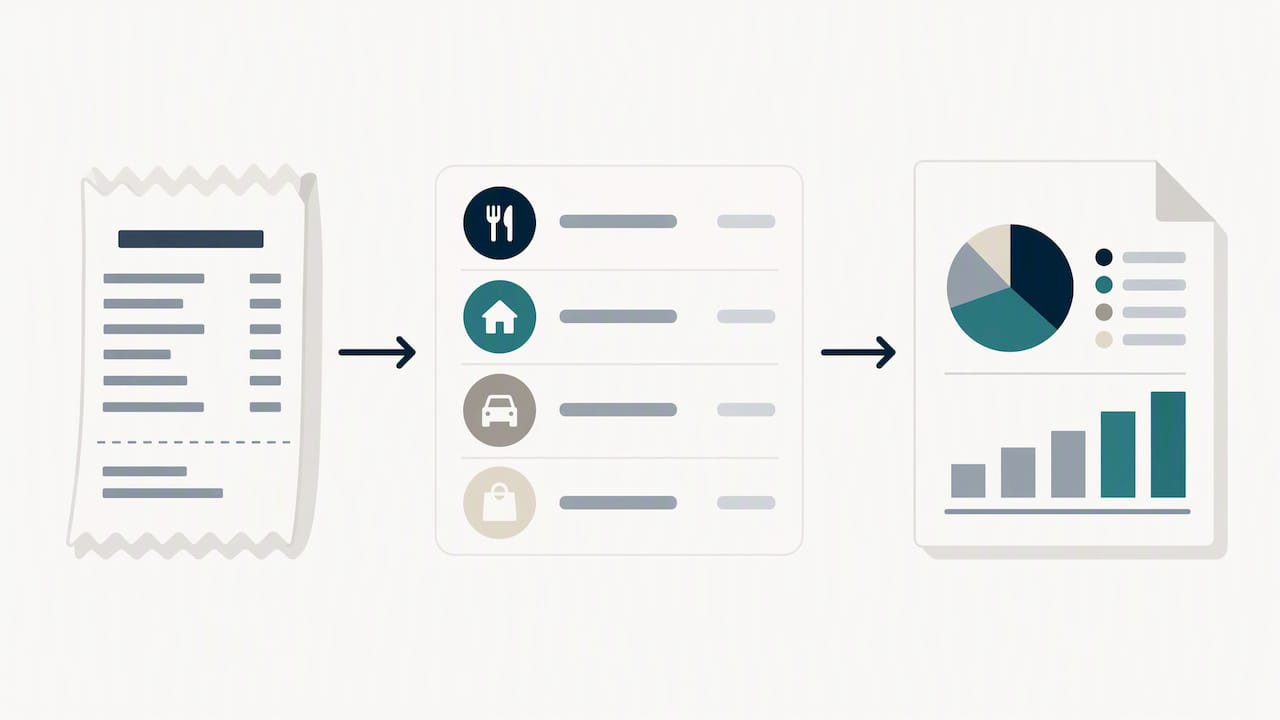
IRS Publication 583 states that you need a system clearly showing your income and deductible expenses, with supporting documents like receipts and invoices kept on file. A photo of a receipt alone is a weak piece of evidence compared with a categorized, exportable summary tied to that image.

Receipt linked to categorized tax summary

The IRS has specifically noted that examiners may request backup files and administrator access to electronic accounting software records during an audit, which means your app needs to produce a readable export, not just a login screen.

A practical audit-ready checklist looks like this:

  • Export monthly or quarterly summaries in CSV and PDF, not just screenshots.
  • Keep an accounting backup file your app can generate on demand.
  • Separate business and personal receipts into distinct categories or accounts from the start.
  • Retain records for at least three years, longer if your situation involves underreported income or specific deduction rules.
  • Store both the receipt image and the categorized line item together, so one backs up the other.

If you run a small business and mix personal and business spending in one account, this separation step is the one most people regret skipping after the fact.

Common mistakes and quick fixes

Most receipt-tracking failures are not technology problems. They are habit problems that show up weeks later as a pile of unsorted transactions.

  • Capture delay: Receipts pile up in a bag or glovebox until they fade or disappear. Fix it with the two-second rule and a backup envelope for the days you forget.
  • Skipping weekly verification: OCR occasionally misreads a total or assigns the wrong category, and those small errors compound. A five-minute weekly scan catches most of them before they affect your monthly numbers.
  • Over-categorizing: Twenty tiny categories feel organized but bury the signal you actually need. Stick to a handful of broad categories that map to real budget decisions.
  • Not matching receipts to bank transactions: Skipping this step lets duplicate charges and missed entries slip through unnoticed.
  • Forgetting to back up exports: Label your archive files by year and store them somewhere separate from your phone, so a lost device does not mean lost records.

Pro Tip: Pick three to five spending categories that match your actual budget line items, not your mood. “Food,” “transportation,” and “subscriptions” tell you more than ten micro-categories ever will.

If you want free comparisons of low-cost tools before settling on one workflow, this list of free financial wellness tools is a useful starting point.

How Vala maps to the receipt-tracking workflow

Vala handles the full loop this guide describes. Receipts get categorized automatically with AI, recurring charges and subscriptions surface through our Money Leak Check, and shared costs split cleanly between partners or roommates without a separate spreadsheet.

Against the checklist above, Vala covers capture and categorization, bank-sync verification, and exportable summaries you can hand to a tax preparer or keep as your own backup. We built the Money Leak Detector specifically to catch the recurring charges that quietly erode a budget between monthly reviews.

If you want a walkthrough of the onboarding steps rather than the checklist version, our simple guide to tracking expenses covers account setup and first-week habits in more detail.

Our take on sticking with the habit

Pick one capture habit, the two-second rule or the photo-on-the-spot method, and run it for a full month before judging whether it works. Block 15 minutes on your calendar each week for the verification pass; treat it like a recurring appointment, not an afterthought. The habit fails more often from inconsistency than from a bad app choice.

— SaverStride

Try the workflow yourself

If you want to test this workflow before committing, we built Vala to handle each step: snap a receipt, let AI sort the category, export a summary, then run a Money Leak Check to see what subscriptions or recurring charges are quietly adding up.

Valapoint

Before you commit to any plan, match the app against the checklist from earlier in this guide, capture quality, categorization, bank sync, and export formats, and see how it holds up.

  • Capture a receipt and check how the OCR reads it.
  • Review the auto-categorization against your own budget categories.
  • Export a sample CSV or PDF to see if it is audit-ready.
  • Run a free Money Leak Check to spot recurring charges.
Workflow step What to test in a trial
Capture Photo scan accuracy and multi-page handling
Categorize Auto-tagging against your real budget categories
Export CSV and PDF summaries ready for taxes
Money Leak Check Detection of recurring or forgotten charges

Our SaverPro plan runs at an affordable monthly rate for full access to these tools, or you can start a free trial first and decide once you have seen it work on your own receipts.

This article is general information, not a substitute for advice from a qualified financial advisor. Consult a qualified financial professional about your own circumstances before acting on anything here.

FAQ

Reddit threads on budgeting commonly mention a mix of free and paid expense trackers, with recommendations varying widely by whether the user wants manual entry, automatic bank sync, or shared-expense splitting. There is no single consensus app, so it is worth matching any recommendation against your own feature checklist, capture, categorization, and export, rather than picking by popularity alone.

What is the $75 rule for receipts?

The “$75 rule” is a common misconception; there is no blanket IRS rule exempting receipts under $75 for general expense tracking. IRS Publication 583 asks taxpayers to keep documentation supporting income and deductible expenses, and specific exceptions depend on expense type and context, so check current IRS guidance for your situation rather than relying on a flat dollar threshold.

What is the best app to track receipts and expenses?

The best app depends on whether you need simple capture, automatic categorization, bank syncing, or shared expense splitting. Vala combines AI-driven categorization, Money Leak Check for recurring charges, and exportable summaries in one workflow, which covers most of the checklist a budgeting-focused user needs.

What is the best scanner for receipts?

A smartphone camera paired with an OCR-capable budgeting app is typically enough for personal or small-business use, since dedicated scanner hardware adds cost without much added accuracy for everyday receipts. Forbes Advisor’s review of receipt scanner apps notes that apps integrating with bank feeds reduce reconciliation work more than scanner hardware alone.

How long should I keep digital receipts for taxes?

A common guideline is at least three years from when you filed, though longer retention applies in specific situations such as underreported income. IRS recordkeeping guidance recommends keeping both the receipt image and a categorized summary together for that period.

Sources

Avoid Money Drama: Build a Group Event Budget With Friends in 10 Minutes

A group budget for events is a pooled amount of money plus a clear set of rules for collecting, spending, and reconciling costs for a trip, party, or shared outing. The single best first step is a short huddle where you agree on the total budget, who pays what share, and how money will move. Once that’s settled, we can help you automate the tracking and splitting from there.


TL;DR:

  • Choosing a payment path where one person fronts costs and others reimburse generally increases satisfaction, but requires trust and quick reimbursements.
  • Setting a contingency fund of around 10% in the shared budget helps cover unexpected costs and prevents overspending.
  • An equal split may encourage overconsumption, so proportional or itemized methods are better when group budgets or participation vary.
  • Tracking expenses with a dedicated app or a consistent method ensures accurate reconciliation and prevents messy or forgotten receipts.
  • Clarifying responsibilities and updating the budget regularly avoids common conflicts and keeps everyone aligned throughout the planning process.

Valapoint
valapoint.com
Keep Group Spending Clear
Vala helps friends track expenses, split group costs, manage budgets, and spot spending patterns in real time.

Visit Vala

Table of Contents

Your 10-minute checklist before anyone pays anything

Before a single dollar changes hands, get your group together for a quick conversation. Ten minutes now save hours of awkward follow-up messages later.

  • Decide the total event budget and whether you’ll use a shared pot or pay item by item.
  • Pick a payment path: one person fronts costs and others reimburse, or everyone pays vendors directly.
  • Choose a split rule: equal shares, proportional shares, or itemized costs per person.
  • Agree on how you’ll document spending and set a date to reconcile.
  • Build in a contingency, such as an extra 10%, and decide what happens if someone cancels.

Write these five decisions down somewhere everyone can see, even if it’s just a group chat message pinned to the top.

How to build the group event budget, step by step

Once the basics are agreed, you can build out the full budget in one sitting. Here’s the order that works best for most groups:

  1. List every expected cost by category: venue or rental, food and drinks, transport, tickets, gratuities, and a contingency line.
  2. Separate fixed costs from variable ones. A venue deposit is fixed, but bar tabs and ride shares can swing widely.
  3. Decide how people will contribute. Equal shares are simplest, but a percentage of income or assigned items can work better for mixed-budget groups.
  4. Set a payment timeline with deposit dates, a final payment deadline, and a reconciliation date after the event.
  5. Write a one-paragraph agreement covering who’s collecting money, how much each person owes, and when, then send it to the group.

Treat this plan as a living document. Costs for group trips and parties often shift once you book things, so revisit the numbers after the first deposit is paid.

Pro Tip: Keep your contingency money in the same shared tracker as everything else so it doesn’t quietly disappear into someone’s personal account.

Which splitting methods work and when to use them

Not every event calls for the same split. Picking the right method up front avoids the most common source of group money tension.

  • Equal split: Fastest to set up, but experimental evidence shows even-split rules can encourage overconsumption compared to everyone paying their own way.
  • Proportional split: Based on income or expected usage, this works better when people in the group have very different budgets.
  • Itemized split: Best when some people skip certain activities, like one couple opting out of a pricey dinner.
  • Indirect payment: One person pays the vendor and everyone reimburses them afterward.

One person paying and others reimbursing tends to increase satisfaction with the purchase, according to research on shared expense payment paths, because repaying a friend feels less uncomfortable than owing a vendor directly. That only works smoothly when the group trusts each other and reimbursements happen quickly, so match the method to your group’s dynamic rather than defaulting to equal splits out of habit.

Tools and steps for tracking costs in real time

Tracking spending as it happens is what keeps a group budget from turning into a guessing game at the end of the trip. You have a few practical options.

  • A shared spreadsheet works for small, short events where everyone remembers to update it.
  • Photographing receipts in a group chat is low effort but gets messy fast once totals pile up.
  • A dedicated expense app, including Vala’s split expenses feature, logs costs automatically and assigns shares as you go.

Whatever you pick, require receipts or app entries for every purchase and use the same categories throughout, or reconciling later becomes guesswork. For a deeper walkthrough, our guide on tracking group spending in real time covers the setup in more detail.

When the event wraps, total everything spent, apply your chosen split method, list who owes whom, and settle balances within a few days while memories are fresh.

Pro Tip: Round small differences under a dollar or two to the nearest whole amount rather than chasing exact cents across five people.

Run the money conversation right

A short, structured conversation prevents most group money conflicts before they start. The CFPB’s Money Circle toolkit offers a simple exercise for this: list everyone involved, sort out who influences money decisions, and map who’s actually responsible for what.

Bring a short agenda to your planning chat so the conversation doesn’t drift, and be clear about who has a vote on spending decisions versus who’s just along for the ride.

Document the key points before any money moves:

  • Who is paying for what, and how much each person owes.
  • When repayments are due.
  • What the contingency plan looks like if costs run over.
  • A check-in date to review spending partway through planning.

Keep the tone light and specific. Something as simple as “let’s settle up by Friday” removes ambiguity without putting anyone on the spot.

Common mistakes groups make and one-line fixes

Most group budget problems come from the same handful of avoidable mistakes.

  • No agreement up front: Fix it by sharing a one-paragraph plan with the whole group before spending starts.
  • Lost receipts and messy math: Fix it by picking one tracking method and sticking to it, no exceptions.
  • One person fronting most of the costs: Fix it by rotating who pays or scheduling automatic reimbursements right after each expense.
  • Spending creeps past the budget mid-event: Fix it with a quick midway checkpoint and an agreed stop-loss number.

Pro Tip: Assign one person as the ledger owner for the event. One clear point of contact beats five people half-tracking the same spreadsheet.

What actually works when groups share money

What actually works when groups share money — overview diagram

The groups that avoid money drama almost always have one thing in common: they talk about money before they spend it, not after. Vague plans like “we’ll figure it out” are where resentment starts, usually over something small like a missed reimbursement or a round of drinks nobody agreed to split.

Simple, written rules fix most of this. They don’t need to be formal, just specific enough that nobody has to guess who owes what.

— SaverStride

How Vala helps you manage pooled budgets and split costs

Setting rules is the hard part. Keeping track of who paid for what shouldn’t be. You can create a shared budget for your group, log expenses as they happen, and split costs automatically using whichever method fits your event, equal, proportional, or itemized.

Valapoint

Real-time tracking means no one has to remember three weeks later who covered the deposit. If you want to see where your group’s money is actually going beyond the event itself, our Money Leak Check can flag recurring charges and spending patterns worth a second look, and SaverPro unlocks deeper automation and insights for $2.99 per month. Start with the primary Vala page or read our guide on what a shared budget actually looks like before you set one up.

FAQ

How do you split costs fairly in a group?

The fairest method depends on your group: equal splits are simplest but can encourage overspending, while proportional or itemized splits work better when budgets or participation vary. Pick the method before spending starts so nobody feels blindsided later.

Should one person pay for everything and get reimbursed?

Yes, when the group trusts each other and reimbursements happen quickly. Research on payment paths shows this indirect approach tends to increase satisfaction compared with everyone paying vendors separately, because repaying a friend feels less uncomfortable than owing a business.

What’s the best way to track group event expenses?

A shared spreadsheet or group chat can work for small events, but an expense app like Vala keeps every entry categorized and splits costs automatically as you add them. Consistency matters more than the tool itself, so pick one method and use it for the whole event.

How do you handle a dispute over who owes what?

Go back to the written agreement you made before spending started, since most disputes come down to a missing or vague rule. If there wasn’t one, use the CFPB’s money circle approach to map out who actually agreed to pay for what and settle from there.

How much should you budget for unexpected costs?

Agree on this buffer during your initial planning conversation so it’s not a surprise when it gets used.

Sources

This guide draws on consumer finance research and official guidance rather than guesswork. The Journal of Consumer Research study on payment paths informed our splitting advice, while the CFPB’s Money Circle toolkit and its tips for managing family lending shaped our communication steps. The Gneezy study on bill-splitting backs our caution around equal splits.

60 Days to Act for U.S. Cardholders: Detect Duplicate Charges Fast

If you see a duplicate charge, check whether the second entry is a pending hold or an actual posted charge, then call the merchant and your card issuer right away. For credit cards, federal rules treat being billed twice as a billing error, and you have 60 days from the statement date to send a written dispute. Debit cards follow different, faster-moving rules, especially if fraud is involved.


TL;DR:

  • Most duplicate charges are caused by merchant retries, billing errors, or refund postings, not intentional fraud, and comparing posting dates helps identify genuine issues.
  • Disputing a credit card billing error must be done in writing within 60 days of the statement showing the error, with investigations completed within 90 days.
  • For debit card errors, liability depends on how quickly you report, with a $50 cap if reported within two business days and potentially unlimited liability if delayed.
  • Acting promptly and documenting evidence with screenshots and receipts significantly increases the chances of resolving disputes quickly.
  • Using monitoring tools can automate detection of duplicate charges and subscriptions, helping you catch errors before they escalate.

Valapoint
Spot Duplicate Charges Sooner
Vala tracks expenses in real time and reveals spending patterns that can help you identify duplicate charges and financial leaks.

Visit Vala

Table of Contents

Quick checklist: 6 things to do now

Speed protects your rights and your money. Work through these steps as soon as you spot a charge that looks off:

  1. Check your account for pending versus posted entries and screenshot both along with your receipt.
  2. Call the merchant, ask for a reversal, and write down the representative’s name, the date, and any confirmation number.
  3. Contact your card issuer the same day and ask for the billing-inquiries address you will need for written notice.
  4. If the charge looks unauthorized, lock or replace your card and watch for more suspicious activity.
  5. Send a written dispute for credit-card billing errors within 60 days of the statement that first showed the error.
  6. Start a dispute file: dates, names, screenshots, and confirmation numbers all in one place.

Pro Tip: Take a screenshot the moment you spot the issue. Pending charges can disappear from your banking app within a day or two, taking your evidence with them.

Why duplicate charges happen

Not every double entry is a mistake. A pending authorization hold often shows up alongside the final posted charge, especially at gas stations, hotels, and restaurants that estimate a tip. The hold usually drops off within a few days once the real charge posts.

Actual duplicate charges tend to come from a smaller set of causes:

  • A payment terminal times out, the merchant retries the transaction, and both attempts go through.
  • A merchant submits the same batch of transactions twice by mistake, an issue explained with practical reconciliation workflows in Stripe Payment Reconciliation for Finance Teams.
  • A subscription service bills you on the wrong cycle or charges you after a failed renewal attempt also succeeded.
  • A refund posts as a separate line instead of reversing the original charge, making it look like you were charged twice.

Small timing gaps and slightly different merchant descriptors can make two charges look unrelated when they are actually the same transaction, or look identical when they are not. Comparing the posting dates and transaction status before you escalate saves you a dispute you did not need to file. When two confirmed posted charges hit for the same amount, same merchant, and nearly the same time, that pattern points to either a merchant processing error or, less often, a compromised card.

Step-by-step dispute process for credit cards

A duplicate charge on a credit card is a billing error under the Fair Credit Billing Act, which gives you real leverage: you do not have to prove fraud, only that you were billed for something you did not authorize twice. That protection is why acting through the proper channel matters more than just complaining to customer service.

Your written dispute should include:

  • Your name and account number.
  • The exact dollar amount and date of the duplicate charge.
  • A short, clear explanation of what happened.
  • Copies of receipts, screenshots, or order confirmations.

You have 60 days from the date of the first statement showing the error to send that notice. The FTC’s sample dispute letter walks through exactly what to include and recommends sending it to the billing-inquiries address, not the payment address, by certified mail so you have proof of delivery.

Once your issuer receives your letter, it must acknowledge the dispute within 30 days and resolve the investigation within two billing cycles, never more than 90 days. During a valid investigation, you can withhold payment on the disputed amount and any related finance charges, and you can request copies of whatever documents the issuer used to make its decision.

Credit card dispute timeline and actions

Duplicate debits and suspected fraud: different rules and faster actions

Debit card disputes follow the Electronic Fund Transfer Act and Regulation E, not the Fair Credit Billing Act, and the stakes around timing are higher. Your liability for an unauthorized debit depends heavily on how fast you report it: generally capped at $50 if you notify your bank within two business days, up to $500 if you wait longer, and potentially unlimited if you let 60 days pass after your statement arrives without reporting it.

If you suspect fraud rather than a simple merchant error:

  • Lock or freeze your card immediately through your banking app, then call your bank to replace it.
  • Follow up any phone report with written notice, since oral notice alone may not fully protect you.
  • Watch your account closely for a few days in case more unauthorized charges appear.
  • Visit IdentityTheft.gov if you think your card number or personal information was stolen rather than just double-billed.

If the issuer won’t fix it: escalation steps and complaint channels

If your card issuer denies the dispute or drags its feet, ask for the specific documents it relied on to make that decision. Look for gaps: did it actually compare posting dates and merchant descriptors, or just note that you shop there regularly?

You can usually reassert your dispute once with new evidence, like a merchant email confirming a double charge, but repeated reassertions without new facts rarely change the outcome. If that still does not resolve things:

  • File a complaint with the CFPB, including dates, screenshots, and copies of all correspondence with your issuer.
  • Keep a clear timeline so the complaint reviewer can see exactly when you reported the issue and when you sent written notice.
  • Consider small claims court or a consumer attorney if the disputed amount is significant and the issuer still refuses to budge after a CFPB complaint.

How to detect duplicates faster and prevent them

Catching duplicates early starts with a habit: reconcile your statement against your actual receipts at least once a month, matching amounts, dates, and merchant names line by line. Set up alerts for repeat charges at the same amount from the same merchant within a short window, since that pattern is the clearest sign of a billing glitch.

A few practical habits make detection much easier:

  • Review pending and posted transactions separately instead of only glancing at your running balance.
  • Set alerts for same-amount, same-merchant repeats within a day or two of each other.
  • Watch for merchant descriptors that look slightly different but clearly reference the same business.
  • Keep an eye on subscriptions and recurring charges that tend to double up after a failed renewal.

A good monitoring tool should flag duplicate-looking transactions automatically, track your subscriptions in one place, and walk you through reconciling your statement before you decide whether to escalate to a full dispute.

Pro Tip: Keep one folder, digital or physical, for every dispute. When you need to escalate, having everything dated and in order can be the difference between a quick resolution and weeks of back and forth.

Author perspective: why acting fast wins disputes

Most people lose dispute leverage by waiting. They expect the merchant to notice and refund the charge on its own, or they call once and assume the issue is handled. Weeks pass, the 60-day window closes, and the written dispute never gets sent.

A simple file with dated screenshots, receipts, and a one-line call log almost always leads to faster, cleaner resolutions than memory and good intentions. Most duplicate charges get fixed when you document them right away and put your dispute in writing before the clock runs out.

— SaverStride

How Vala helps find duplicate charges and simplify recovery

Catching a duplicate charge usually means scrolling through statements line by line, which is tedious and easy to put off. Our Money Leak Check scans your connected accounts for exactly this kind of pattern, flagging repeat charges, mismatched amounts, and recurring subscriptions that may have billed you twice.

Valapoint

Instead of manually cross-referencing receipts, you get a clear view of what looks off and the details you need to start a dispute right away.

  • Our detection tool surfaces duplicate and suspicious charges automatically, so you are not relying on catching them by eye.
  • A subscription plan adds deeper tracking and subscription review on top of the free detection.
  • Having your transaction history organized in one place makes building your dispute file faster when you do need to escalate.

If you want a clearer picture of where duplicate charges and other money leaks might be hiding, start your free analysis with Vala and see what turns up in your own accounts.

This article is general information, not a substitute for advice from a qualified financial advisor. Consult a qualified financial professional about your own circumstances before acting on anything here.

FAQ

I’ve been charged twice for the same transaction. What should I do?

Check whether the second entry is a pending hold or a fully posted charge, then call the merchant and your card issuer the same day. If it is a credit card billing error, send written notice within 60 days of the statement that first showed it.

No, a merchant or processor charging you twice for the same purchase is a billing error under federal law, not a legitimate charge you owe twice. The FTC specifically lists being billed twice as an example of a billing error you can dispute.

What should I do if a transaction gets processed twice?

Contact the merchant first to ask for a reversal, since many duplicate transactions are quick fixes on their end. If the merchant does not resolve it, contact your card issuer and follow up with a written dispute within the required window.

I was charged twice on my credit card. What should I do?

Gather your receipt or order confirmation, then send a written dispute to your issuer’s billing-inquiries address within 60 days of the statement showing the error. Your issuer must acknowledge the dispute within 30 days and resolve it within two billing cycles, no more than 90 days total.

How is a duplicate debit card charge different from a credit card one?

Debit card disputes fall under Regulation E rather than the Fair Credit Billing Act, and your liability depends on how quickly you report the problem. Reporting within two business days keeps your potential loss capped at $50, while waiting longer can raise that cap significantly.

Sources

Groups: Use an App to Split Expenses if 3+ Factors Favor Automation

Spreadsheets win when you need full control, privacy, or a free custom setup; apps win when you want automation and fast settlement. Guidance from the CFPB and spreadsheet error research from Dartmouth both point to the same tension: control versus convenience, and auditability versus automation. We built Vala around solving that convenience gap without ignoring the privacy tradeoffs.


TL;DR:

  • Large groups benefit more from app-based splitting due to automation, faster settlement, and easier handling of frequent or complex expenses.
  • Spreadsheets are more likely to contain errors, especially formula mistakes, which can lead to inaccurate calculations over time.
  • Connecting bank accounts to apps requires careful permission management, as permissions do not automatically end upon app uninstallation.
  • For international expenses, apps with automatic currency conversion reduce manual work and minimize exchange rate errors.
  • Combining spreadsheets and apps can optimize record-keeping, using spreadsheets for audit trails and apps for quick settlement and notifications.

Valapoint
Simplify Shared Expense Tracking
Vala helps groups track expenses, split costs, and uncover spending patterns with automation and real-time financial insights.

Visit Vala

Table of Contents

Head-to-head: features and trade-offs between spreadsheets and apps

Spreadsheets ask more of you upfront. You build the categories, enter every expense by hand, and write the formulas that calculate who owes what. Apps automate most of that through bank sync and receipt capture, so setup takes minutes instead of hours.

That manual control comes with a cost. A Dartmouth audit of operational spreadsheets found 381 potential issues and 117 confirmed errors across just 25 sheets, mostly from formula and design mistakes that spread quietly through shared files.

A significant share of cells checked in that Dartmouth audit carried a potential error, which is a reminder that spreadsheets look precise even when they aren’t (Dartmouth).

Here is how the two methods stack up on the factors groups care about most:

  • Setup and effort: spreadsheets require manual entry every time; apps capture receipts and sync transactions automatically.
  • Accuracy: spreadsheets depend entirely on your formulas being right; apps calculate splits the same way every time.
  • Customization: spreadsheets handle any split rule you can write a formula for; apps support common rules but may limit unusual ones.
  • Settlement: apps often include reminders and in-app payment options; spreadsheets require someone to chase payments manually.
  • Privacy: spreadsheets stay on your device unless you share the file; apps need bank or card permissions that persist after you stop using them, per CFPB guidance.
  • Cost: spreadsheets are typically free; apps may charge for premium features.

Spreadsheets suit small, stable groups who trust one person to maintain the file. Apps suit groups with frequent, changing expenses where nobody wants to be the bookkeeper. The real adoption question is simple: will your group actually keep using the tool? A feature-rich app nobody opens loses to a plain sheet that gets checked every week.

How to choose: decision checklist and the exact questions to ask

Before picking a method, run through the factors that actually predict whether it will stick:

  1. Group size: larger groups benefit more from automation since manual entry scales poorly.
  2. Frequency of shared costs: daily or weekly expenses favor apps; occasional big-ticket splits work fine in a sheet.
  3. Complexity of splits: itemized or income-based splits need flexible formulas or app support for custom rules.
  4. Settlement timeline: if you need fast payouts, apps with built-in payment options save a step.
  5. Privacy tolerance: if you’re uncomfortable linking bank accounts, a spreadsheet keeps everything local.
  6. Cost sensitivity: free spreadsheets beat paid apps for groups that split rarely.
  7. Ledger ownership: someone has to own and maintain the record, regardless of tool.

Ask your group these questions directly: How often do we split costs? Does anyone object to connecting a bank account? Who is willing to own the file or the app setup? Do we need itemized splits or just an even divide? If three or more answers point toward speed and automation, an app is the better fit.

Pro Tip: If your group can’t agree on an allocation rule first, no tool will fix the disagreement, decide the rule, then pick the tool that supports it.

Red flags that predict failure: no single owner for the spreadsheet, frequent disputes over who paid what, or an app nobody remembers to open. The fix is usually the same: assign ownership and set a recurring check-in, weekly for active groups, monthly for occasional ones.

Make spreadsheets work: setup checklist and error-control practices

A reliable spreadsheet starts with structure. Assign one owner, protect formula cells from accidental edits, and keep category names consistent across every tab. Separate raw inputs from calculated outputs so nobody overwrites a formula by mistake.

  • Lock or protect cells containing formulas so a stray edit doesn’t break the calculation.
  • Use one tab for entries and a separate tab for summary totals.
  • Keep a simple change log noting who edited what and when.
  • Review the sheet on a set schedule, weekly works for most groups, rather than only when someone complains.

For splits, three formula types cover most situations: equal division (total divided by headcount), itemized splits (each person pays for what they claimed), and share-based splits (proportional to income or usage). Build each as its own column so you can audit the logic later.

Spreadsheet audits found formula and reference errors were the most common type, not simple typos, which means the fix isn’t careful typing, it’s protecting the cells that hold your logic (Dartmouth). When disagreements come up, check the formula first, then the raw entry. Most disputes trace back to one or the other.

Use apps safely and effectively: privacy checklist and coordination tips

Apps earn their convenience by connecting to your accounts, which means permissions deserve real attention. CFPB guidance notes that deleting an app does not automatically end its data access. You typically need to revoke authorization directly and, where available, request data deletion.

  • Connect only the accounts you actually need for splitting, not every account you own.
  • Check the app’s permission settings periodically, not just at setup.
  • Export your data regularly so you have a backup outside the app.
  • Revoke access explicitly before assuming uninstalling is enough.

For group setup, assign a clear role, someone to add expenses, someone to confirm settlements, and decide upfront whether payments happen automatically or get logged for manual transfer. Apps that support installment-based settlement reduce the awkward “remind your friend to pay you back” conversation.

Pro Tip: Export your app data monthly even if you never plan to switch tools, it gives you a record for taxes or disputes that the app itself might not keep forever.

Combine an app with periodic spreadsheet exports when you need longer-term audit trails, tax documentation, or a backup that doesn’t depend on any single company staying in business.

Hybrid workflows and migration: when and how to combine spreadsheets and apps

Switch methods when friction repeats: missed settlements, a group that’s outgrown manual entry, or constant arguments over who owes what. Migration works best in stages:

  1. Export your existing spreadsheet data before making any changes.
  2. Map your categories to the new tool’s structure so nothing gets lost.
  3. Keep the old file as an audit trail rather than deleting it.
  4. Run both systems in parallel for one month to confirm the new setup works.

Two hybrid setups cover most groups well. Use a spreadsheet for permanent records and an app for reminders and payments, or use an app purely for settlement while keeping a spreadsheet for the itemized audit trail your group actually trusts. Research on group-expense tools from Drexel shows that reducing friction around division and payment tracking, not adding more features, is what actually gets groups to keep using a tool.

Integration capabilities with other financial tools or platforms

Spreadsheets integrate with whatever you can import or export manually, usually CSV files from your bank or card statements. That flexibility is real but slow. You’re copying and pasting or running exports every time you want fresh data.

Apps tend to integrate more directly, pulling transactions from linked bank accounts and sometimes connecting to budgeting or savings tools in the same ecosystem. If you already track your overall budget in an app, choosing a group-expense tool that fits into that same system saves you from maintaining two separate records.

The tradeoff is dependency. A spreadsheet never breaks because a bank changed its API. An app’s integration might, which is worth considering if you need something that works reliably for years without maintenance. For groups who want their group expense tracking to connect naturally with a broader financial picture, rather than living in an isolated file, an integrated app setup tends to save the most ongoing effort.

Offline accessibility and data backup options

Spreadsheets work offline by default. A file saved to your device or a local backup is accessible with no internet connection, and you control exactly where copies live.

Apps generally require a connection to sync, though many cache recent data for offline viewing. The real backup question is who owns the copy: if an app shuts down or you lose access to your account, your data might go with it unless you’ve exported it regularly.

The safest practice, regardless of method, is keeping at least one backup outside the primary tool. For a spreadsheet, that means a cloud copy plus a local one. For an app, that means periodic exports to a file you control, something worth building into your routine even if the app feels reliable today.

Handling multi-currency or international expenses

Groups splitting costs across currencies face a problem spreadsheets handle only with manual work. You’d need to track exchange rates yourself and update formulas each time rates shift, which introduces another place for the kind of formula error Dartmouth’s research flags as common in operational sheets.

Apps that support multi-currency splitting typically convert amounts automatically using current rates, which removes a manual step and a common source of mistakes. If your group travels together or includes members in different countries, this is one of the clearest cases where automation outperforms a manual sheet.

Illustration of multi-currency expense conversion

If you’re sticking with a spreadsheet for international splits, build a dedicated conversion column, note the rate and date used for each entry, and avoid overwriting historical conversions when rates change later. That keeps your record accurate even without automatic updates.

Expense-splitting apps that connect to financial accounts typically rely on encryption to protect data in transit and at rest, along with secure authentication for account access. The specific standards vary by provider, so it’s worth checking an app’s own security documentation rather than assuming a baseline.

What matters more practically is permission management. CFPB guidance notes that connecting an account creates an ongoing relationship, and strong encryption doesn’t eliminate the need to review what you’ve authorized and revoke it when you’re done. Treat security and permission hygiene as two separate checks: one covers how your data is protected, the other covers who still has access to it.

A quick comparison of expense-tracker approaches, including privacy considerations, is covered in this independent roundup of freelancer expense tools, useful if you want a broader view before connecting any account.

Author perspective: the default recommendation for most groups

For most friend groups and roommates, we’d default to an app. The coordination savings outweigh the setup cost, and Drexel’s research on group-expense tools backs that friction reduction. Exceptions: if your group is small, stable, and values privacy over speed, a spreadsheet still works fine.

— SaverStride

Publisher option: how Vala addresses the trade-offs

We built Vala to close the gap between a spreadsheet’s control and an app’s convenience. Our Split Bills App handles shared expense splitting, automated reminders, and settlement in three payments, so nobody has to chase a friend for money.

Valapoint

  • Automated group splitting removes the manual math and the formula risk that comes with it.
  • Built-in settlement options mean payments get tracked without separate spreadsheets or apps.
  • Our Money Leak Check flags recurring charges your group might be splitting without noticing.

We’re upfront about the tradeoff: connected features need account permissions, and we ask you to grant only what you’re comfortable sharing. Our SaverPro plan, priced at $2.99 per month, unlocks the full set of automation and insight tools if you want to go beyond the free features. Start with a Money Leak Check to see where your shared or personal spending could use a closer look.

FAQ

Is a spreadsheet or an app better for splitting expenses?

It depends on your group’s size and habits: spreadsheets suit small, stable groups who want control and privacy, while apps suit larger or frequent-expense groups who want automation and faster settlement. Neither option is universally better, the right choice follows your group’s actual behavior.

Are spreadsheets prone to errors when splitting group expenses?

Yes, spreadsheets carry a real risk of formula and design errors, especially as they grow more complex. A Dartmouth audit of 25 operational spreadsheets found 381 potential issues and 117 confirmed errors, showing how mistakes can spread unnoticed in shared files.

Linking accounts is common practice, but it creates an ongoing data-sharing relationship that doesn’t automatically end when you delete the app. CFPB guidance recommends reviewing and explicitly revoking permissions rather than assuming uninstalling is enough.

How much does Vala cost for splitting expenses with a group?

Our SaverPro plan costs $2.99 per month and includes full access to automated group splitting, budgeting tools, and AI-driven insights. A free tier is also available for basic tracking before you decide to upgrade.

What’s the best way to track shared expenses across different currencies?

Apps that support multi-currency splitting generally convert amounts automatically, which reduces manual error compared to tracking exchange rates by hand in a spreadsheet. If you’re using a spreadsheet for international costs, keep a dedicated column noting the rate and date for each conversion.

Sources

Stop 3 Autopay Failures: U.S. Credit Card Strategy to Avoid Overdrafts

For most people who pay their card in full every month, the best default is to autopay the statement balance. If you tend to carry a balance, autopay the minimum as a safety net and pair it with an active paydown plan. Either way, keep variable, trial, or disputed charges off unattended autopay and watch them with alerts instead.


TL;DR:

  • Paying the statement balance autopay keeps interest at zero and preserves your grace period if you pay in full each month.
  • Autopaying the minimum covers your credit history but does not prevent interest or lower reported utilization, which affects your credit score.
  • Setting a pre-close payment before the statement date reduces reported utilization but adds operational complexity and risks insufficient funds.
  • Monitoring alerts and tracking tools help detect failed payments, overdrafts, and unrecognized charges, minimizing common autopay risks.
  • Confirm your autopay setup by checking dates, funding options, and posting confirmation to avoid surprises and ensure reliable payments.

Valapoint
See Where Your Money Goes
Vala tracks expenses, manages budgets, and highlights spending patterns that can help you spot financial leaks around recurring payments.

Visit Vala

Table of Contents

Which autopay option should you choose?

Every issuer offers a few autopay modes, and picking the wrong one can quietly cost you money or protection. Here’s what each one actually does.

Statement balance autopay pays off everything shown on your last statement. If you pay in full each cycle, this keeps your grace period intact and you avoid interest entirely. It’s the simplest “set it and forget it” option for people who don’t carry debt.

Minimum payment autopay only covers the smallest amount due. This protects your payment history, which makes up 35% of a FICO Score, but it does nothing for your grace period or your interest charges. Treat it as a backstop, never a strategy on its own.

Current balance autopay pays whatever you owe as of the payment date, which can differ from your statement balance if you’ve made new purchases. This works well if you want your balance at or near zero constantly, but it can also pull more than you expect if spending spikes.

Fixed amount autopay sends the same dollar figure every cycle regardless of what you owe. This suits people on irregular income who want predictable outflows, but it risks leaving a balance (and interest) if your spending creeps above that number.

Use this quick checklist to match your situation to a mode:

  • Pay in full every month: autopay the statement balance.
  • Carrying a balance you’re paying down: autopay the minimum, then add manual or scheduled extra payments.
  • Unpredictable income: autopay a fixed amount you know you can always cover, then true up the rest manually.
  • Multiple small subscriptions on the card: autopay the statement balance so nothing slips through, but review the statement before it closes.

How credit card billing timing actually works

Autopay only works well when you understand the three dates that control it: when your statement closes, when your payment is due, and when your issuer reports your balance to the credit bureaus.

  1. Statement closing date: this is the snapshot date. Whatever balance you’re carrying at closing typically becomes the number reported to the bureaus and the figure most “statement balance” autopay rules use.
  2. Payment due date: under CFPB guidance, a payment is generally not late if it’s received by 5 p.m. on the due date in the time zone your statement uses, and the due date is typically at least three weeks after the bill is sent. Weekends and holidays push the deadline to the next business day, so confirm your issuer’s exact cutoff.
  3. Bureau reporting date: most issuers report your balance around the statement closing date, not the due date. That gap matters: a large purchase made right before closing shows up as high utilization even if you pay it off in full two weeks later.

Paying full in full by the due date generally preserves your grace period and keeps interest at zero, according to CFPB guidance on grace periods. But if you want lower reported utilization, paying before the statement closes, rather than waiting for the due date, is the lever that actually moves the number lenders see.

Common autopay risks and how to avoid them

Autopay removes the risk of forgetting a payment, but it introduces new risks of its own, mostly tied to timing and funding.

Overdraft and returned payments top the list. The FDIC warns that recurring debits can trigger overdraft or non-sufficient funds fees, especially when processing timing is unpredictable and a payment lands before your paycheck does. Keep a cushion in your checking account, and consider a backup funding source for your largest recurring bill.

Illustration of autopay timing and overdraft risk

Enrollment failures happen more often than people expect. A confirmation screen is not proof the pull actually went through. Check your transaction history the cycle after you enable autopay to confirm the debit posted, and verify your issuer’s cutoff time so your payment counts as on time under CFPB rules.

Subscription and negative-option traps are a different risk class entirely. The FTC’s guidance on auto-renewals notes that free trials and negative-option subscriptions often continue billing after you think you’ve canceled, since they require active authorization to stop.

To stay protected:

  • Save every cancellation confirmation email or screenshot.
  • Check your statement line by line each month for charges you don’t recognize.
  • Dispute unauthorized or continued charges with your issuer as soon as you spot them.
  • Never auto-renew a trial without a calendar reminder a few days before it converts.

Pro Tip: Set a recurring reminder a few days before your statement closes to scan for one-off charges or renewed trials, since that’s the window where surprises are easiest to catch.

How to set up autopay without surprises

Setting up autopay correctly takes about ten minutes, but skipping the verification steps is where most problems start.

  1. Find your statement closing date and due date in your issuer’s app or online account, and note their stated cutoff time for same-day processing.
  2. Confirm your payment method options. Some issuers only pull from a linked bank account; others accept debit cards or external transfers, which can affect how fast the payment settles.
  3. Choose your autopay amount (statement balance, minimum, current balance, or fixed amount) based on whether you pay in full or carry a balance.
  4. Select your funding account and make sure it has enough buffer to cover the payment even if your schedule shifts by a day or two.
  5. Submit enrollment and save the confirmation, but don’t treat it as final. Confirmation pages reflect your request, not a guaranteed successful debit.
  6. Watch your first autopay cycle closely. Check your bank account on the scheduled date to confirm the debit actually posted, and check your card account to confirm the payment applied.
  7. If a payment fails, contact your issuer immediately, ask about a late-fee waiver (many will grant one for a first-time autopay glitch), and dispute the fee in writing if you believe the failure was on their end rather than yours.

Advanced autopay tactics for utilization and interest

Once your baseline autopay is reliable, a few adjustments can shave down both your reported utilization and your interest costs.

Splitting payments across paydays lowers your average daily balance between statement cycles. Instead of one large payment on the due date, sending two smaller payments, one right after each paycheck, keeps your balance lower for more of the month, which matters since issuers typically calculate interest using a daily periodic rate, as CFPB explains.

Pre-close payments target the specific snapshot your issuer reports to the bureaus. Paying down your balance a few days before the statement closes, rather than waiting for the due date, lowers what’s reported as your utilization, which carries real weight since amounts owed make up 30% of a FICO Score.

  • Set a scheduled extra payment two or three days before your statement closes if you want lower reported utilization.
  • Keep your due-date autopay as the safety net even if you add pre-close payments.
  • Avoid stacking too many manual payments on top of autopay. Every extra transaction is another chance for a timing mismatch or a failed pull.
  • Never let a pre-close payment push your checking account into a spot where your due-date autopay might bounce.

The trade-off is operational complexity. Every additional scheduled payment is another point where a funding gap or a bank glitch can cause a missed debit, so weigh the utilization benefit against how closely you’re able to monitor your accounts.

Keeping autopay safe with alerts and tracking tools

Autopay works best when it’s paired with monitoring, not left completely unattended. A few account alerts do most of the heavy lifting.

  • Low-balance alerts on your checking account give you a warning before a scheduled debit risks an overdraft.
  • Transaction alerts notify you the moment a payment posts, so you catch failures or duplicate charges fast.
  • Statement-created alerts flag the exact day your balance snapshot locks in, which is your cue for any last pre-close payment.

Beyond bank alerts, a subscription tracker that flags upcoming renewals helps catch negative-option charges before they hit, and general budgeting and expense-tracking apps give you a fuller view of pending transactions and account buffers so a scheduled payment never catches you off guard. For anyone managing several recurring bills at once, a roundup of free financial wellness tools is a useful starting point if you’re not ready to commit to a paid app.

Some apps build subscription tracking and recurring-charge detection into AI-driven insights, which can help surface charges you’ve forgotten about before they renew on autopay.

A practitioner’s honest take on autopay

Autopay fails for one of three reasons: wrong funding timing, no buffer in checking, or a subscription nobody’s watching. Fix those three and autopay becomes nearly bulletproof. My rule of thumb: automate the bill, never automate the subscription, and always keep a week’s worth of spending as a cushion in checking.

— SaverStride

Let Vala help you watch autopay and catch money leaks

Setting up a reliable autopay strategy handles the “don’t miss a payment” problem. Catching the subscriptions, trials, and forgotten charges that ride along on that same statement is a separate job, and it’s one we built Vala around.

Valapoint

Our Money Leak Check scans your spending for recurring charges you may have missed, the same subscriptions and negative-option renewals that cause the most unwelcome autopay surprises. Beyond that scan, Vala gives you:

  • Automated tracking of recurring charges and subscription renewals.
  • Real-time alerts when a new or unusual charge shows up.
  • Budget views that connect your autopay bills to your overall spending picture.
  • A paid plan for deeper AI-driven insights and shared expense tools with current prices available on the pricing page.

If you’ve ever wondered what’s quietly draining your account between statements, our Money Leak Check is a free place to start.

FAQ

Is it a good idea to set up autopay for credit cards?

Yes, for most people, since it protects your payment history, which is the largest factor in your FICO Score. The key is choosing the right autopay amount for your situation and keeping a buffer in your checking account to avoid overdrafts.

What bills should you not put on autopay?

Avoid unattended autopay for variable charges, free trials, and anything you’re actively disputing. The FTC warns that negative-option subscriptions often continue billing unless you actively cancel, so these need manual review rather than a set-it-and-forget-it payment.

What is the best autopay option for a credit card?

If you pay your card in full every month, autopay the statement balance to preserve your grace period and avoid interest. If you carry a balance, autopay the minimum as a safety net and add a separate paydown plan on top of it.

What is the downside of autopay?

The main downsides are overdraft risk if your funding account runs low, and the chance that a subscription or trial keeps charging because nobody’s watching it closely. The FDIC notes that processing timing on recurring debits can create unexpected fees even when you think you have enough funds available.

Sources