Pay Yourself First Budgeting: Automate Savings Now

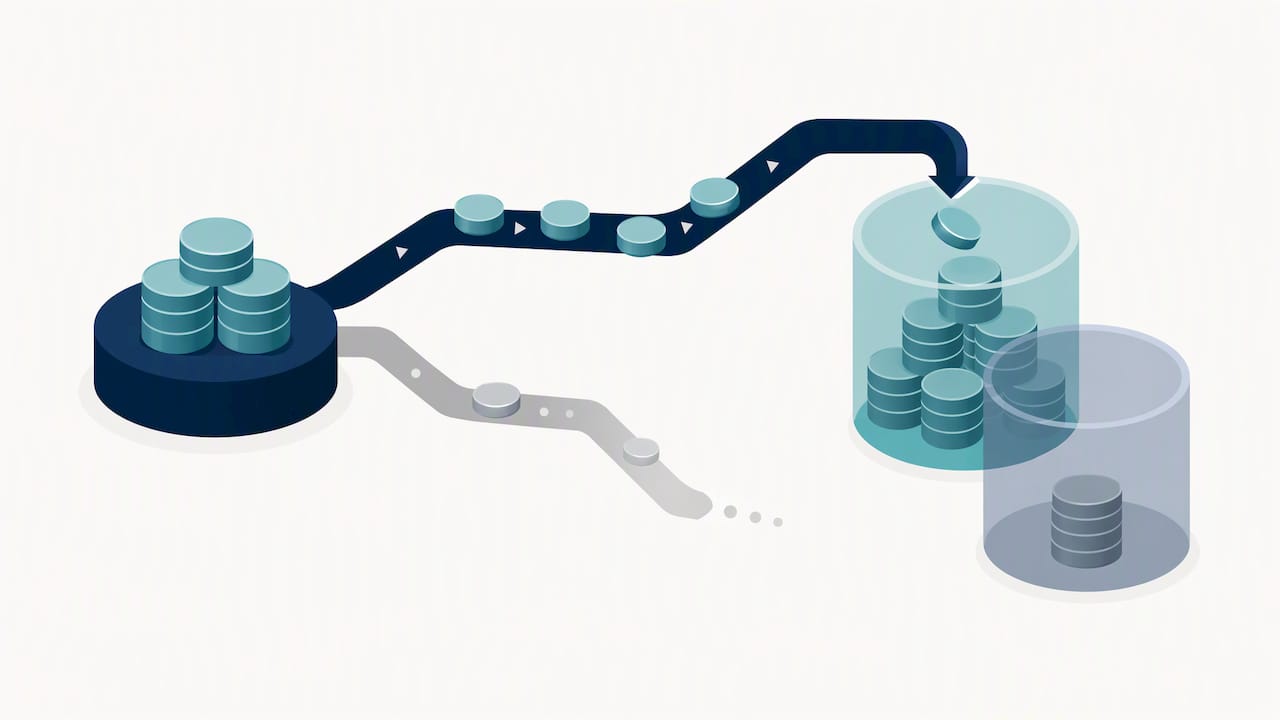
Pay yourself first budgeting means moving money into savings the moment your paycheck lands, before a single bill or discretionary dollar gets spent. It’s also called reverse budgeting, and the action step is simple: set up an automatic transfer of 5% to 10% of your take-home pay today, with a goal of reaching 10% to 20% as your finances stabilize. The Federal Reserve found that 37% of adults couldn’t cover a $400 emergency in cash, which is exactly the gap this method closes. You don’t need FINRA credentials or an SIPC-insured brokerage to start. You just need one transfer, scheduled for your next payday.

  • Start at 5%–10% of net pay; scale toward 10%–20% over time
  • Automate it through payroll, split direct deposit, or a bank transfer rule
  • Route the money somewhere you won’t casually spend it, like a separate savings account
  • Use a tool like Vala to schedule and track the transfer automatically

Key Takeaways

Pay yourself first budgeting works because automating a fixed percentage of net pay into savings removes the willpower problem that derails manual budgeting.

Point Details
Start with 5%–10% Automate this percentage of net pay now, scaling toward 10%–20% as your budget stabilizes.
Build a starter fund first Save $500–$1,000 before tackling high-interest debt or bigger savings goals.
Match your automation to your accounts Use payroll deductions for retirement, split deposit or transfers for emergency and sinking funds.
Adjust for variable income Average 3–6 months of net pay before automating a percentage if your paycheck fluctuates.
Automate with a tool like Vala Vala can schedule transfers, track savings goals, and flag spending leaks automatically.

Table of Contents

What Is the Pay Yourself First Method, Really?

Reverse budgeting flips the traditional script. Instead of paying bills, spending on wants, and saving whatever scraps remain, you save first and build your spending plan around what’s left. NerdWallet frames this as the defining feature of the approach: automation removes the guesswork and the temptation to skip savings when money feels tight.

The psychology matters as much as the mechanics. Investopedia notes that treating savings like a fixed bill, rather than a leftover, changes how people relate to their money. You stop relying on willpower and start relying on a system.

This method works especially well for goals with a clear finish line:

  • Building an emergency fund
  • Contributing to retirement accounts
  • Saving for a home down payment
  • Funding a planned purchase through a sinking fund

How to Set Up Pay Yourself First This Week

You can have this running before your next paycheck hits. Follow these steps in order:

  1. Pick your percentage or dollar amount. Base it on net pay, not gross, and start at 5%–10% if you’re new to this.
  2. Choose your destination account. A high-yield savings account works well for near-term goals; a 401(k) or IRA works for retirement.
  3. Set up automation. Options include payroll deduction, splitting your direct deposit between two accounts, or scheduling a recurring bank transfer.
  4. Time it carefully. Confirm the transfer date and leave a buffer so your checking account doesn’t dip below what your bills need.

Each automation method has trade-offs. Payroll deductions (like a 401(k) contribution) are the most hands-off but limited to retirement accounts. Split direct deposit sends part of your paycheck straight to savings without you ever touching it. Bank-based recurring transfers are flexible but depend on you setting the date correctly. App-based rules, including automated savings goals, can layer on top of any of these for extra tracking.

Pro Tip: Schedule your transfer for the same day your paycheck posts, or the evening before your bills are due to clear. Moving money too early or too late is the most common way people accidentally overdraft while trying to save.

Which Accounts Should Hold Your Pay-Yourself-First Money?

Where the money goes matters as much as how much you send there.

  • Emergency savings: An online high-yield savings account, kept separate from checking so it’s not an easy tap.
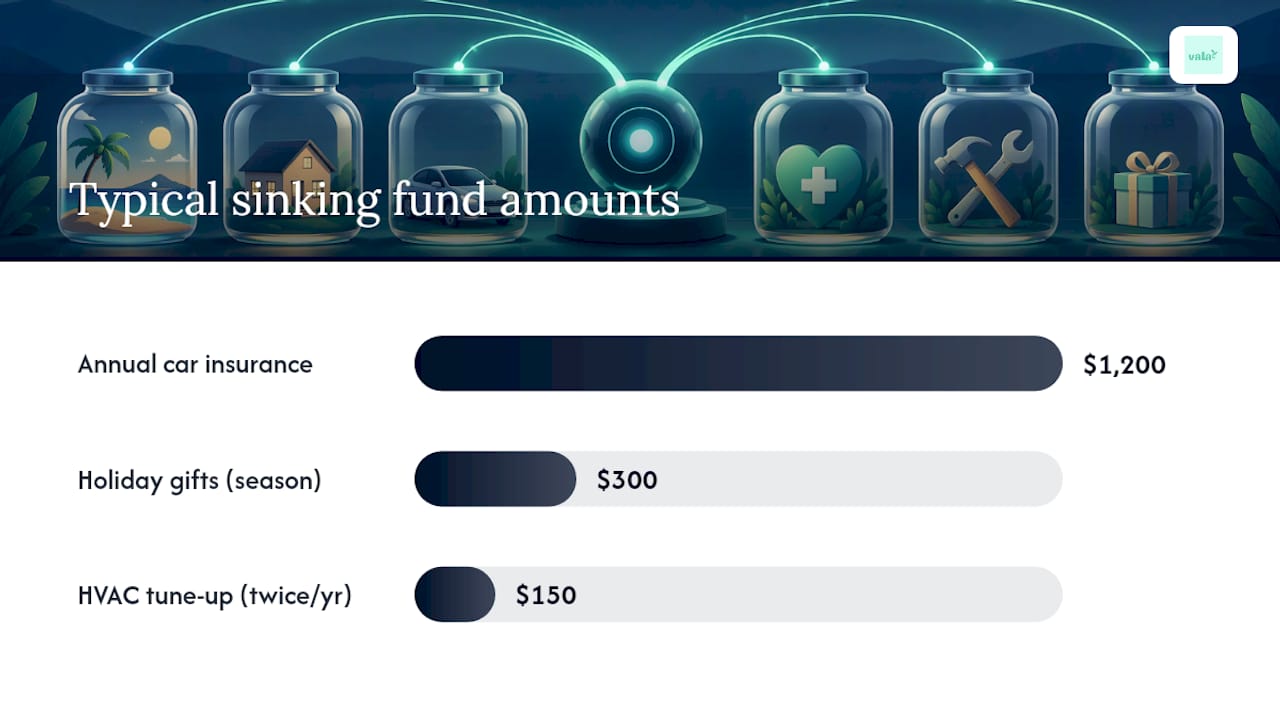
  • Sinking funds: Sub-accounts for planned costs like car repairs, holidays, or annual insurance premiums.
  • Retirement accounts: A 401(k), especially with an employer match, or an IRA for tax-advantaged long-term growth.
  • Taxable investment accounts: Useful for medium-term goals beyond retirement, once your emergency fund and high-interest debt are handled.

Prioritize the emergency fund first, then retirement contributions up to any employer match, since that match is essentially free money. Save taxable investing for later in the sequence. One caution worth repeating: don’t treat a 401(k) or IRA as backup cash. Early withdrawals often trigger penalties and taxes that erase the benefit of saving in the first place.

Benefits, Pitfalls, and How to Avoid Them

Glass jar being filled with coins

The upside is real. Automating savings builds a consistent habit, removes the daily decision fatigue of “should I save today,” and lets you capture employer retirement matches without extra effort.

The downsides show up when the system isn’t planned around your actual cashflow.

Pros:

  • Builds a durable savings habit without relying on motivation
  • Increases consistency compared to saving “whatever’s left”
  • Captures employer matches and compounding automatically

Cons:

  • Can create cash shortfalls if the transfer amount is too aggressive
  • May slow high-interest debt payoff if applied without a plan
  • Harder to manage with variable or unpredictable income

Ramsey Solutions points out that pay yourself first works best paired with a zero-based budget, where every dollar left after saving has an assigned job. Start with a smaller percentage than you think you need, keep a small buffer in checking, and track expenses alongside your automated transfer so nothing slips through the cracks.

Is Pay Yourself First Right for You?

This method fits best if you have steady income and want a low-maintenance system that runs in the background. If your paycheck varies wildly or you’re carrying high-interest debt, the standard version needs a modification.

  • Good fit: Steady paychecks, minimal high-interest debt, a preference for automation over active budgeting
  • Needs adjustment: Living paycheck to paycheck, carrying credit card balances above 15% to 20% interest, or income that swings month to month

A simple sequence works for most people: build a small starter emergency fund, then attack high-interest debt, then scale your automated savings back up once that debt is gone. Ramsey Solutions recommends this starter-fund-first approach specifically for people managing tight cashflow or debt. If straight pay-yourself-first doesn’t fit yet, a hybrid plan (a small automated transfer plus targeted debt payments) or a full zero-based budget can bridge the gap.

A Simple Paycheck Example You Can Copy

Say your net pay is $3,000 a month. Here’s how a reverse budget might route it:

  1. Save first: 15% to savings = $450 (split $300 to emergency fund, $150 to retirement or a sinking fund)
  2. Needs: Roughly 50% = $1,500 for rent, utilities, groceries, transportation
  3. Wants: Remaining $1,050 for discretionary spending

That maps loosely onto the 50/30/20 framework, just reordered so the “20” gets claimed first instead of last.

To scale up without hardship:

  • Month 1–3: Automate 10% while you adjust to the reduced take-home cash
  • Month 4–8: Increase to 15% once you’ve confirmed bills are covered comfortably
  • Month 9–12: Push toward 20% if debt is under control and income is stable

What the Data Says About Emergency Funds and Debt

The Federal Reserve reports that 37% of adults couldn’t cover a $400 emergency expense with cash on hand. That statistic is the strongest argument for prioritizing an emergency fund before anything else, including extra retirement contributions.

A sound priority order, backed by financial guidance across multiple sources:

  • Build a $500–$1,000 starter emergency fund first
  • Pay down high-interest debt (generally above 15% to 20% APR)
  • Resume or scale automated savings toward retirement and other goals

For deeper reading, the Federal Reserve’s survey data, FINRA’s investor resources, and SIPC’s investor protection information all offer further grounding on savings gaps and account protections.

Adjusting for Variable Income and Tight Budgets

Nearly empty wallet with folded cash nearby

If your paycheck changes month to month, don’t automate a fixed percentage against your best month. Investopedia recommends averaging your last 3 to 6 months of net pay and automating a percentage against that baseline instead.

For low-income households, start smaller than feels significant. A fixed $25 or $50 per paycheck, split off through direct deposit, still builds the habit and the balance over time.

  • Use a 3–6 month average of net pay for variable income
  • Start with fixed dollar amounts if percentages feel unmanageable
  • Send windfalls (tax refunds, bonuses, side gig income) straight to your starter emergency fund

Pro Tip: Route irregular income, like a tax refund or freelance payment, directly to savings the day it arrives. It accelerates your goal without ever touching your regular monthly cashflow.

How I’d Start This Method This Month

Here’s the plan I’d follow: set a 5% automatic transfer on my very next payday, open a separate savings account specifically for that money, and calendar a 3-month check-in to see if I can raise the percentage.

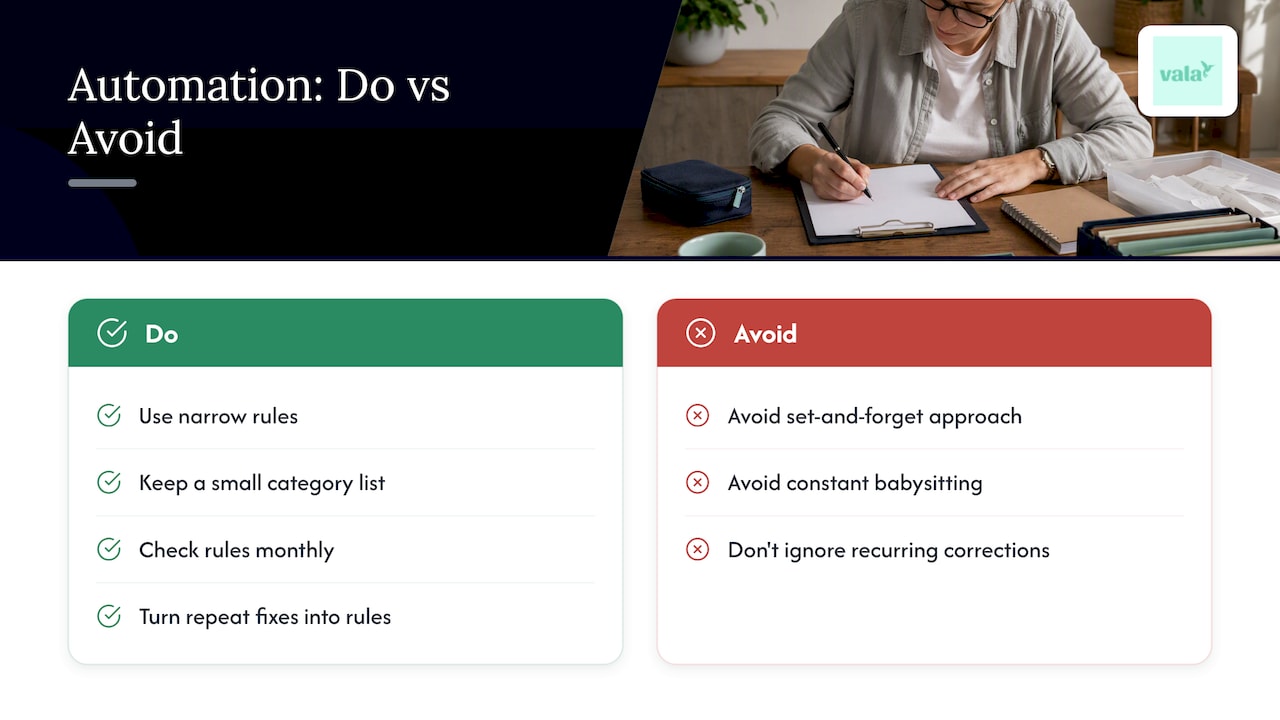
That’s it. Small, automated, and boring in the best way. The habit does more work than the percentage does at first, and the review date keeps it from becoming a “set it and forget it forever” mistake.

Let Vala Handle the Automation for You

Manually managing transfer dates, tracking savings goals, and watching for leaks in your budget takes time you’d rather spend elsewhere. Vala automates the transfers, tracks your savings goals in real time, and flags spending patterns that quietly drain the money you meant to save.

Valapoint

If you’re ready to put pay yourself first budgeting on autopilot, start with the Vala personal finance app and set your first automated savings goal today. This is an optional tool. The method works with a spreadsheet and a bank app too, but Vala removes the manual steps that cause most people to quit within a few months.

Frequently Asked Questions

How much should I save with pay yourself first budgeting?
Start at 5%–10% of your net pay and work toward 10%–20% as your budget allows. If you’re carrying high-interest debt, prioritize a $500–$1,000 starter emergency fund before scaling savings higher.

Is pay yourself first the same as the 50/30/20 rule?
Not exactly, but they overlap. The 50/30/20 rule allocates 50% to needs, 30% to wants, and 20% to savings. Reverse budgeting takes that same 20% and moves it to the front of the line, before needs and wants get funded.

Should I pay yourself first if I have credit card debt?
Skipping the debt to save aggressively usually costs more in interest than you’d earn in savings.

What if my income varies every month?
Average your net pay over the last 3 to 6 months and automate a percentage against that baseline instead of your best or worst month. This keeps transfers realistic and avoids overdraft risk during slower months.

This article is general information, not a substitute for advice from a qualified financial advisor. Consult a qualified financial professional about your own circumstances before acting on anything here.

Sources

Financial Management Basics for Individuals and Couples

A basic financial management system comes down to four things: your net income, a categorized list of expenses, one budgeting method you’ll actually stick with, and a weekly tracking habit. That’s it. Everything else, apps, spreadsheets, envelopes, is just a delivery mechanism for those four pieces.

Here’s what to do today, in order. First, pull your last one to three months of bank and credit card statements. Second, calculate your net income (what actually lands in your account after taxes) and total your recurring monthly outflows. Third, pick one tracking method, an app, a spreadsheet, or plain cash in envelopes, and log every expense for the next seven days.

The rest of this guide walks through how to choose a budgeting method that fits your income and personality, how couples and roommates can split shared costs without resentment, a sample budget you can copy directly into a spreadsheet or an app like Vala, and the habits that make a budget last longer than a New Year’s resolution.

Key Takeaways

Consistent weekly tracking, one clear budgeting method, and upfront rules for shared expenses matter more than finding a “perfect” financial system.

Point Details
Gather your numbers first Pull one to three months of statements and calculate net income before choosing a method.
Pick one method and commit Choose 50/30/20, zero-based, envelope, or pay-yourself-first based on your income stability.
Set one savings goal Divide the total cost by months remaining to get a concrete monthly savings target.
Agree on shared-cost rules upfront Couples and roommates avoid conflict by setting split methods before spending happens.
Start tracking with Vala Vala automates expense tracking, shared splitting, and savings goals in one free-to-start app.

Table of Contents

Why a Budget Matters More Than You Think

A budget isn’t a leash. It’s a planning tool that shows you where your money is already going, so you can point more of it toward what you actually care about. The Bank of America Better Money Habits guide makes a point worth repeating: there’s no single “correct” budgeting method, and the people who succeed are the ones who check in on their numbers regularly, not the ones who found some perfect system.

Think about what a working budget actually gives you:

  • Clarity between income and expenses, so you stop guessing whether you can afford something.
  • Debt control, because you can see exactly how much is going toward interest versus principal.
  • Faster savings progress, since idle cash gets assigned a job instead of disappearing.
  • Leak detection, catching forgotten subscriptions and creeping costs before they add up.
  • Fewer money arguments, if you’re sharing finances with a partner or roommates.

That last point deserves its own callout. Couples and small groups who set spending roles and expectations upfront report far less friction than those who wing it. A budget doesn’t remove flexibility. It just makes sure flexibility is a choice, not an accident.

Your Quick-Start Checklist: What to Gather First

You don’t need a financial planning degree to start. You need paperwork and about 45 minutes.

  1. Pull your pay stubs from the last one to three months, or your last several deposits if you’re self-employed.
  2. Download bank and credit card statements covering the same window.
  3. Collect recent bills and receipts, rent, utilities, insurance, groceries, so you can separate fixed from variable costs.
  4. List upcoming annual or irregular expenses, car registration, holiday spending, annual subscriptions, and divide each by 12 to get a monthly equivalent.
  5. Flag every recurring subscription you can find, streaming services, apps, memberships, and mark which ones you actually use.

If your income varies week to week, average your last three to six paychecks to estimate a realistic monthly baseline rather than budgeting off your best month. Mycreditunion uses this same gather-then-calculate approach, and it works whether you’re salaried, hourly, or freelance. Beginner guides also tend to recommend tracking spending for a full three months before making major changes, since one month rarely captures your real spending pattern.

How Do You Choose a Budgeting Method You’ll Stick With?

The best budgeting method is the one you’ll still be using in three months. That’s not a cop-out. It’s the actual finding from budgeting research: consistency beats sophistication every time.

Here are the four approaches worth trying:

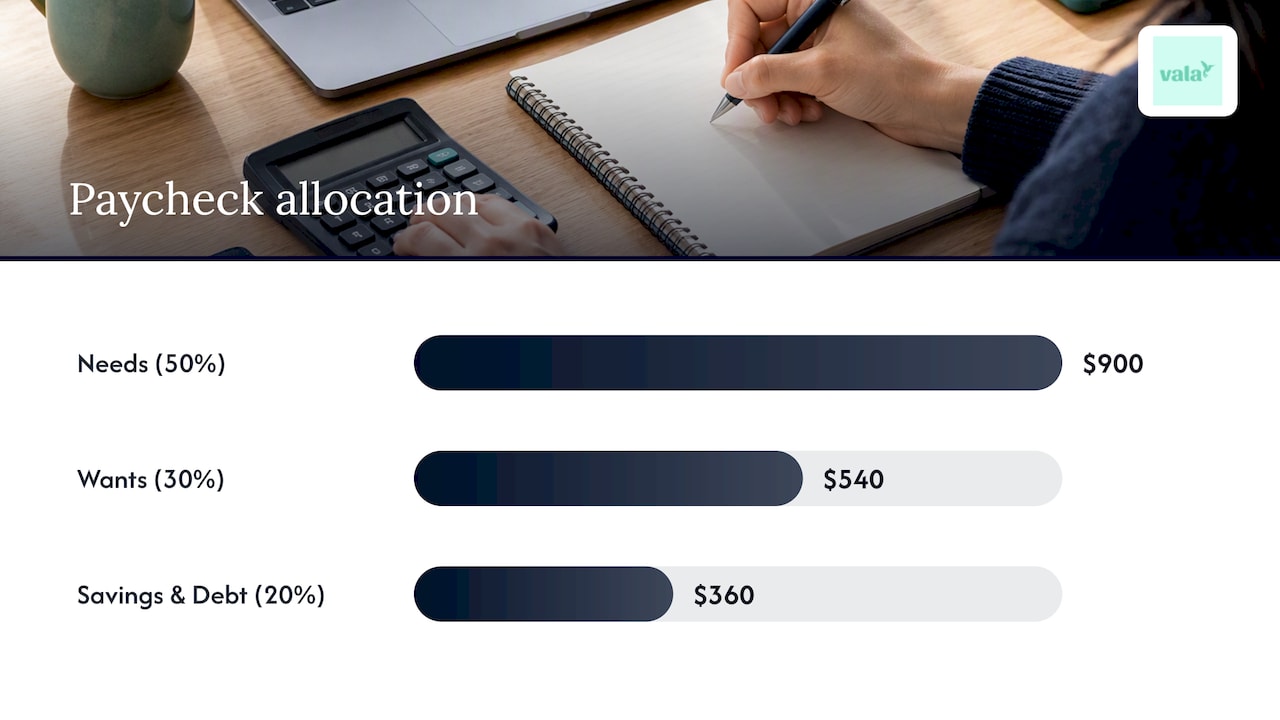
The 50/30/20 rule splits net income into 50% needs, 30% wants, and 20% savings and debt repayment. Fidelity’s budgeting guide treats this as a strong starting range rather than a rigid formula, and it’s a good fit if you want simplicity over precision.

Comparative diagram of budgeting methods

Zero-based budgeting assigns every dollar of income a job, expenses, savings, debt, discretionary spending, until nothing is left unaccounted for. It takes more setup but gives you the tightest control, which suits detail-oriented budgeters or anyone working through debt.

Cash envelope budgeting puts physical cash into labeled categories and stops spending once an envelope is empty. It’s blunt, but that bluntness is the point: it works especially well for people who overspend on cards without noticing.

Pay-yourself-first automates a savings transfer the moment income arrives, then lets you spend freely from what’s left. It suits people with stable income who want savings on autopilot without micromanaging every category.

If your income is irregular, lean toward zero-based budgeting built around your average income, with a buffer category absorbing the difference in strong months.

Apps, Spreadsheets, or Cash: Which Tracking Method Fits You?

Use whatever tracking method removes the most friction from your week. For most people starting out, that means an app paired with a five-minute weekly check-in, since automation removes the manual entry that kills most budgeting attempts within a month.

Each method has real trade-offs:

  • Apps sync transactions automatically and categorize spending in real time, but they require linking financial accounts, which raises legitimate privacy questions.
  • Spreadsheets give you full customization and don’t require linking any accounts, but every transaction has to be entered by hand.
  • Cash envelopes create the strongest behavioral guardrails because running out of physical cash is an immediate, tangible stop signal, but they don’t work for online purchases or recurring bills.

Consumer Reports notes that budgeting apps offer real convenience and automation, but also come with data-sharing trade-offs worth understanding before you connect a bank account. That’s a reasonable trade rather than a reason to avoid apps altogether.

Pro Tip: Before linking any bank account to an app, check whether it offers a read-only connection. Read-only access lets the app see transactions without being able to move money, which meaningfully lowers your risk exposure.

Vala approaches this by combining automated transaction tracking, subscription detection, and spending pattern analysis in one place, so the weekly check-in takes minutes instead of an hour of manual entry. If you want a deeper comparison of tracking approaches before committing, Vala’s budgeting apps guide walks through the feature set in more detail.

Splitting Costs Fairly With a Partner or Group

Hands exchanging cash for shared expenses

Shared finances work best with three things in place: agreed-upon rules set before spending happens, one shared ledger everyone can see, and clarity on who pays what. Without those, even small purchases turn into recurring arguments.

Couples generally land on one of three structures, according to the California DFPI’s guide to couples’ finances: merged accounts, hybrid joint and separate accounts, or fully separate finances with joint cost sharing systems. The hybrid model tends to cause the least friction for couples who value both togetherness and independence.

For roommates and friend groups, three splitting methods cover most situations:

  • Equal split. A $120 grocery run among four roommates means $30 each, regardless of who ate more.
  • Proportional by income. If Partner A earns $4,000/month and Partner B earns $2,000/month, a $600 rent bill splits roughly $400/$200, keeping the burden proportional rather than identical.
  • Rotating payer. One person covers the full bill this month, the next person covers it next month, evening out over time without anyone tracking every transaction.

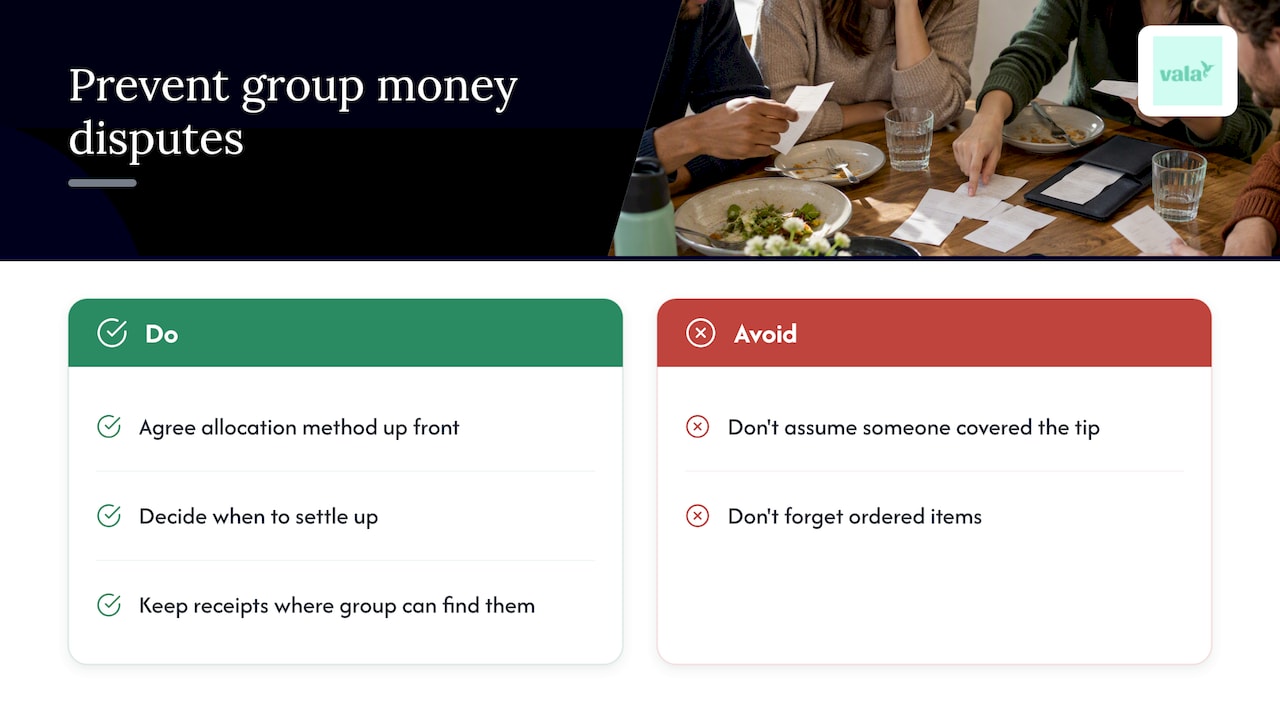
A 2026 guide on splitting bills recommends keeping digital receipts and agreeing on the split method upfront, both of which prevent the “I thought we already settled that” conversation. When you’re comparing tools for this, look for shared wallets, automated settlement between members, and recurring split rules so you’re not re-splitting the same rent bill by hand every month.

Turning Savings Goals Into Monthly Numbers

A savings goal only becomes real once you turn it into a monthly number. Take the total cost of what you want, divide by the number of months until you need it, and that’s your target. A $1,200 emergency fund goal over eight months means $150 a month, treated as a fixed expense rather than whatever happens to be left over.

Longer-term goals work the same way, just with more months in the denominator. A $6,000 down payment goal over two years is $250 a month, small enough to automate without noticing the hit to your checking account.

Three habits make this stick:

  1. Run a 21-day savings challenge. Automate a small transfer, even $10, every day for three weeks. The habit matters more than the amount at this stage, and MyCreditUnion.gov uses this exact exercise to build early savings momentum.
  2. Automate the transfer on payday, not at the end of the month, so saving happens before spending has a chance to eat it.
  3. Build sinking funds for irregular costs, car maintenance, gifts, annual renewals, so a single unexpected bill doesn’t derail your entire month.

A Sample Monthly Budget You Can Copy

Here’s a starter template using the 50/30/20 framework as a baseline, adjusted for a worked example with $4,000 in monthly net income.

Now say actual spending comes in at $2,300 for needs and $1,100 for wants, $400 over budget combined. Rather than cutting savings to compensate, trim the wants category first: canceling two unused subscriptions and cooking three more meals at home might recover $150 to $200, with the rest absorbed by a temporary reduction in discretionary spending. If your income is irregular, budget against your average from the last three months and route any month that comes in above average straight into your sinking fund.

Building a Routine That Keeps the Budget Alive

Short, consistent check-ins beat occasional deep dives every time. A budget you revisit for fifteen minutes every week will outlast one you obsess over for an hour once a quarter and then ignore.

Your weekly checklist:

  • Review the last seven days of transactions and categorize anything unassigned.
  • Compare spending against your budgeted amounts for the week.
  • Flag any subscription or recurring charge you don’t recognize.
  • Adjust one category if you’re consistently over or under.

Once a month, go deeper: reconcile your full budget against actual bank balances, rebalance categories that are consistently off, and move any surplus into savings goals rather than letting it sit in checking. Block these check-ins on your calendar the same way you’d block a recurring meeting. Habits that depend on remembering rarely survive a busy week.

Keeping Your Financial Data Private and Secure

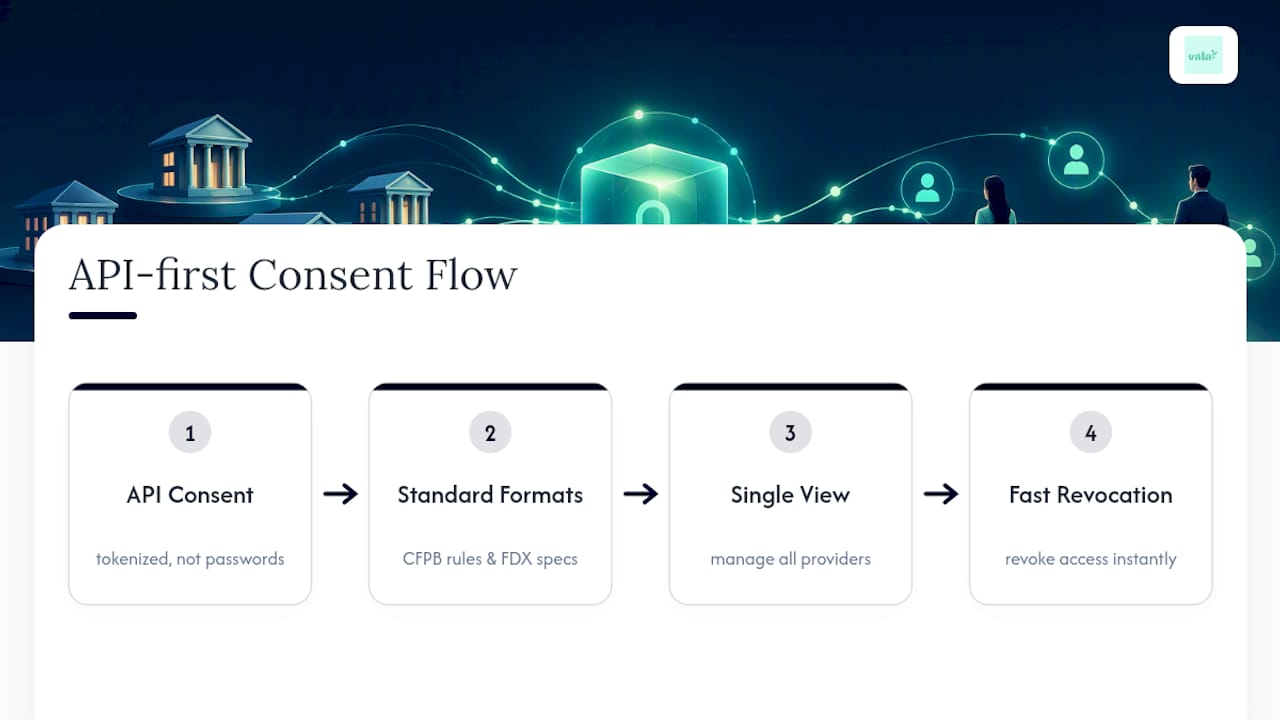
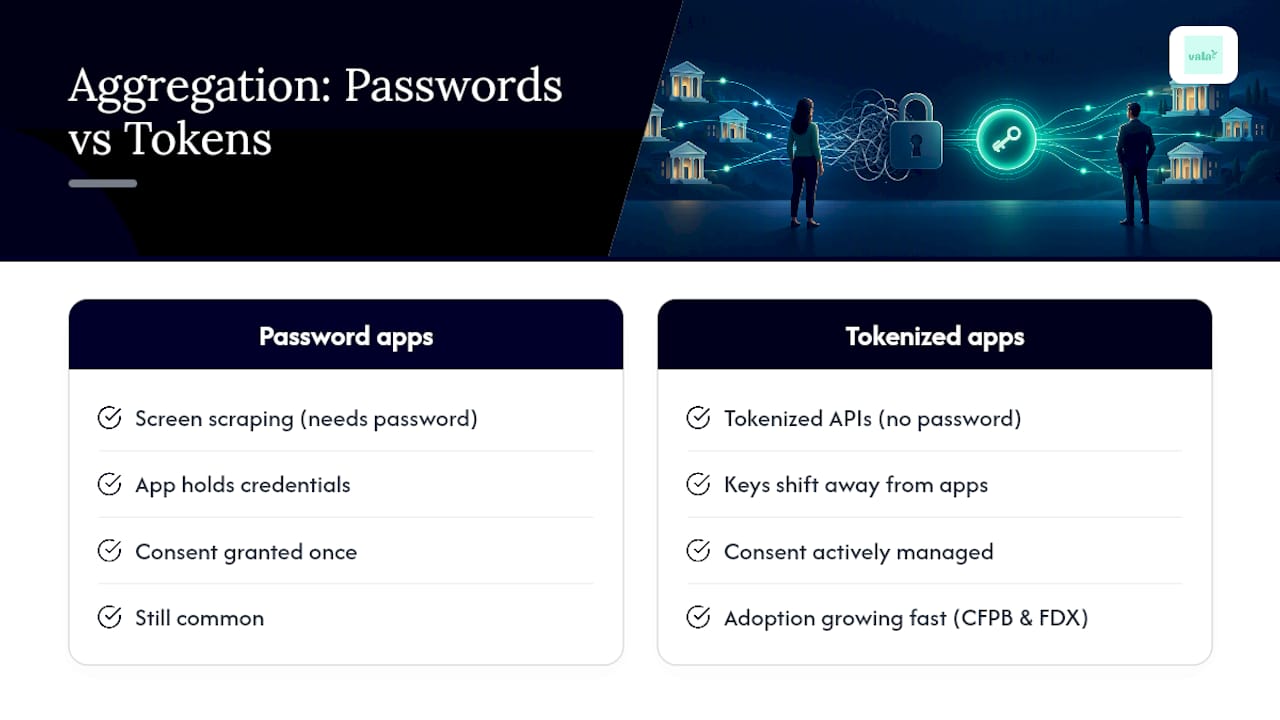
Convenience and data exposure sit on opposite ends of a trade-off, and you get to decide where on that spectrum you’re comfortable. Apps that link directly to your bank accounts can automate almost everything, but that automation depends on sharing account access with a third party.

A few settings meaningfully reduce your exposure:

  • Use a strong, unique password for any financial app and enable multi-factor authentication wherever it’s offered.
  • Choose read-only bank connections when the option exists, rather than connections that can initiate transfers.
  • Review what permissions an app actually requests before granting them, not after.
  • Read the privacy policy section on data sharing and third-party access before linking accounts.

Consumer Reports frames this clearly: the risk isn’t necessarily disqualifying, but it’s real, and it deserves a few minutes of attention before you connect anything. If full automation feels like too much exposure, a hybrid approach, manual entry for sensitive accounts and automation for the rest, is a reasonable middle ground.

What Actually Makes a Budget Work Long-Term

Budgeting advice tends to obsess over finding the “right” system, when the harder problem is almost always follow-through. Most people don’t fail because they picked 50/30/20 instead of zero-based. They fail because life changed, and their budget didn’t change with it.

The single biggest shift I’d encourage is treating your budget as a living draft instead of a locked contract. A month where you overspend on wants isn’t a failure to fix with stricter rules. It’s information. Maybe your “wants” allocation is genuinely too small for your life right now, and adjusting it honestly beats pretending you’ll white-knuckle through the next twelve months.

Small, consistent wins compound faster than most people expect. Someone who tracks spending for just one week and catches a single forgotten $15 subscription has already recovered $180 a year, without cutting a single meal out or canceling a vacation. That’s the real value of financial literacy for beginners: not perfection, but momentum you can build on.

Start with one week of tracking. Pick one method. Revisit it in a month, and change whatever isn’t working. That’s the whole system.

Where Vala Fits Into Your Budgeting Plan

Vala takes everything covered above, tracking, categorizing, shared splitting, savings goals, and money-leak detection, and bundles it into one app you can start using free. Instead of manually reconciling spreadsheets or splitting rent through a text thread, Vala automates the parts that usually cause people to quit within a month.

Valapoint

Here’s how the features map to what you just read: automated transaction tracking and categorization handle your weekly check-in, shared wallets and recurring split rules manage roommate or partner expenses without manual math, savings goal tools convert your target numbers into automated monthly transfers, and built-in subscription review catches the leaks before they cost you a full year of forgotten charges. Security controls include read-only bank connections and permission settings you control directly.

If you’re ready to put this guide into practice instead of managing it by hand, start with the Vala personal finance app and set up your first budget in one sitting.

Frequently Asked Questions

What are the basics of financial management for someone just starting out?
The core basics are knowing your net income, categorizing your monthly expenses, choosing one budgeting method, and tracking spending weekly. Everything else builds on those four fundamentals.

How much should I save each month as a beginner?
It depends on your goal and timeline. Divide the total cost of what you’re saving for by the number of months until you need it, that’s your monthly target, rather than following a fixed percentage that ignores your actual goals.

Is it better to use an app or a spreadsheet for budgeting?
Use whichever removes more friction from your week. Apps automate categorization and reduce manual entry, while spreadsheets offer more customization without linking bank accounts. Most beginners stick with tracking longer when it’s automated.

How do couples split expenses fairly?
Most couples use a hybrid approach: a joint account for shared bills like rent and groceries, with separate personal accounts for individual spending. Proportional splitting by income is common when earnings differ significantly.

What should I do if my income is irregular?
Average your last three to six months of income to set a realistic monthly budget baseline, and route any above-average months into a buffer or sinking fund to cover leaner months.

Sources

How to Stay in Budget: Simple Habits That Work

You can stay in budget by tracking every dollar, cutting predictable leaks, automating essentials, and protecting a small emergency fund. Start today with these five steps:

  • Track every expense for about a week, even small ones.
  • List all fixed and recurring charges (subscriptions, bills, memberships).
  • Automate bill payments and a small weekly savings transfer.
  • Pause any subscription you haven’t used in the last 30 days.
  • Set a realistic weekly spending limit for discretionary categories.

An app like Vala can automate the tracking and alert you the moment a category runs over.

Pro Tip: The fastest single win is canceling one unused subscription today. Most people find at least one within five minutes of checking their bank statement.


Key Takeaways

Staying in budget comes down to three consistent actions: track every dollar, automate what you can, and audit recurring costs at least once a month.

Point Details
Track before you plan Pull three months of statements to get honest spending averages before setting category limits.
Automate savings first Move your savings amount out of checking on payday so you spend only what remains.
Audit recurring costs monthly A 15-minute bank statement review typically uncovers at least one forgotten charge to cancel.
Build a recovery plan Use a 30/90/180-day checkpoint sequence to stabilize, adjust, and rebuild after a shortfall.
Use Valapoint’s Vala app Vala automates categorization, detects recurring charges, and alerts you before a category runs over.

Table of Contents

Why staying on budget actually changes your financial life

A budget isn’t a restriction. It’s a clear picture of where your money goes, and that picture is what lets you stop overdraft fees, build savings, and make real progress toward goals.

FDIC’s Money Smart resources reinforce that auditing your accounts regularly and understanding your cash flow are the foundational steps to protecting your balance and avoiding unnecessary fees. Small, consistent daily savings also add up faster than most people expect. Fidelity notes that saving $5 to $14 a day accumulates materially over a year, which makes even modest habit changes worth starting now.

Key stat: Saving a small amount daily adds up to a few thousand dollars over the course of a year, without any change to your income.

Following the steps in this guide gives you a working monthly budget, a set of habits to keep you inside it, and a clear path back when you fall short.


How to create a budget you can actually stick to

The simplest method that works for most people is a three-step sequence: capture what comes in, list what goes out, and assign every dollar a job before the month starts.

Step-by-step budget setup

  1. Capture your net income. Write down every income source after taxes: salary, freelance, side income, benefits. Use your lowest recent month if income varies.
  2. List fixed expenses. Rent or mortgage, car payment, insurance premiums, loan minimums. These don’t change month to month.
  3. List variable expenses. Groceries, gas, dining out, entertainment, clothing. Pull three months of bank statements to get honest averages.
  4. Categorize and set limits. Group expenses into buckets: housing, transportation, food, personal, savings, debt. Assign a realistic dollar limit to each.
  5. Allocate for goals and your emergency fund. Treat savings as a fixed expense. Even $25 a week toward an emergency fund builds a buffer over time.
  6. Add irregular and seasonal expenses. Annual subscriptions, car registration, holiday gifts, back-to-school costs. Divide the annual total by 12 and add that amount as a monthly line item.
  7. Schedule a monthly review. Block 20 minutes at the end of each month to compare what you planned against what you actually spent.

Fidelity’s financial planning framework recommends starting with a cash-flow analysis and using percentage-based targets to allocate income across essentials, extras, and savings. That said, the right split depends on your income and cost of living, so treat any framework as a starting point, not a rule.

Budgeting frameworks at a glance

Framework Best for Complexity Control level
Percent-based (e.g., 50/30/20) Most people starting out Low Moderate
Zero-based budgeting Detail-oriented planners Medium High
Envelope/cash method Discretionary overspenders Low High

A simple monthly template to recreate:

  • Income: Total net monthly income
  • Fixed expenses: Rent, insurance, loan payments
  • Variable expenses: Groceries, gas, dining, personal care
  • Savings and emergency fund: Weekly or monthly transfer amount
  • Goals: Vacation fund, debt payoff, down payment
  • Irregular/seasonal: Monthly reserve for annual costs

Starting conservative gives you room to breathe without feeling like you failed.*


Practical tactics that keep you inside your budget daily

The most effective single habit is automating your essentials and building friction into discretionary spending. When the right money moves happen without you thinking about it, you’re protected from the moments when willpower runs low.

Automate the basics

Set up auto-pay for every fixed bill. Then automate a small transfer to savings on payday, even if it’s $10. Behavioral research from the SSA’s Choose Work program confirms that keeping your budget accessible and planning purchases in advance are two of the most reliable everyday tactics for staying on track.

Pay yourself first: move your savings amount out of your checking account before you spend anything else. What’s left is your spending money for the month. This one shift removes the temptation to “save what’s left over,” which rarely works.

Build friction for discretionary spending

Remove saved card details from shopping sites. Use a separate card or cash envelope for categories like dining and entertainment, and stop when it’s gone. For any purchase over $50, apply a 24-hour cooling-off period before buying. AARP’s expense-cutting guidance points out that gym memberships, brand-name groceries, and in-store impulse buys are among the most common budget drains, and simple behavioral shifts like shopping with a list cut those costs without much effort.

Hands removing credit card near smartphone

Meal planning and grocery batching

Plan your meals for the week before you shop. A weekly meal plan typically cuts both food waste and impulse purchases at the register. The USDA’s ShopSimple tool helps you build lower-cost grocery lists around what’s already on sale or in season. Batch cooking on weekends also reduces the temptation to order delivery on busy weeknights, which is one of the most common places variable food budgets blow up.

Hands chopping garlic during meal prep

One overlooked cost is convenience. A cheaper grocery store across town might cost you more overall once you factor in gas and time. The true cost of convenience is worth calculating before assuming the “cheaper” option saves money.

Pro Tip: Split your paycheck mentally across pay cycles. If you’re paid biweekly, assign half your monthly fixed bills to each paycheck. This prevents the common trap of spending freely after payday and scrambling before the next one.


How to audit and cut recurring costs that drain your budget

Recurring costs are the most common budget leak, and they’re usually the easiest to fix. Most people are paying for at least one service they’ve forgotten about.

Your recurring cost audit checklist

  • Subscriptions: List every streaming service, software subscription, news site, and app with a recurring charge.
  • Bank fees: Check for monthly maintenance fees, ATM fees, and overdraft charges.
  • Phone and internet: Compare your current plan against current offers from your provider and competitors.
  • Insurance: Auto, renters, and health insurance premiums can often be reduced by adjusting coverage or shopping for new quotes annually.
  • Memberships: Gym, warehouse clubs, professional associations. Ask when you last used each one.
  • Extended warranties and protection plans: Often auto-renew and go unnoticed.

The CFPB’s cutting-expenses tool provides a household-level checklist for identifying and reducing these exact costs, and it also walks you through checking eligibility for assistance programs that can reduce essential bills. Fidelity’s expense-cutting guidance adds negotiating service plans and canceling unused subscriptions as high-return, low-effort moves.

Worth knowing: Unused subscriptions are one of the most frequently cited sources of budget leakage. A 15-minute audit of your last two bank statements is usually enough to find at least one charge you’d forgotten.

Audit action steps

Audit step Who to contact Expected outcome
Cancel unused subscriptions App or website directly Immediate monthly savings
Negotiate phone/internet plan Call provider’s retention line Lower rate or added features
Request fee waiver on bank account Your bank’s customer service Reduced or eliminated monthly fee
Get new insurance quotes Comparison site or broker Potential premium reduction
Check assistance program eligibility Benefits.gov or CFPB tool Reduced utility or healthcare costs

Which tools and templates help you stay on track automatically

Automation and timely alerts cut the friction of staying on budget. When your app flags an overage before you’ve spent the full category, you can course-correct in real time instead of discovering the problem at month’s end.

A simple weekly and monthly template

Weekly check (10 minutes):

  • Review transactions from the past 7 days.
  • Flag any uncategorized or unexpected charges.
  • Check remaining balance in your highest-risk variable categories (dining, entertainment, personal care).

Monthly review (20 minutes):

  • Compare actual spending to your planned limits in each category.
  • Adjust next month’s limits based on what you learned.
  • Confirm your emergency buffer transferred and your savings goal is on track.

Manual vs. app vs. hybrid: what works for whom

Approach Best for Key trade-off
Manual (spreadsheet) Detail-oriented, privacy-focused High control, high time cost
App with bank link Busy people who want automation Low effort, requires bank connection
Hybrid (app + manual review) Most people Balances automation with awareness

The features that matter most in any budgeting app: automatic transaction categorization, recurring charge detection, category alerts, goal-tracking buckets, and bank account integration. Free budgeting tools are a good starting point if you want to test the habit before committing to a paid plan.

What Valapoint’s Vala app provides

  • Auto-categorization: Every transaction is sorted automatically, so you’re not manually tagging purchases.
  • Recurring subscription detection: Vala surfaces charges that repeat monthly so you can review and cancel what you don’t need.
  • Real-time alerts: Get notified when a category is approaching its limit, before you go over.
  • Goal-tracking buckets: Assign money to specific goals (emergency fund, vacation, debt payoff) and watch progress update automatically.
  • Shared expense splitting: Useful for couples or roommates managing a joint budget. See the couples budgeting guide for how this works in practice.

Pro Tip: Enable two automations first: transaction alerts for your top variable category and a recurring-charge detection review once a month. Those two alone catch the majority of budget surprises.


What to do when you still come up short

Coming up short doesn’t mean the budget failed. It means you have new information. Here’s how to respond quickly.

Immediate triage steps

  1. Pause all discretionary spending for the remainder of the pay period. Dining out, entertainment, and non-essential shopping stop first.
  2. Cover essentials first. Rent, utilities, groceries, and minimum debt payments take priority over everything else.
  3. Contact creditors early if you can’t cover a minimum payment. Many lenders offer hardship programs or short-term deferrals when you call before missing a payment.
  4. Reduce variable expenses fast. Swap a restaurant meal for a home-cooked one. Delay a non-urgent purchase by one pay cycle.
  5. Tap your emergency buffer if you have one, and plan to replenish it over the next 1–3 months.
  6. Check for short-term income options. A few hours of gig work, selling unused items, or picking up an extra shift can close a small gap without touching savings.

Recovery timeline

  • Days 1–30: Stabilize. Cover essentials, pause discretionary spending, and identify the specific category that caused the shortfall.
  • Days 31–90: Adjust. Revise the budget category that broke down. If it was food, try meal planning. If it was an unexpected bill, add a monthly reserve for that category.
  • Days 91–180: Rebuild. Replenish any emergency fund you tapped. Confirm the adjusted budget held for two full months before calling it fixed.

For hardship assistance with utilities, food, or healthcare costs, Benefits.gov and the CFPB’s cutting-expenses tool both list eligibility-check resources. The overdraft prediction guide on the Valapoint blog also walks through how to spot a shortfall before payday so you can act before a fee hits.


Why the automation-first approach works for real people

Most budgeting advice fails not because the math is wrong, but because it assumes you’ll remember to check your budget every day. You won’t. Life gets busy, and the gap between intention and action is where budgets collapse.

The approach in this guide is built around reducing that gap. Automating savings and bill payments removes the decisions that are easiest to skip. Building friction into discretionary spending slows down the purchases that feel harmless in the moment but add up fast. And scheduling a short weekly check keeps you aware without making budgeting feel like a second job.

The America Saves resource center reinforces this: small, realistic goals paired with accountability tend to stick far better than ambitious overhauls. A budget you check for 10 minutes a week is more effective than a perfect spreadsheet you abandon after two months.

Habit formation takes time. Most people need 6–8 weeks of consistent tracking before the new behavior feels automatic. The first month is the hardest. After that, the patterns become familiar and the mental load drops significantly.


Vala makes it easier to stay on budget from day one

Knowing what to do and actually doing it consistently are two different things. Vala closes that gap by handling the tracking, alerts, and subscription reviews automatically, so you spend less time managing your budget and more time benefiting from it.

Valapoint

With Vala, you get real-time transaction categorization, recurring charge detection, and category alerts that fire before you overspend, not after. The goal-tracking feature lets you assign money to your emergency fund, a debt payoff target, or a savings goal and watch it grow with every paycheck. Couples and roommates can split shared expenses without the awkward math. The free tier covers core tracking; the premium subscription unlocks AI-driven spending insights, advanced subscription management, and full bank integration.

Start with the free plan on the Vala personal finance app and run your first subscription audit today. You can also explore personal finance tools and calculators to map your budget before you connect an account.


Sources

These official and research-backed resources support the guidance in this article. Each one offers free tools, checklists, or stepwise guidance you can use alongside your budget.

These sources were selected for their official standing, practical checklists, and research-backed guidance, making them reliable references for anyone building or refining a personal budget.

This article is general information, not a substitute for advice from a qualified financial advisor. Consult a qualified financial professional about your own circumstances before acting on anything here.

Typical Monthly Expenses: What U.S. Households Really Spend

Typical monthly expenses are the recurring costs a household pays every month, and according to the BLS Consumer Expenditure Survey, the average American consumer unit spends a significant amount per month across all categories. That works out to about $77,280 per year. The three biggest line items are housing, transportation, and food, which together account for more than half of most household budgets.

A few things to keep in mind before you compare your own numbers to that benchmark:

  • The BLS figure is a mean average across all consumer unit types, including singles, couples, and families. Your household size and composition will shift each category.
  • Location matters enormously. A two-bedroom apartment in Austin costs far less than the same unit in San Francisco. HUD’s fair market rent data shows wide variation across metro areas.
  • The benchmark includes households at all income levels, so high earners pull the mean up. If you want a more grounded comparison, look at median figures or use the average monthly expenses breakdown for a closer look at how the numbers split by income band.

Key Takeaways

The most important step in managing your monthly expenses is calculating your real baseline first, including irregular costs and payroll deductions, before making any changes.

Point Details
National benchmark The BLS CEX reports a mean of roughly $6,440 per month per consumer unit — use it as a directional guide, not a target.
Biggest three categories Housing, transportation, and food together account for more than half of most household budgets.
Annualize irregular costs Divide any annual or semi-annual bill by 12 and set that amount aside monthly to avoid budget surprises.
50/30/20 as a starting point Allocate 50% to needs, 30% to wants, and 20% to savings and debt — then adjust for your cost of living and life stage.
Valapoint automates the process Vala categorizes transactions automatically, audits subscriptions, and tracks sinking funds so your budget stays accurate without manual effort.

Table of Contents

What goes into your typical monthly expenses, category by category

Every household budget is built from the same core categories, even if the dollar amounts look different. Below is a full breakdown of what each category covers and typical U.S. monthly ranges, drawn from BLS data and supporting sources.

A few categories deserve extra context.

Housing is the single largest line item for most households. The BLS data confirms it consistently takes the largest share of spending, and HUD’s fair market rent tables show that a two-bedroom unit in a high-cost metro can run two to three times what the same unit costs in a mid-size Midwestern city. If you own, swap rent for your mortgage principal and interest, then add property taxes and insurance separately.

Food splits into groceries and dining out. Statista’s weekly grocery expenditure data shows U.S. consumers spend varying amounts per week depending on household size. Multiply your weekly grocery spend by 4.33 to get a monthly estimate. Dining out is often underestimated because it shows up as small, frequent charges that add up fast.

Childcare is where many family budgets get blindsided. The Department of Labor reports that childcare costs remain a near-prohibitive expense for a large share of American families. Full-time daycare for an infant can exceed $1,500 per month in many states, which is why it needs its own dedicated budget line rather than getting lumped into “miscellaneous.”

Childcare items and toys in playroom corner

Savings should appear as a budget line, not an afterthought. Treat it like a bill you pay yourself first. The same logic applies to retirement contributions, even if they come out of your paycheck automatically.

One important note on the ranges above: the BLS CEX reports mean spending, which is pulled upward by high earners. If your income is closer to the national median, your realistic living expense estimates will likely fall in the lower half of each range. The EPI Family Budget Fact Sheets offer region-specific and family-size-specific estimates that often give a more grounded picture for middle-income households.


How to calculate your own monthly expenses in five steps

Knowing the national averages is useful. Knowing your own numbers is what actually changes your budget. Here is a repeatable process you can complete in under an hour.

  1. Gather your records. Pull the last three months of bank statements, credit card statements, and any paper bills. Three months smooths out one-off spikes. Twelve months is better if your spending is seasonal (holiday gifts, summer travel, annual subscriptions).

  2. List every expense as fixed or variable. Fixed expenses stay the same each month: rent, car payment, loan minimums, insurance premiums. Variable expenses change: groceries, gas, dining out, entertainment. Knowing which is which tells you where you have room to adjust.

  3. Average your variable expenses. Add up each variable category across your three-month window and divide by three. That gives you a reliable monthly baseline. For categories with big seasonal swings, use a 12-month window instead.

  4. Annualize your irregular costs, then divide by 12. Property taxes, car registration, annual subscriptions, holiday spending, and quarterly insurance bills all belong in your monthly budget. The formula is simple: total annual cost ÷ 12 = monthly allocation. For example, a $1,800 annual car insurance premium becomes $150 per month in your budget, even if you pay it twice a year.

  5. Account for payroll deductions and employer benefits. If your health insurance premium, 401(k) contribution, or FSA deposit comes out of your paycheck before you see it, add those back into your monthly picture. They are real expenses, and leaving them out understates your true monthly spending by hundreds of dollars.

Documents to have on hand:

  • Last 3–12 months of bank and credit card statements
  • Most recent pay stub (for deductions and employer contributions)
  • Annual bills: property tax statement, insurance declarations, subscription renewal emails
  • Loan statements showing minimum payments and balances

Mini example for an irregular cost: You pay $900 every six months for car insurance. That is $1,800 per year. Divide by 12: your monthly allocation is $150. Set that $150 aside each month in a dedicated savings bucket, and the semi-annual bill never catches you off guard.

Pro Tip: Use a monthly budget planner to lay out your fixed and variable categories before you start pulling statements. Having a template in front of you makes the process faster and reduces the chance you forget a category.

Resources like Mycreditunion offer plain-language budgeting guides that walk through document gathering if you want a step-by-step companion while you work through this process.


Sample budgets and the 50/30/20 rule explained

The 50/30/20 rule is the most widely used percentage framework for personal budgets.

When to adjust the percentages:

  • High cost-of-living area: Housing alone may consume 35–40% of take-home pay, which means the “wants” bucket shrinks, not the savings bucket.
  • Heavy debt load: Redirect part of the “wants” allocation toward debt paydown until high-interest balances are gone.
  • Childcare phase: A family paying $2,000 per month in daycare may need to temporarily compress both wants and savings to keep the budget balanced.
  • Aggressive savings goal: If you are building an emergency fund or saving for a down payment, push savings to 25–30% and trim wants accordingly.

The sample budgets below use three common income levels. All figures are based on monthly after-tax (take-home) income.

The family budget above reflects the reality that childcare costs can represent a large portion of a household’s monthly spending, often requiring a reallocation away from discretionary spending. The EPI Family Budget Fact Sheets show that a two-parent, two-child family in a high-cost metro can face total monthly costs that are significantly elevated when childcare and housing are both at market rate.

Reducing your emergency fund to cover a rent spike is a short-term fix that creates a bigger problem later.*

For a ready-to-use framework, the Valapoint budget calculator lets you plug in your income and see how your spending compares to these percentage targets in real time.


How to handle irregular and annual costs without surprises

Irregular expenses are the most common reason budgets fall apart. A $600 car registration, a $1,200 dental bill, or $800 in holiday gifts all feel like emergencies if you have not planned for them. They are not emergencies. They are predictable costs that need a monthly home.

The annualizing formula:

Total annual cost ÷ 12 = monthly sinking fund contribution

Apply it to every expense that does not arrive monthly:

  1. List every non-monthly expense you paid in the last 12 months: property taxes, insurance premiums, car registration, annual subscriptions, holiday gifts, back-to-school shopping, vacation, home maintenance.
  2. Add them up to get a total annual irregular spend.
  3. Divide by 12 and add that amount to your monthly budget as a “sinking fund” line.
  4. Open a dedicated savings bucket (most online banks let you create named sub-accounts) and transfer that amount every month.
  5. Review the list every January. Costs change. A new pet, a home repair, or a child starting school adds new irregular items each year.

Frequency buckets to track:

  • Monthly: utilities, subscriptions, loan minimums
  • Quarterly: some insurance premiums, estimated tax payments (if self-employed), pest control
  • Annual: property taxes, car registration, holiday spending, vacation, home warranty

Pro Tip: Name your sinking fund buckets specifically, not generically. “Car fund” is vague. “Car registration + maintenance 2026” tells you exactly what the money is for and makes you less likely to raid it for something else.

When an irregular cost is genuinely unpredictable in size (a major home repair, a medical procedure), treat it as a savings goal rather than a sinking fund. Set a target amount, contribute monthly, and keep it separate from your emergency fund.


Practical ways to reduce your monthly expenses right now

Cutting monthly costs does not require a lifestyle overhaul. The highest-impact moves are usually in the categories that take the biggest share of your budget.

Start with the biggest categories first:

  • Housing: Refinancing a mortgage at a lower rate, taking on a roommate, or negotiating a lease renewal can save hundreds per month. Even a $100 reduction in rent saves $1,200 per year.
  • Transportation: Dropping comprehensive coverage on an older car, carpooling two days a week, or switching to a lower-cost insurance provider are all moves that compound quickly.
  • Groceries: Meal planning before you shop, buying staples in bulk, and using a store loyalty app consistently can trim 15–20% off a typical grocery bill without changing what you eat.

Subscriptions are the easiest win:

Most households are paying for at least two or three subscriptions they rarely use. A 30-minute audit, which you can do using a guide like how to identify unnecessary recurring expenses, typically surfaces $50–$100 in monthly charges that can be paused or canceled immediately.

Utilities and insurance respond to effort:

  • Call your internet provider and ask for a retention rate. Most will offer a lower price rather than lose you.
  • Bundle home and auto insurance with one carrier. Bundling discounts typically run 10–25%.
  • Weatherstrip doors and windows before winter. The upfront cost is low; the monthly savings on heating bills are consistent.

The order to try things:

  1. Cancel or pause unused subscriptions (fast, zero downside)
  2. Shop and bundle insurance (one afternoon, recurring savings)
  3. Meal plan and reduce dining out (behavioral, high impact)
  4. Negotiate fixed bills: internet, phone, gym membership
  5. Refinance or restructure debt if rates have dropped
  6. Explore housing options: roommate, refinance, or relocation

Pro Tip: Track your savings, not just your spending. When you cancel a $15 subscription, add $15 to your savings transfer that same month. Seeing the savings number grow is what keeps the habit going.

One area where you should not cut: preventive healthcare. Skipping annual checkups or delaying prescriptions to save money tends to create larger costs later. Treat preventive care as a non-negotiable line item, not a discretionary one.

Stethoscope and mask for preventive healthcare


What published U.S. spending averages actually measure

The headline numbers you see in budgeting articles come from a small set of federal data sources. Knowing what each one measures helps you use the figures correctly.

Source What it measures Update cadence How to interpret it
BLS Consumer Expenditure Survey (CEX) Average spending by category for U.S. consumer units Annual Reports mean spending; skewed upward by high earners. Use as a benchmark, not a target.
BLS Current Employment Statistics (CES) Employment levels and average wages by industry Monthly Tracks wage trends that affect household spending capacity over time.
HUD Fair Market Rents Rental costs by metro area and unit size Annual Best source for local housing cost comparisons; more useful than national averages for renters.
EPI Family Budget Calculator Region- and family-size-specific monthly cost estimates Periodic Closer to real-world costs for middle-income families than BLS means.
Statista Weekly Grocery Data Weekly grocery spend per U.S. consumer Periodic Multiply by 4.33 to estimate a monthly grocery budget.

A few terms worth understanding before you benchmark your own budget:

  • Consumer unit vs. household: The BLS uses “consumer unit,” which is a group of people who share income and expenses. It is similar to a household but not identical.
  • Mean vs. median: The BLS CEX reports mean (average) spending. Because high earners spend significantly more, the mean is higher than what most households actually spend. Median figures, when available, are a more realistic comparison for middle-income readers.
  • National vs. regional: National averages blend high-cost metros with low-cost rural areas. For housing especially, always check a local source like HUD fair market rents.

The BLS Consumer Expenditure Survey is the most comprehensive federal source for household spending data, but its mean figures reflect a wide range of income levels and household types. Use it as a directional benchmark, then adjust for your location, household size, and income — not as a precise prescription for what you should spend.

The BLS Current Employment Statistics releases are also worth watching over time. When wage growth slows or employment shifts, household budgets feel the pressure within a few months, which is why the averages published in the CEX can look different from what households report experiencing in real time.


What most people get wrong when they first total their monthly expenses

The most common surprise when people sit down to calculate their monthly spending for the first time is not the big categories. Housing, car payments, and groceries are visible. The shock usually comes from three places: subscriptions that have been quietly renewing for years, irregular costs that were never given a monthly home, and payroll deductions that were never counted as expenses at all.

A household that earns $80,000 per year and sees $5,500 per month hit their checking account might assume their monthly budget is $5,500. But if $800 per month is leaving before the paycheck arrives (health insurance, 401k, FSA), the real monthly spending picture is closer to $6,300. That gap is where budgets break down.

The second pattern worth noting: people tend to underestimate food and overestimate how much they spend on entertainment. Dining out, coffee runs, and grocery overages are the categories that most consistently exceed what people think they spend, largely because the charges are small and frequent. Tracking for at least three months before making any major budget changes gives you a far more accurate baseline than a single month’s snapshot.


Vala makes tracking your monthly expenses automatic

You have the framework. Vala gives you the tools to run it without the spreadsheet headache.

Valapoint

Vala’s AI-powered expense tracking automatically categorizes every transaction the moment it posts, so your monthly budget breakdown is always current. The app flags recurring subscriptions you may have forgotten, builds sinking fund buckets for irregular costs, and shows you exactly where your spending drifts from your targets. For couples and shared households, Vala splits group expenses automatically so nothing falls through the cracks.

The Vala personal finance app connects securely to your bank accounts using bank-level encryption, and your data is never sold. Start with the free plan and upgrade when you want the full AI insight suite.


Sources

These are the primary sources behind the figures and ranges in this guide. Each one is worth bookmarking if you want to go deeper on any category.

A note on mean vs. median: Every national average in this guide comes from BLS mean data unless otherwise noted. Because high-income households pull the mean upward, your actual monthly costs may be lower than the benchmarks suggest. For a more accurate local picture, cross-reference the BLS figures with HUD rental data and EPI regional estimates for your specific area and family size.

This article is general information, not a substitute for advice from a qualified financial advisor. Consult a qualified financial professional about your own circumstances before acting on anything here.

Budget Courses for Beginners: Learn and Apply Fast

For most beginners, the Federal Reserve Education’s Budgeting 101 is the single best starting point: it’s free, structured around practical modules like goal-setting and tracking, and requires no prior financial knowledge. If you want to go further, here are three quick picks:

  • Federal Reserve Education — Budgeting 101 (Free, beginner, self-paced, no certificate): Best free starter; covers goals, tracking, and irregular expenses in a clear roadmap format.
  • Coursera budgeting specializations (Free audit or paid with certificate, beginner to intermediate, self-paced): Best if you want a verified credential or a structured multi-week program with graded projects.
  • Goodbudget 101 (Free, beginner, self-paced, no certificate): Best for hands-on envelope budgeting practice using a real app, with no spreadsheet required.
  • Udemy personal budgeting courses (Low one-time fee, beginner, self-paced, lifetime access): Best for learners who want downloadable templates and short video modules they can revisit anytime.

Nearly 9 in 10 Americans use some form of budgeting, yet fewer than 1 in 4 follow it consistently. A structured budget course closes that gap by giving you a method, not just a spreadsheet.


Key Takeaways

The most effective approach to learning budgeting is to pick one structured course, apply it with real tools within 30 days, and treat the first three months as a test run rather than a performance.

Point Details
Start with a free course Federal Reserve Education’s Budgeting 101 and Consumer.gov’s worksheet cost nothing and cover every core beginner module.
Match the course to your goal Choose paid and certified (Coursera) for career credentials; choose free or low-cost (Udemy) for personal skill-building.
Apply within 30 days Build a real monthly budget, set up one sinking fund, and run a weekly check-in before the course ends.
Treat month one as a test Most budgets fail because initial numbers are unrealistic; adjust categories rather than quitting when targets are missed.
Valapoint reinforces the habit Vala’s expense tracking and AI insights keep your course work active after the final lesson, turning learning into a daily routine.

Table of Contents

1. Federal Reserve Education — Budgeting 101

  • Price: Free
  • Level: Beginner
  • Duration: 1–2 hours (self-paced)
  • Format: Self-paced reading and worksheets
  • Certificate: None
  • Hands-on practice: Yes — goal-setting and tracking worksheets
  • Tools required: None (printable worksheets)

The Federal Reserve’s Budgeting 101 roadmap is the most authoritative free resource available. It maps directly to the modules most paid courses charge for: setting financial goals, tracking income and expenses, and planning for irregular costs like car repairs or annual subscriptions. No login, no upsell.


2. Goodbudget 101

  • Price: Free
  • Level: Beginner
  • Duration: 1–3 hours (self-paced)
  • Format: Self-paced tutorials inside the Goodbudget app
  • Certificate: None
  • Hands-on practice: Yes — live envelope budgeting inside the app
  • Tools required: Goodbudget app (free tier available)

Goodbudget 101 teaches the envelope method by having you actually use it. You set up virtual envelopes for spending categories, assign income, and track in real time. For learners who find spreadsheets intimidating, this is the fastest path from theory to practice.


3. Coursera budgeting courses and specializations

  • Price: Free to audit; paid certificate options typically $49–$79/month with financial aid available
  • Level: Beginner to intermediate
  • Duration: 4–10 weeks depending on specialization
  • Format: Instructor-led video, quizzes, and guided projects
  • Certificate: Yes (paid or financial aid)
  • Hands-on practice: Yes — graded assignments and projects
  • Tools required: Google Sheets or Microsoft Excel (course-dependent)

Coursera aggregates budget-related courses and specializations from universities and financial institutions, many with free preview lessons. If a certificate matters to you — for a career pivot or a resume line — this is the most credible path at a reasonable cost. Financial aid is genuinely available; the application takes about 15 minutes.


4. Consumer.gov — Making a Budget

  • Price: Free
  • Level: Beginner
  • Duration: Under 1 hour
  • Format: Self-paced worksheet and step-by-step guide
  • Certificate: None
  • Hands-on practice: Yes — downloadable budget worksheet
  • Tools required: None (printable)

The U.S. government’s consumer budgeting guide walks you through gathering pay stubs and bills, filling in a budget worksheet, and reviewing monthly spending. It’s the most practical “day one” resource for someone who has never written a budget before.


5. Udemy personal budgeting courses

  • Price: $10–$20 one-time (frequent sales); lifetime access
  • Level: Beginner
  • Duration: 1–4 hours of video content
  • Format: Self-paced video modules with downloadable worksheets
  • Certificate: Completion certificate (not accredited)
  • Hands-on practice: Yes — templates and monthly budget assignments
  • Tools required: Microsoft Excel or Google Sheets

Udemy courses like Learn How To Budget are built for people who want a structured video experience without a monthly subscription. Lifetime access means you can revisit the material when your income or expenses change — which they will.


6. Fidelity — How to Budget in 7 Simple Steps

  • Price: Free
  • Level: Beginner to intermediate
  • Duration: 30–60 minutes
  • Format: Self-paced reading with allocation examples
  • Certificate: None
  • Hands-on practice: Partial — allocation examples and goal-setting prompts
  • Tools required: None

Fidelity’s seven-step budgeting framework covers goal identification, spending tracking, realistic allocation, and consistency. It’s particularly useful for learners who want a structured mental model before they open a spreadsheet. The allocation examples give concrete numbers to work from, not just abstract percentages.


How to choose the right budget course for your goals

Not every course fits every learner. Before you enroll, run through this checklist:

Criteria to weigh:

  • Time commitment: Can you realistically finish this in four weeks given your schedule? A 10-week specialization you abandon at week three teaches you nothing.
  • Hands-on practice: Does the course include templates, worksheets, or projects you build yourself? Passive video watching rarely changes behavior.
  • Certificate value: For personal finance skill-building, a certificate adds little. For a career in financial planning or accounting, a Coursera verified credential from a recognized institution carries more weight. The Bureau of Labor Statistics notes that personal financial advisors typically hold formal degrees and licenses, so a course certificate alone won’t substitute for professional credentials.
  • Instructor credentials: Look for courses taught by certified financial planners (CFPs), CPAs, or university faculty. A course with no instructor bio is a red flag.
  • Reviews and ratings: Filter for reviews that mention specific outcomes (“I built my first budget,” “I paid off a credit card”) rather than generic praise.
  • Free preview or sample lesson: Any reputable course offers at least one free lesson. If there’s no preview, skip it.
  • Refund policy: Udemy offers a 30-day refund. Coursera has a 14-day refund window on most paid plans. No refund policy is a red flag.

Red flags to avoid:

  • No syllabus or module list published before enrollment
  • No sample lesson or free preview
  • Reviews that are all five stars with no specifics
  • Vague certificate terms (“certificate of completion” with no issuing institution named)

A simple scoring method: Rate each course you’re considering on four criteria — time fit, hands-on practice, instructor credibility, and review quality — using a 1–3 scale. Any course scoring 10 or above is worth enrolling in. Below 8, keep looking.

Experts recommend treating the first three months of budgeting as a test run, adjusting categories that consistently miss the mark rather than abandoning the process. Choose a course that gives you enough structure to run that experiment, not one that overwhelms you before you start.


How to choose the right budget course for your goals — overview diagram

What budget courses actually teach you

Most personal finance courses follow a similar module sequence, regardless of platform. Here’s what you can expect:

Common modules:

  • Income and cash flow (what comes in, when, and how reliably)
  • Expense categorization (fixed vs. variable, needs vs. wants)
  • Emergency fund basics (how much, where to keep it)
  • Debt payoff strategies (avalanche vs. snowball methods)
  • Sinking funds for irregular expenses (car maintenance, annual subscriptions, holiday gifts)
  • Automation setup (auto-transfers, bill pay, savings contributions)
  • Weekly and monthly review routines

Budgeting methods you’ll encounter:

  • 50/30/20: 50% to needs, 30% to wants, 20% to savings and debt. Good starting framework for most beginners.
  • Zero-based budgeting: Every dollar gets assigned a job until income minus expenses equals zero. Teaches intentionality; requires more tracking effort.
  • Envelope method: Cash or virtual envelopes for each spending category. Spending stops when the envelope is empty. Goodbudget 101 teaches this directly.
  • Pay-yourself-first: Savings contribution comes out immediately after each paycheck; you spend what’s left. Works well for people who struggle with willpower.

The best method is the one you’ll actually maintain for at least three months. Personal preference matters more than technical elegance.

Typical course projects:

  • Build a one-month zero-based budget from scratch
  • Set up a sinking fund schedule for three to five irregular expenses
  • Create a Google Sheets or Excel spending tracker
  • Run a weekly 20-minute money check-in for four consecutive weeks

Consumer.gov’s budget worksheet is a practical starting point for the first project, and Fidelity’s allocation examples help you set realistic category targets before you fill in the numbers.


Free vs. paid budgeting courses: which one fits your situation

Dimension Free courses Paid courses
Price $0 $10–$79+ (one-time or monthly)
Level Mostly beginner Beginner to intermediate
Duration 1–3 hours 4–40+ hours
Format Self-paced reading/worksheets Video modules, instructor-led, or cohort
Certificate Rarely Often (accredited on Coursera; completion-only on Udemy)
Hands-on practice Worksheets only Templates, graded projects, guided exercises
Tools required None or printable Google Sheets, Microsoft Excel

When to choose free:

  • You want to build basic habits before committing money to a course.
  • You’re testing whether budgeting instruction works for your learning style.
  • You don’t need a certificate.

When to choose paid:

  • You want structured accountability and graded feedback.
  • You need a certificate for a resume or career development.
  • You want downloadable templates and lifetime access to revisit material.

Coursera offers financial aid on most paid specializations, which effectively makes them free for qualifying learners. Apply before you assume a course is out of budget.

On the certificate question: for personal finance skill-building, a completion certificate from Udemy carries no professional weight. A verified credential from a Coursera university partner carries more, but still doesn’t substitute for a CFP designation if you’re pursuing a career in financial advising. For most readers, the skills matter more than the paper.


Your 30-day plan to apply what you learn

Finishing a course is step one. Applying it is where the habit actually forms.

Week 1 — Set up:

  1. Complete your chosen course’s first two modules.
  2. Gather your last three pay stubs and two months of bank statements.
  3. Fill in a Consumer or download a free template from Valapoint’s free budget planner.

Week 2 — Track:

  1. Categorize every expense from the past 30 days into your budget categories.
  2. Identify your top three spending categories and compare them to your targets.
  3. Set up your Google Sheets or Excel tracker using your course template.

Week 3 — Adjust:

  1. Revise any category that was off by more than 20% in week two.
  2. Create one sinking fund for a predictable irregular expense (car insurance renewal, holiday gifts).
  3. Run your first weekly 20-minute money check-in.

Week 4 — Automate:

  1. Set up one automatic transfer to savings immediately after your next paycheck.
  2. Review recurring subscriptions and cancel any you haven’t used in 30 days.
  3. Schedule your monthly budget review as a recurring calendar event.

Tools to use:

  • Google Sheets or Microsoft Excel: Build your tracker from your course template. Free and flexible.
  • Washington State DFI worksheets: Free calculators and budgeting worksheets from a state financial regulator, useful for sinking fund planning.
  • Valapoint’s personal finance tools: Calculators for budget, savings, and debt that complement course projects and help you set measurable goals.
  • AI-assisted budgeting workflows: Practical examples of how automation reduces the manual tracking burden once your categories are set.

Pro Tip: Treat your first month as a data-collection experiment, not a performance test. Your goal is to learn what your actual spending looks like, not to hit every target perfectly. Use your course assignments to populate your tracking tool, so the work you do for the course becomes the foundation of a real, ongoing budget.

Experts consistently recommend treating the first three months as a test run and adjusting categories that miss the mark rather than scrapping the whole system. That mindset is what separates people who build lasting habits from people who try once and quit.


The part most budget courses don’t tell you

Most courses teach you the mechanics of budgeting correctly. Where they fall short is in preparing you for the psychology of it.

Hands adjusting budget categories with coins and calculator

The real obstacle isn’t knowing what a sinking fund is. It’s the second month, when your numbers are still messy and you’re tempted to conclude that budgeting “doesn’t work for you.” Investopedia’s research shows that most budgets fail because they’re rigid or unrealistic, not because the person lacks discipline. That’s a design problem, not a character flaw.

The learners who make progress treat their budget like a draft document. They pick a method, run it for 90 days, and adjust what doesn’t fit rather than abandoning the whole thing. Consistency over three months matters far more than choosing the “right” method on day one. A zero-based budget you actually maintain beats a perfectly optimized spreadsheet you open twice.

Start small. One category, one week, one check-in. The habit compounds faster than you expect.


Pair your course with a tool that keeps you on track

Learning to budget is one thing. Keeping it going after the course ends is another. Valapoint’s Vala app is built for exactly that gap: it tracks your expenses automatically, surfaces spending patterns you’d miss in a spreadsheet, and sends reminders before bills hit. You can set up budget categories that mirror your course assignments, so the work you did in week one doesn’t disappear into a folder you never open again.

Valapoint

Vala’s free tier covers basic tracking and expense categorization. The paid plan adds AI-driven insights, recurring subscription review, shared expense splitting for couples or roommates, and savings goal tracking — features that turn course theory into a daily habit without extra effort. For learners who want to go further, Valapoint’s budget goal tracker connects your sinking funds and savings targets to real account data, so you can see progress in real time. A budgeting app supports your learning, but it doesn’t replace a structured course if you need guided instruction or a credential. Use both. Start tracking free with Vala and let your course give you the framework.


Sources

This article is general information, not a substitute for advice from a qualified financial advisor. Consult a qualified financial professional about your own circumstances before acting on anything here.

The Essential Components of a Budget, Explained

A practical household budget always includes income, fixed expenses, variable expenses, debt repayment, savings, sinking funds for irregular bills, and a discretionary category. As Dollar Professor explains, every budget ultimately boils down to three core parts: income, expenses, and savings. The components of a budget work together in a simple flow: your net income comes in, predictable obligations get covered first, savings and debt payments follow, and whatever remains funds your everyday wants.

Here’s a quick look at what belongs in every budget:

  • Income (take-home pay, side gigs, benefits)
  • Fixed expenses (rent, insurance, loan payments, subscriptions)
  • Variable expenses (groceries, utilities, gas, entertainment)
  • Debt repayment (minimums plus any extra payments)
  • Savings (emergency fund and goal-based accounts)
  • Sinking funds (car registration, annual bills, home repairs)
  • Discretionary money (fun spending, personal allowance)

Key Takeaways

A complete household budget covers seven components: income, fixed expenses, variable expenses, debt repayment, savings, sinking funds, and discretionary spending. Every dollar should have a clear assignment before the month begins.

Point Details
Start with net income Use take-home pay, not gross, as your monthly baseline to avoid overspending from day one.
Emergency fund target Aim for 3–6 months of living expenses in a liquid account before funding other goals.
Convert irregular bills Divide any annual cost by 12 and contribute that amount monthly as a sinking fund.
Review monthly, adjust often Compare actuals to your plan each month and revise allocations to stop recurring leaks.
Valapoint tracks it all Vala maps each component into automated workflows: categorization, sinking funds, bill reminders, and subscription audits.

Table of Contents

1. What counts as income in your budget?

Your budget starts with one number: your net income. That’s your take-home pay after taxes, Social Security, Medicare, and any employer deductions like health insurance or a 401(k) contribution. Using gross income instead of net is one of the most common budgeting mistakes, and it leads to overspending from day one.

Net income includes more than your paycheck. Count every regular source: salary, hourly wages, freelance or side gig earnings, rental income, alimony, child support, and any government benefits you receive. Each source needs its own line so you can see your true monthly baseline.

Irregular income is trickier. If your pay varies by season or project, use a conservative floor: average your three lowest recent months and budget from that number. Any income above the floor becomes a bonus you can direct toward savings or debt. This approach keeps your core budget stable even when your earnings fluctuate.

Pro Tip: Set your income floor before allocating anything to discretionary spending or long-term savings. If your floor is $3,200 and you earn $3,800 this month, the extra $600 goes toward a goal, not lifestyle creep.

2. Fixed expenses: the obligations you cover first

Fixed expenses are the costs that stay the same every month regardless of what you do. Rent or mortgage, car payments, student loans, insurance premiums, and recurring subscriptions all fall here. Because these amounts don’t change, they’re the easiest to plan for and the first allocation after your net income lands.

Common fixed expenses include:

  • Rent or mortgage payment
  • Renter’s or homeowner’s insurance
  • Car loan or lease payment
  • Auto insurance
  • Health, dental, and vision insurance (if not payroll-deducted)
  • Minimum loan payments
  • Streaming, software, or membership subscriptions

Find the exact amounts from your most recent statements or bank history. For bills paid annually or quarterly, divide the total by 12 to get a monthly equivalent. A $720 annual car registration becomes $60 per month in your budget, even if you only write the check once a year.

Pro Tip: Set autopay for every fixed expense that allows it. Then use a bill-reminder feature in your budgeting app to flag anything that isn’t automated. Missed payments cost you in late fees and can hurt your credit score.

3. Variable expenses: where your budget flexibility lives

Variable expenses shift month to month. Groceries, utilities, gas, dining out, clothing, and entertainment all belong here. Unlike fixed costs, you have real control over these numbers, which makes them the fastest place to find savings when you need to cut.

Before setting any limits, track what you actually spend. Pull three months of bank and credit card statements and average each category. That gap is where the opportunity lives.

Tracking tactics that work:

  • Check your spending totals weekly, not just at month-end
  • Use consistent category names so transactions don’t drift between buckets
  • Flag any subscription charges that appear in variable spending (they may belong in fixed)

For a deeper look at how to identify and manage these costs, Valapoint’s guide to variable expenses walks through common categories and practical reduction strategies.

Pro Tip: Run a subscription audit every quarter. Recurring charges under $15 are easy to forget, but three or four of them add up to a meaningful monthly drain.

The Federal Reserve Education’s budgeting lesson draws a useful distinction: fixed expenses stay constant, variable expenses fluctuate, and irregular costs (like annual bills) should be converted into monthly sinking-fund contributions. That framework keeps all three types manageable.

4. Debt and debt repayment: minimums first, then strategy

Every debt in your household needs a line in your budget. Start by covering the minimum payment on every account, every month. Missing a minimum triggers late fees, damages your credit score, and can trigger penalty interest rates. Minimums are non-negotiable.

Once minimums are covered, you can apply extra money to accelerate payoff. Two strategies dominate:

  • Debt snowball: Pay minimums on all accounts, then throw extra money at the smallest balance first. When that’s paid off, roll its payment to the next smallest. The psychological win of eliminating accounts keeps motivation high.
  • Debt avalanche: Pay minimums on all accounts, then direct extra money to the highest-interest balance first. This approach saves the most in total interest over time.
Debt Snowball Debt Avalanche
Speed to first payoff Faster (smallest balance) Slower (highest rate first)
Total interest paid Higher Lower
Psychological benefit Strong (quick wins) Moderate
Best for Motivation-driven payers Math-driven payers

Steps to set up your debt repayment plan:

  1. List every balance, interest rate, and minimum payment
  2. Confirm all minimums fit within your monthly budget
  3. Choose snowball or avalanche based on your personality
  4. Automate the minimum payments; manually direct any extra funds

5. Savings: emergency funds and goal-based accounts

Savings belong in your budget as a fixed line, not as “whatever’s left over.” Pay yourself first by transferring to savings the same day your paycheck arrives.

Your first savings priority is an emergency fund. Standard guidance targets a sufficient emergency fund to cover several months of typical living expenses held in a liquid, accessible account. If your monthly expenses run $3,000, that means $9,000–$18,000 set aside before you focus heavily on other goals. Raisin’s budgeting guide confirms this range as the standard household benchmark, alongside frameworks like 50/30/20 and zero-based budgeting as practical starting structures.

Beyond the emergency fund, goal-based saving works best in separate buckets:

  • Short-term goals (under 12 months): vacation, new appliance, holiday gifts
  • Medium-term goals (1–5 years): down payment, car replacement, home renovation
  • Long-term goals (5+ years): retirement, college funding, financial independence

For retirement accounts held in brokerage or IRA structures, SIPC provides protection on eligible securities up to $500,000 if a member firm fails. That’s worth knowing as your long-term savings grow.

Pro Tip: Open a separate high-yield savings account for each major goal and automate a transfer on payday. When the money moves before you see it, you stop treating it as available to spend.

5. Savings: emergency funds and goal-based accounts — overview diagram

6. Sinking funds: planning for the bills that don’t come monthly

A sinking fund is a dedicated savings pool for a predictable but irregular expense. You contribute a fixed amount each month so the money is ready when the bill arrives. No scrambling, no credit card, no raiding the emergency fund.

Common sinking fund categories:

  • Vehicle registration and tags
  • Annual insurance premiums (if paid in a lump sum)
  • Holiday and gift spending
  • Home maintenance and repairs
  • Medical or dental out-of-pocket costs
  • Back-to-school supplies

The math is simple. Take the annual cost and divide by 12. A $600 car insurance renewal means $50 per month into a sinking fund. A $1,200 holiday budget means $100 per month starting in January.

Steps to build your sinking funds:

  1. List every irregular expense you can predict over the next 12 months
  2. Estimate the annual cost for each
  3. Divide each by 12 to get the monthly contribution
  4. Open a labeled savings bucket or sub-account for each
  5. Automate the monthly transfer

The Federal Reserve Education lesson on budgeting specifically recommends converting annual irregular costs into monthly amounts to prevent shortfalls. Sinking funds do exactly that, and they protect your emergency savings from being spent on predictable costs.

7. Discretionary money: why “fun” spending belongs in your budget

Discretionary spending is everything you want but don’t strictly need: dining out, hobbies, entertainment, personal care beyond basics, and impulse purchases. Leaving it out of your budget doesn’t make it disappear. It just makes it invisible, which is how budgets fail.

Hands putting coins in jar

Giving discretionary spending its own category does two things. First, it sets a clear limit so you know when to stop. Second, it removes the guilt from spending within that limit. Both outcomes improve long-term adherence.

That’s a guideline, not a rule. If your fixed expenses are high or you’re aggressively paying down debt, your discretionary percentage will be lower.

Pro Tip: Give discretionary spending its own account or app category and treat it as a weekly allowance. Once it’s gone, it’s gone. Spending from a capped bucket feels very different from spending from a general checking account with no visible limit.

8. How to categorize, track, and keep your budget working

A budget you set up once and never revisit stops working within weeks. Consumer treating budgeting as an iterative process: monitor spending regularly, compare actuals to your plan each month, and revise allocations to stop recurring leaks.

Your monthly budget routine:

  1. Confirm your net income for the month (or use your conservative floor)
  2. Subtract all fixed expenses to see what remains
  3. Fund each sinking fund contribution
  4. Allocate variable expense budgets by category
  5. Confirm savings and debt repayment contributions
  6. Assign the remainder to discretionary spending

For categorization, consistent naming matters. Valapoint’s spending category guide explains how clear category definitions reduce “drift,” where transactions end up in the wrong bucket and distort your picture of where money is going. Pick a category name and stick with it across every transaction.

Weekly habits that keep the budget on track:

  • Spend five minutes reviewing new transactions and confirming categories
  • Flag anything that looks miscategorized and correct it immediately
  • Check variable category totals against your monthly limits

Pro Tip: Schedule a recurring monthly budget review on the same date each month, ideally a day or two after your last paycheck of the month. Treat it like a standing appointment. Fifteen minutes of review prevents weeks of drift.

9. A simple monthly budget example you can use right now

Here’s a realistic one-month sample for a household with $4,500 in monthly net income. The numbers are illustrative, but the proportions reflect common household allocations.

This is a zero-based budget: every dollar has a job, and the total allocated equals net income. If income varies in a given month, adjust the discretionary and extra debt payment lines first before touching savings or fixed obligations.

For a ready-to-use template, Valapoint’s free budgeting tools include worksheets and starter templates that match this structure.

10. How budgeting apps map these components into real workflows

Understanding the components of a budget is step one. Automating them is what makes the system stick. A good budgeting app handles the mechanical work so your monthly routine takes minutes instead of hours.

Here’s how a typical app workflow maps to the components above:

  • Link your accounts so transactions import automatically and get categorized in real time
  • Set recurring transfers for sinking funds and savings goals so contributions happen on payday without manual action
  • Automate minimum debt payments through your bank or lender, then track the confirmation in the app
  • Schedule monthly review reminders so you never skip the reconciliation step

Security is a reasonable concern when linking bank accounts. Reputable apps use read-only connections through established aggregators, meaning the app can see your transactions but cannot move money without your explicit action. Look for apps that use bank-level encryption and clearly state their data practices.

Valapoint’s Vala app maps directly to these workflows. Budget templates align with the component structure above, automatic sinking-fund tracking keeps irregular contributions visible, and a subscription audit feature surfaces recurring charges you may have forgotten. The Principles of Accounting overview of master budgets notes that linking budget elements electronically and testing assumptions is what separates a functional budget from a static spreadsheet. An app does that linking automatically.

Pro Tip: Turn on spending alerts for your variable categories.

The part of budgeting most guides skip

Most budgeting articles focus on the mechanics: list your income, subtract your expenses, save the rest. That’s accurate, but it misses the behavioral side entirely.

The components of a budget aren’t just accounting categories. They’re a decision framework. When you automate a $75 monthly transfer to a holiday sinking fund in January, you’re not just saving money. You’re removing a future decision under pressure. December arrives and the money is already there. No credit card, no stress, no regret.

The same logic applies to discretionary spending. Giving “fun money” its own category isn’t a concession to weakness. It’s a design choice that makes the rest of the budget more durable. People who allow zero discretionary spending tend to abandon their budgets entirely after one bad week. People who budget for wants alongside needs tend to stay consistent for months.

The real shift happens when you stop treating a budget as a restriction and start treating it as a plan you built on purpose. The components don’t limit you. They tell you exactly how much freedom you have in each area, which is a very different feeling.

Vala helps you put every component to work

Vala gives you a clear, connected view of every budget component in one place: income tracking, automatic expense categorization, sinking-fund management, bill reminders, and a subscription audit that surfaces charges you’ve stopped noticing.

Valapoint

You don’t need to build the system from scratch. Vala’s budget templates follow the same component structure outlined in this guide, and automated transfers handle sinking funds and savings goals on payday. The result is a budget that runs with minimal friction and a monthly review that takes fifteen minutes instead of an hour.

Start with the Vala personal finance app to connect your accounts, set up your component categories, and see where your money actually goes.

Sources

This article is general information, not a substitute for advice from a qualified financial advisor. Consult a qualified financial professional about your own circumstances before acting on anything here.

How I Manage My Money: A Simple, Practical Plan

The best thing you can do right now is set a simple budget and automate one transfer to savings. That single action, done today, starts the cycle that every other money habit builds on. Here is the short checklist to follow:

  • Daily (2 minutes): Open your banking app and confirm no unexpected charges.
  • Weekly (10 minutes): Review spending by category and flag anything over budget.
  • Monthly (30 minutes): Reset your budget, check your savings balance, and pay down any extra debt.

Expect a small cash buffer within 30 days, noticeably faster debt payments by 90 days, and visible net worth progress by 365 days. FINRA’s five-step financial roadmap confirms this sequence works: take inventory, understand interest, pay off debt, build retirement, then optimize taxes. Tracking net worth alongside monthly spending also keeps motivation steady through uneven months.

Key Takeaways

Automating one savings transfer and reviewing spending weekly are the two habits that move every other money goal forward faster.

Point Details
Start with three core numbers Know your take-home income, essential expenses, and net worth before building any budget.
Use a percentage framework The 50/30/20 rule or Fidelity’s 60/30/10+15 guideline gives you a tested starting split.
Build an emergency fund first Aim for $500–$1,000 to start, then grow to 3–6 months of essential expenses over time.
Pick a debt strategy and automate it Snowball builds momentum; avalanche saves interest. Set minimums on autopay and direct extra dollars to your target debt.
Valapoint automates the follow-through Vala connects accounts, tracks categories, and alerts you before you overspend, so the plan stays active without manual effort.

Table of Contents

How do you calculate the numbers that drive your money?

Three figures run everything: your monthly take-home income, your essential expenses, and your net worth snapshot.

Monthly take-home income is what actually hits your account after taxes and deductions. If your income varies, use a 12-month rolling average from your bank statements. That average becomes your planning baseline. Consumer recommends this approach specifically for irregular earners.

Essential expenses split into fixed (rent, car payment, insurance) and variable (groceries, utilities, gas). Pull three months of statements and average the variable ones. The total tells you your floor: the minimum you need each month no matter what.

Net worth is simply assets minus liabilities. Add up savings, retirement accounts, and any property value, then subtract every debt balance. You do not need precision here. A rough number updated monthly shows whether you are moving forward.

Pro Tip: Write all three numbers on one page before you build any budget. Seeing income, expenses, and net worth together in one place makes priorities obvious and removes the guesswork from every decision that follows.

What budget framework actually works for beginners?

Two frameworks cover most situations. Pick the one that fits your income structure.

Framework Essentials Wants / Nonessentials Short-Term Savings Retirement
50/30/20 50% 30% 20% Included in 20%
Fidelity 60/30/10+15 60% 30% 10% +15% pre-tax

Budget frameworks comparison diagram

Fidelity’s money management guide outlines both models. The 50/30/20 rule works well when your income is moderate and retirement is already handled through a workplace plan. Fidelity’s 60/30/10+15 guideline suits higher earners who want to separate retirement from short-term goals.

Sinking funds solve the problem of predictable irregular expenses. Instead of scrambling when your car registration or annual insurance bill arrives, divide the total by 12 and move that amount to a labeled savings bucket each month. Common sinking funds: car maintenance, home repairs, holiday gifts, and annual subscriptions.

To set up your first budget:

  1. List every expense category from last month’s statements.
  2. Assign each category to essentials, wants, or savings.
  3. Apply your chosen percentage split to your take-home income.
  4. Compare the target to your actual spending. Adjust one or two categories, not everything at once.
  5. Run it for 30 days before making further changes.

Pro Tip: Fidelity’s financial planning steps recommend starting with the basics first: budget, insurance, and emergency fund. Get those three solid before you optimize anything else.

How do you track spending without it becoming a chore?

Manual tracking with a spreadsheet gives you full control and zero subscription cost. An AI-assisted Excel budget template can speed up the setup if you prefer that route. The trade-off is time: you enter every transaction yourself, which works well if you have fewer than 20 transactions a week.

Automated apps like Mint connect directly to your accounts, pull transactions, and categorize them without manual entry. That automation is what makes tracking stick long-term. U.S. Bank’s money management guide advises defining your financial priorities before choosing any tool, so the app serves your goals rather than the other way around.

When evaluating any tracking tool, check for:

  • Auto-import: Does it connect to your bank and credit cards securely?
  • Categorization accuracy: Does it correctly sort groceries, subscriptions, and dining?
  • Goal and sinking-fund support: Can you set savings targets by category?
  • Privacy and security: Does it use read-only bank connections and encrypt your data?

A simple adoption plan: connect your accounts on day one, set your categories on day two, automate any recurring rules on day three, then check in weekly. That four-step setup takes under an hour. For a deeper look at budgeting app options, Valapoint’s blog covers practical adoption tips and feature comparisons.

How much emergency fund do you actually need?

Start with $500–$1,000. That starter target, recommended by Experian’s beginner money guide, gives you enough to cover a car repair or a medical copay without touching a credit card. Once you hit that milestone, build toward one full month of essential expenses, then extend to 3–6 months over time.

Three reliable ways to fund it faster:

  • Round-ups: Some apps round each purchase to the nearest dollar and transfer the difference automatically.
  • Percentage of each paycheck: Even 3–5% of each direct deposit adds up quickly.
  • Small side income: A single freelance project or a sold item can jump-start the fund without touching your regular budget.

Keep the emergency fund in a high-yield savings account or money market account, separate from your checking. The separation removes the temptation to spend it, and the higher rate means your buffer earns something while it sits.

Pro Tip: Automate the transfer the day after your paycheck lands. When the money moves before you see it, you stop thinking of it as available to spend.

Debt snowball vs. avalanche: which one should you use?

Both strategies work. The difference is psychology versus math.

The debt snowball pays the smallest balance first, regardless of interest rate. You clear accounts faster, which builds momentum. The debt avalanche targets the highest interest rate first, saving more money over the full payoff period. Fidelity’s money management resource covers both trade-offs clearly.

When to use each:

  • Choose avalanche if you carry high-rate credit card debt and can stay motivated without quick wins.
  • Choose snowball if you have several small balances and need visible progress to keep going.
  • Consider consolidation or a low-rate balance transfer when your credit score qualifies and the transfer fee is less than the interest you would otherwise pay.

For student loan borrowers, repayment strategy examples from Titan Prep walk through income-driven and standard options that interact with these payoff methods.

Implementation checklist:

  1. List every debt with its balance, minimum payment, and interest rate.
  2. Set all minimums on autopay.
  3. Direct every extra dollar to your target debt (smallest or highest rate).
  4. Track your projected payoff date and update it monthly.

Pro Tip: Even $25 extra per month on a credit card balance cuts months off the payoff timeline. Start small and increase the extra payment as your budget frees up.

Where should you put extra savings after debt?

Follow this priority order, drawn from Fidelity’s financial planning steps:

  • Step 1: Fully fund your emergency cushion (3–6 months of essentials).
  • Step 2: Contribute enough to your 401(k) to capture the full employer match. That match is an immediate 50–100% return on those dollars.
  • Step 3: Max your HSA if you have a high-deductible health plan. HSA contributions are triple tax-advantaged: deductible going in, tax-free for medical use, and taxable-but-penalty-free after 65.
  • Step 4: Scale retirement contributions toward 10–15% of gross income across 401(k) and IRA.
  • Step 5: Use a taxable brokerage account for goals beyond retirement (a home down payment, a sabbatical, a business start).

The Investor makes the case for starting early better than any paragraph can. Run your own numbers: even modest monthly contributions grow substantially over 20–30 years.

Pro Tip: Automate every contribution the day you set it up. A contribution you schedule manually each month will eventually get skipped. One that moves automatically never does.

How do you protect what you have built?

Insurance and credit hygiene prevent a single event from erasing months of progress.

Essential coverage to have in place:

  • Health insurance (prevents catastrophic medical debt)
  • Auto insurance at or above your state’s minimum liability requirement
  • Renters or homeowners insurance (often under $20–$30/month for renters)
  • Disability insurance if your employer offers it, especially if you are the primary earner
  • Term life insurance if others depend on your income

Credit hygiene basics:

  • Pay every bill on time. Payment history is the single largest factor in your credit score.
  • Keep credit utilization below 30%, and aim for under 10% if you are actively building your score.
  • Check your credit reports at AnnualCreditReport.com once a year. All three bureaus are free.

Fraud prevention:

  • Enable transaction alerts on every account.
  • Freeze your credit at all three bureaus if you are not actively applying for credit. It is free and takes minutes.
  • Use tracking apps that connect via read-only, encrypted bank links rather than stored passwords.

How do you make budgeting a habit that actually sticks?

Budgeting works best as a repeating cycle, not a one-time setup.

  1. Daily: Spend two minutes scanning for unexpected charges or overdraft risk.
  2. Weekly: Review each spending category against your budget. Reallocate if one category is running over.
  3. Monthly: Reset allocations, confirm savings transfers went through, and update your debt balances.
  4. Quarterly: Review your financial goals. Did your income change? Did a major expense appear? Adjust the budget to match your current life, not the one you planned for three months ago.

When you spot a category consistently over budget, you have two choices: cut spending in that category or move money from a lower-priority one. Neither is wrong. The goal is alignment between your spending and your actual priorities.

Track three numbers over time: your cash buffer (emergency fund balance), your savings rate (savings divided by take-home income), and your total debt balance. Those three metrics tell you whether the plan is working faster than any single monthly budget review can.

Pro Tip: Net worth is a better long-term motivator than monthly spending totals. A month where you overspent on groceries but paid down $300 in debt still moved your net worth forward. Zoom out.

How does an AI app like Vala support every step of this plan?

Each step in this plan maps directly to a feature in an app like Vala.

  • Account aggregation: Connects all your bank and credit card accounts in one place, so your full financial picture is always current.
  • Category automation: Sorts transactions automatically and flags patterns you would miss reviewing statements manually. Automated expense tracking reduces both workload and categorization errors.
  • Sinking-fund buckets: Lets you label savings by purpose (car fund, holiday, insurance) so every dollar has a clear role.
  • Debt payoff tracking: Monitors balances and projects payoff dates as you make extra payments.
  • Spending alerts: Notifies you when a category approaches its limit, before you overspend.

Three quick use cases: a single earner with irregular freelance income uses the 12-month average baseline and Vala’s alerts to avoid overspending in high-income months. A couple sharing household costs uses the shared expense splitting feature to keep contributions fair without manual calculations. A saver paying down credit cards uses the debt tracker to watch balances drop in real time, which sustains motivation through the avalanche method.

AI-driven budget personalization takes this further by adapting category suggestions to your actual spending patterns rather than a generic template.

Pro Tip: Start with one connected account and one budget category. Get comfortable with the weekly check-in before adding more. U.S. Bank’s guidance and Fidelity’s advice both point to the same truth: one manageable habit beats ten abandoned ones.

The one habit that changed how I manage money

The habit that made the biggest difference was the weekly 10-minute review. Not a full budget overhaul, not a spreadsheet rebuild. Just opening the app every Sunday, scanning the week’s categories, and moving any leftover money to savings or debt before the next week started.

Hands setting weekly reminder on smartphone

The challenge was consistency. The first few weeks felt pointless because the numbers barely moved. But by week six, the pattern was clear: dining out was consistently over budget, and subscriptions I had forgotten about were quietly draining $40 a month. Fixing those two things freed up real money without changing anything else.

The practical mechanics: set a recurring calendar reminder for Sunday evening, keep the session under 15 minutes, and automate any transfer you decide on immediately rather than planning to do it later. The review reveals the problem; the automation fixes it before the next week starts.

Pick one habit from this article and start it today. Not next month.

Vala makes it easier to follow through on your plan

Most people know what they should do with their money. The gap is follow-through, and that is exactly where Vala closes it. Vala’s personal finance app connects your accounts, categorizes spending automatically, and surfaces the patterns that drain your budget quietly, like forgotten subscriptions and creeping variable costs.

Valapoint

The freemium version covers basic tracking and budgeting. The paid plan adds AI-driven spending insights, sinking-fund buckets, shared expense splitting, and bill reminders that keep every deadline visible. Setup takes under 10 minutes: connect your accounts, confirm your categories, set one savings goal, and let the automation handle the weekly tracking you would otherwise skip.

Visit Valapoint’s personal finance tools to run your numbers and see where your money is actually going.

Useful resources for going deeper

  • Money management tips | Fidelity — covers the 50/30/20 rule, Fidelity’s 60/30/10+15 guideline, and debt payoff strategy trade-offs.
  • Financial planning steps | Fidelity — a sequenced guide from budget basics through retirement and tax optimization.
  • 11 money management tips for beginners | Experian — practical starter goals including emergency fund targets and automation tactics.
  • 5 Steps to Take Control of Your Finances | FINRA — a concise five-step roadmap from inventory to tax-smart investing.
  • Investor — free tool to project how regular contributions grow over time.
  • Mymoney — free government worksheets and calculators for self-led financial planning.
  • Consumer — straightforward budgeting guidance including tips for handling irregular income.

This article is general information, not a substitute for advice from a qualified financial advisor. Consult a qualified financial professional about your own circumstances before acting on anything here.

Sources

Stop Impulse Buying: Psychology-Backed Tactics That Work

You can stop impulse buying right now with four moves: pause before purchasing, add friction to the checkout process, redesign your environment to reduce temptation, and budget intentionally for treats you actually want. That’s the whole system. Everything else is detail.

Here’s what you can do in the next 10 minutes:

  • Delete your saved card details from your top two shopping sites or apps.
  • Screenshot the item you want, then close the app or browser tab entirely.
  • Move your phone away from your desk or put it in another room for 15 minutes.
  • Unsubscribe from one marketing email sitting in your inbox right now.
  • Add the item to a wishlist instead of your cart, and set a calendar reminder to revisit it in 48 hours.

Pro Tip: When the urge to buy hits, name it out loud or in a note: “I feel the urge to buy this.” Rating its intensity from 1 to 10 and watching it for 10–15 minutes is a CBT-derived technique called urge surfing that lets the craving peak and fall without you acting on it.

Key Takeaways

Stopping impulse buying comes down to five consistent moves: pause before you purchase, add friction to the checkout process, redesign your environment, budget intentionally for joy, and track your spending with tools that surface leaks automatically.

Point Details
Pause before every purchase Use the 48-hour rule and wishlist method to let urges peak and fall before spending.
Add friction to checkout Remove saved card details and uninstall retail apps to slow the buying sequence.
Redesign your environment Unsubscribe from marketing emails, mute notifications, and curate social feeds to cut trigger exposure.
Budget for intentional joy Allocate a monthly “joy” amount per value category so planned treats replace impulsive ones.
Track with Valapoint Use Valapoint’s AI-driven insights and budget categories to detect leaks and reinforce non-spending wins.

Table of Contents

Why do you keep impulse buying? Emotional and situational triggers explained

Impulse purchases rarely happen because you need something. They happen because you feel something. Stress, boredom, anxiety, and even celebration all activate the brain’s reward system, and shopping delivers a fast dopamine hit that temporarily soothes the discomfort. The problem is that the relief fades quickly, and the purchase stays on your credit card statement.

Research and practitioner commentary consistently show that impulse buying spikes during periods of social stress or economic uncertainty, precisely when budgets are already under pressure. Recognizing your personal triggers is the first line of defense.

The most common triggers include:

  • Stress or anxiety: Shopping feels like control when everything else feels chaotic.
  • Boredom: Scrolling a retail app fills idle time and produces small excitement hits.
  • Celebration: “I deserve this” spending after a win or a hard week.
  • Hunger: Shopping while hungry, especially for food-adjacent or comfort items, amplifies impulse decisions.
  • Notifications and urgency cues: Flash sales, countdown timers, and “only 2 left” alerts are engineered to bypass deliberate thinking.
  • FOMO: Seeing others buy or post about products on social media creates social pressure that feels like need.

To find your top two or three personal triggers, ask yourself: What was I feeling in the hour before my last three impulse buys? Where was I? What had just happened? A pattern usually appears within minutes of honest reflection. You can also take Valapoint’s Financial DNA Test to get a clearer picture of your spending style and the behavioral tendencies driving it.

How to stop impulse buying with pause-and-wait tactics

The single most reliable tactic is creating a gap between the urge and the purchase. That gap is where the impulse dies. U.S. Bank’s financial education guidance specifically recommends the 24–48 hour rule and removing saved payment data as friction tools that reduce emotionally driven purchases.

Here’s how to build that gap deliberately:

  1. Add the item to a wishlist, not your cart. A wishlist has no checkout button. The act of saving it satisfies the urge to “do something” without spending.
  2. Set a 48-hour reminder. Put it in your phone calendar. If you still want the item in two days and it fits your budget, buy it guilt-free.
  3. Remove stored payment details. Typing in your card number manually adds 60–90 seconds of friction. That pause is often enough to break the emotional momentum.
  4. Take a 10–15 minute urge-surfing pause. Step away from the screen. Rate the urge’s intensity. Watch it drop. CBT guides from the Beck Institute confirm that urges peak and recede naturally within this window when you don’t feed them.
  5. Use the screenshot method. Consumer finance guides widely recommend taking a screenshot of the item and closing the app. The image stays; the checkout pressure disappears.

Why does each of these work? Impulse buying relies on a tight loop: trigger, craving, action, reward. Breaking the loop at the action stage weakens the habit over time. Every time you delay and don’t buy, the neural pathway linking that trigger to that purchase gets a little thinner.

Pro Tip: Use if-then planning to make delay automatic: “If I feel the urge to buy something unplanned, then I will add it to my wishlist and close the app.” Writing this down once makes it far easier to execute under emotional pressure.

How to stop impulse buying with pause-and-wait tactics — overview diagram

How to redesign your shopping environment to reduce temptation

You can’t rely on willpower alone when your environment is designed to sell to you. The fix is to reduce exposure before the urge even starts.

Start with this checklist:

  • Uninstall retail apps from your phone. Browsing friction on a mobile browser is significantly higher than tapping an app icon.
  • Mute or turn off push notifications from every shopping platform, including food delivery apps.
  • Unsubscribe from marketing emails. Use a tool like Unroll.Me or simply hit unsubscribe on the next five promotional emails you receive.
  • Remove saved card details from browsers and retail accounts (this doubles as a pause tactic).
  • Install an ad blocker such as uBlock Origin on your desktop browser to cut retargeting ads that follow you after browsing.
  • Curate your social media feeds. Unfollow or mute accounts that consistently trigger purchase urges, whether that’s influencer hauls, flash-deal accounts, or brand pages.

Social spending deserves its own rule. If group outings or shared purchases tend to push you into unplanned spending, set a personal cap before you go. Decide the number in advance, not in the moment when social pressure is highest.

Build a value-based budget so spending feels intentional, not guilty

A budget that bans all fun spending doesn’t work. Financial therapists are clear on this: removing all discretionary spending creates deprivation, and deprivation leads to rebound binges that cost more than the original treats would have. The goal is to make your spending intentional, not to eliminate enjoyment.

Here’s how to build a values-based budget in three steps:

  • Identify your top two or three genuine value categories. These are the areas where spending actually makes you happy: experiences with friends, fitness, cooking, books. Not the categories where you spend by default.
  • Allocate a monthly “joy” amount to each. Even $30–$50 per category is enough to satisfy the urge to treat yourself without blowing your budget.
  • Rename the categories with goal language. Instead of “fun money,” label it “Weekend Hikes Fund” or “Cookbook Collection.” Specific labels reduce the chance of raiding the category for unrelated impulse buys.

Use this mini-worksheet as a starting point:

Automation makes this stick. U.S. Bank recommends scheduling automatic transfers to savings on payday, before discretionary money is available to spend. When the “hot” money moves to a separate account immediately, the temptation to spend it drops sharply. Categorizing past spending by copying bank statements into labeled buckets, as The Guardian’s personal finance reporting describes, also reveals exactly where small leaks are hiding. You can use Valapoint’s personal finance tools and calculators to set up these allocations and run the numbers quickly.

For readers who prefer a spreadsheet approach, an AI-powered Excel budget template can help you build and automate these category allocations without starting from scratch.

Build a value-based budget so spending feels intentional, not guilty — overview diagram

What tools and systems actually help you curb impulse spending?

Tech should do one thing for impulse control: make not buying feel easier than buying. The best tools automate friction, surface spending leaks you can’t see manually, and reward restraint by showing your savings grow.

Here’s how to set up a practical system:

  • Budgeting app (Valapoint): Connect your accounts and let Vala’s AI-driven insights flag small recurring leaks, categorize discretionary spending automatically, and alert you when a category is running hot. The spending insights feature is particularly useful for spotting patterns you’d never notice from a bank statement alone.
  • Card controls: Most U.S. banks and credit unions let you set spending limits by category or merchant type directly in their app. Use this to cap retail or food delivery spending at your budgeted amount.
  • Subscription managers: Review recurring charges monthly. Valapoint’s subscription review feature surfaces charges you may have forgotten, which are often the result of past impulse sign-ups.
  • Notification managers: iOS Screen Time and Android Digital Wellbeing both let you set app limits and schedule downtime for shopping apps during high-risk hours (late evenings, lunch breaks).
  • Browser extensions: uBlock Origin blocks retargeting ads. The Honey extension, used carefully, can also delay purchases by surfacing coupon codes, which adds a small pause to the checkout flow.

Pro Tip: Set up Valapoint’s budget goal tracker with a “Joy Fund” category and a monthly cap. Every time you check the app and see the balance unspent, that visual feedback reinforces the habit of not buying. Saving money automatically through AI insights works the same way: watching a savings balance grow is a reward that competes with the dopamine hit of buying.

Privacy matters when connecting financial accounts. Valapoint uses secure bank integration with read-only access, so your credentials stay protected while the app reads your transaction data.

When impulse buying is more than a habit and where to get help

Most people can curb impulse spending with the tactics above. But for some, the behavior is driven by deeper emotional patterns that habit changes alone won’t fix. Peer-reviewed research links trait impulsivity and specific decision-making patterns to compulsive purchasing behaviors, and clinical interventions address those underlying traits directly.

Seek professional support when you notice:

  • Chronic overdrafts or carrying debt specifically from discretionary purchases
  • Hiding purchases from a partner, family member, or roommate
  • Buying items and returning them repeatedly without using them
  • Sleep disruption or persistent anxiety tied to spending guilt
  • Relationship conflicts caused by financial secrecy or overspending
  • Feeling unable to stop even when you genuinely want to

Where to find help:

  • CBT therapist: Search the Beck Institute’s therapist directory or Psychology Today’s filter for financial or behavioral issues.
  • Financial therapist: The Financial Therapy Association (financialtherapyassociation.org) lists credentialed practitioners who combine money coaching with emotional support.
  • Debtors Anonymous: Free peer-support meetings available online and in person across the U.S. at debtorsanonymous.org.

What to do right after an impulse purchase

Acting quickly after an unplanned purchase limits the financial damage and, more usefully, turns the event into data you can use.

  1. Check the return window immediately. Most U.S. retailers offer 14–30 days. Open the confirmation email now and note the deadline in your calendar.
  2. Consider resale if returning isn’t possible. Platforms like Facebook Marketplace, eBay, and Poshmark let you recover most of the cost on clothing, electronics, and home goods.
  3. Log the trigger. Write one sentence in a notes app: what you were feeling, where you were, and what prompted the purchase. This is your urge journal entry. Behavioral money coaches recommend urge logs as one of the most effective tools for breaking the cycle.
  4. Adjust next month’s budget. Move the amount spent from your “joy” category or flag it as an overage. Don’t punish yourself; just rebalance.
  5. Reward the next non-purchase. The next time you face the same trigger and don’t buy, transfer $5 or $10 to savings. Small positive reinforcement builds the new habit faster than guilt ever does.

One-week rapid reset: On day one, return or list the item. Days two through four, log every urge without acting on it. Day five, review your trigger journal and identify the pattern. Days six and seven, set one new environment change (delete an app, unsubscribe from one email list) based on what you found.

How long does it take to see real results?

Small wins appear fast. Measurable budget changes follow within weeks. Habit stabilization takes longer, but the financial impact compounds steadily. USA Today’s consumer reporting notes that impulse buying rises during tight-budget periods, which means the payoff from building these defenses is highest exactly when you need it most.

Tactic Short-Term Result (Days 1–14) Medium-Term Result (Weeks 3–4)
Urge surfing (10–15 min pause) Fewer same-session purchases Reduced frequency of strong urges
24–48 hour rule Immediate drop in spur-of-moment buys Wishlist items often go unbought
Environment redesign Less exposure, fewer trigger moments Lower baseline temptation
Value-based budgeting Clearer category limits Visible rebalancing of discretionary spend
App-based tracking (Valapoint) Leaks identified within first review Consistent category awareness month over month

To track your own progress, measure these each week:

  • Number of impulse purchases made (aim to reduce week over week)
  • Total discretionary spending versus your budgeted amount
  • Number of urges logged versus urges acted on
  • Wishlist items added but not purchased (this is a win worth counting)

Progress is rarely a straight line. A stressful week will produce more urges. That’s normal. What changes over time is how often those urges turn into purchases.

What these tactics feel like when you actually use them

The first week is the most friction-heavy. You’ll feel the pull to check a retail app and realize you deleted it. You’ll start to type your card number and stop halfway through. Those moments of mild annoyance are the system working. By week two, the wishlist fills up with things you no longer want. By week three, checking your Valapoint budget and seeing a category with money still in it starts to feel genuinely satisfying. One planned treat per month, something you actually chose rather than grabbed impulsively, feels better than five unplanned purchases combined.

Progress isn’t linear. Some weeks you’ll slip. The recovery checklist above handles that. What compounds over months is the growing gap between what you earn and what you spend without thinking, and that gap is where financial confidence lives.

Valapoint makes it easier to stay on track

Knowing the tactics is one thing. Having a system that enforces them automatically is what makes the difference between a good week and a lasting habit.

Valapoint

Valapoint’s AI-powered finance app detects the small recurring leaks that manual budgeting misses, flags when discretionary categories are running over, and surfaces spending patterns before they become problems. Set up a “Joy Fund” budget bucket with a monthly cap, connect your accounts securely, and let the app’s real-time alerts create the friction that keeps impulse spending in check. The subscription review feature catches forgotten sign-ups, and the budget goal tracker turns every unspent dollar into visible progress toward something you actually care about.

Start with the free plan and see your spending patterns clearly within the first week. Download the Valapoint personal finance app and run your first spending analysis today.

Sources

These are the primary sources used in this article, each worth bookmarking for deeper reading:

This article is general information, not a substitute for advice from a qualified financial advisor. Consult a qualified financial professional about your own circumstances before acting on anything here.

Understand Personal Cash Flow: Your Quick Plan to Track & Improve

Personal cash flow is the difference between the money coming in and the money going out each month. Positive cash flow means you keep more than you spend. Negative cash flow means the opposite, and that gap tends to grow quietly until it becomes a real problem. By the end of this guide, you’ll be able to calculate your net cash flow, set up a simple tracking routine, and take concrete steps to improve it starting today.

Three actions you can take right now:

  • Calculate this month’s net cash flow. Add up your take-home income, then subtract every expense you can find. The number you get is your starting point.
  • Find one avoidable outflow to cut. Check your bank statement for subscriptions, auto-renewals, or recurring charges you forgot about.
  • Automate one small saving. Automating a small saving each paycheck builds the habit before the amount matters.

Pro Tip: Experian recommends listing every inflow and outflow for a full calendar month before drawing conclusions. One month of data is a snapshot; two or three months reveal a pattern.


Key Takeaways

Understanding and managing your personal cash flow comes down to one repeatable habit: calculate your net cash flow monthly, find one leak, and automate one saving, then build from there.

Point Details
Core formula Net cash flow = total inflows minus total outflows; a positive result means you have a surplus to direct intentionally.
Sinking funds prevent surprises Divide annual and quarterly bills by 12 and treat each as a monthly outflow to avoid false surpluses.
Variable income needs a conservative baseline Build your budget on your lowest reasonable monthly income from the past 6–12 months, not your average.
Weekly reps build the habit A 15-minute weekly review and a 30-minute monthly statement are enough to stay accurate and catch problems early.
Valapoint’s Vala automates the routine Vala handles categorization, leak detection, sinking funds, and bill reminders so your cash flow statement stays current without manual effort.

Table of Contents

What does personal cash flow actually measure?

Personal cash flow measures money movement over a specific period, usually a month. It answers one question: did more money arrive than leave? That makes it your short-term financial vital sign, distinct from two other tools you may already use.

Here’s how the three concepts differ:

  • Cash flow statement: Records what actually happened. Inflows minus outflows equals your net position. It looks backward.
  • Budget: A forward-looking plan for how you intend to spend and save. It looks ahead.
  • Net worth: A snapshot of assets minus liabilities at a single point in time. It doesn’t tell you whether you can pay next month’s bills.

Bank of America’s Better Money Habits makes the distinction clear: a budget is your intent, and a cash flow statement is your record. Using both together gives you the full picture. The budget tells you where you planned to go; the cash flow statement tells you where you actually went.

Cash flow also affects your credit and borrowing capacity. Lenders and financial advisors look at whether your income reliably covers your obligations. A consistently positive net cash flow signals financial stability, while repeated shortfalls can push you toward credit reliance and higher utilization. Before seeking personalized borrowing advice, you can verify any financial professional’s credentials through FINRA BrokerCheck.


How to calculate your personal cash flow step by step

The formula is straightforward:

Net cash flow = Total cash inflows − Total cash outflows

Diagram of step-by-step cash flow calculation

K38 Consulting’s cash flow guide confirms this core formula and notes that a surplus can immediately fund emergency savings or debt repayment.

What counts as an inflow

Include money you actually receive and can spend:

  • Net (take-home) pay from your job
  • Freelance or side income received this month
  • Rental income
  • Interest or dividends paid out in cash
  • Government benefits or alimony received

Exclude reinvested dividends or unrealized investment gains. Those don’t hit your checking account, so they can’t pay your bills.

What counts as an outflow

Outflows fall into four categories:

  • Fixed: Rent or mortgage, car payment, insurance premiums, loan minimums
  • Variable: Groceries, utilities, gas
  • Discretionary: Dining out, streaming services, clothing
  • Lumpy/annual: Car registration, holiday gifts, annual subscriptions

That last category trips most people up. LegalClarity’s cash flow analysis guide recommends converting every nonmonthly bill into a monthly sinking-fund line. Divide the annual amount by 12 and treat that figure as a monthly expense. A $600 car insurance payment due in October becomes $50 per month in your cash flow statement, every month.

Pro Tip: Taxes deserve the same treatment. If you pay quarterly estimated taxes, divide your annual tax bill by 12 and include that as a monthly outflow. Ignoring it creates a false surplus that disappears four times a year.

Worked monthly example

This reader has a positive net cash flow of $1,490. That surplus is available for an emergency fund, debt paydown, or savings goals.


Which tracking method will you actually stick with?

The best tracking method is the one you use consistently. Here are the three main options and their real trade-offs:

Manual ledger (pen and paper or a notes app)

  • Setup time: 10 minutes
  • Automation: None
  • Best for: People who want full control and spend mostly cash
  • Downside: Easy to miss transactions; requires daily discipline

Spreadsheet template

  • Setup time: 20–30 minutes
  • Automation: Partial (formulas auto-calculate totals)
  • Best for: People comfortable with Google Sheets or Excel who want flexibility
  • Downside: You still enter transactions manually; no bank sync

Dedicated finance app

  • Setup time: 15–30 minutes including bank connection
  • Automation: High (auto-categorization, alerts, recurring tracking)
  • Best for: Anyone who wants real-time visibility without manual entry
  • Downside: Requires sharing bank credentials; subscription cost for premium features

Investopedia’s monthly budget guide suggests starting with broad spending buckets rather than tracking every penny. That approach reduces friction and builds the habit before you refine the categories.

Valapoint’s Vala app covers the app-based route with automatic categorization, spending leak detection, sinking fund tracking, and bill reminders. It maps directly to the steps in this guide. You can explore Vala’s finance app features to see how it handles each piece.

For readers who prefer a cash-first system, tracking cash spending without stress offers practical low-friction workflows that don’t require an app at all.

To start today: Open your bank’s transaction history for the past 30 days. Copy the totals into the template in Section 9 or a blank spreadsheet. That single step gives you your first real cash flow number.


How to improve weak or negative cash flow

If your net cash flow is negative or barely positive, these actions tend to move the needle fastest. Work through them in order.

  1. Cancel or pause unused subscriptions. Pull your last two bank statements and highlight every recurring charge. Cancel anything you haven’t used in 30 days. This is the fastest win because the savings repeat every month automatically.
  2. Refinance or consolidate high-interest debt. A lower interest rate on a credit card or personal loan reduces your fixed monthly outflow immediately. Even a 3–4 percentage point reduction on a $5,000 balance saves meaningful money each month.
  3. Adjust your tax withholding. If you consistently get a large refund, you’re giving the IRS an interest-free loan. Adjusting your W-4 through your employer adds money to each paycheck now. Northwestern Mutual’s budgeting guide includes this as a practical step in any cash flow review.
  4. Add an income stream. Freelance work, selling unused items, or a part-time shift adds to inflows without touching your current lifestyle.
  5. Automate savings before you spend. Set up a direct deposit split so a fixed amount moves to savings the moment your paycheck arrives. Automating personal savings goals removes the decision entirely.

Pro Tip: Round-up features in finance apps move spare change from every purchase into savings automatically. It’s not a wealth-building strategy on its own, but it builds the savings habit and adds up faster than most people expect.

Once you have a surplus, allocate it in this order:

  • First: Build a one-month cash reserve (your immediate liquidity buffer)
  • Second: Pay down high-interest debt (credit cards, payday loans)
  • Third: Fund short-term goals (vacation, car repair fund)
  • Fourth: Invest for long-term goals

How to handle variable or irregular income

Freelancers, gig workers, and anyone with seasonal income face a specific challenge: their cash flow varies month to month, so a single month’s calculation can mislead them.

Hands organizing cash envelopes for budgeting

The fix is a conservative baseline. Fidelity’s budgeting guide recommends building your budget on the lower end of your recent monthly income. Look at 6–12 months of income history and use a figure close to your lowest reasonable month, not your average. If your income ranged from $2,800 to $5,400 over the past year, plan around $3,000. Any month you earn more is a surplus you can direct intentionally.

A practical smoothing checklist for variable earners:

  • Separate bill account: Move your fixed monthly obligations (rent, utilities, insurance) into a dedicated account. Fund it first from every payment you receive.
  • Sinking funds for irregular bills: Annual and quarterly expenses get their own monthly line, as described in the calculation section.
  • Quarterly tax sinking fund: If you’re self-employed, divide your estimated annual tax by 12 and set that aside monthly. Quarterly deadlines stop being a crisis when you’ve been saving for them all along.
  • Larger emergency buffer: Fidelity’s guidance points toward a 6-month liquidity buffer for variable-income earners, compared to the 3-month baseline often cited for salaried workers.
  • Conservative discretionary spending: In a high-income month, resist the urge to expand lifestyle spending. Treat the surplus as next month’s safety net first.

A quick numeric example: you earn $48,000 in a good year but your income swings by $1,500 month to month. Your annual car insurance is $720, your quarterly estimated tax is $1,800, and you have a $240 annual software subscription.

  • Car insurance: $720 ÷ 12 = $60/month
  • Estimated tax: ($1,800 × 4) ÷ 12 = $600/month
  • Software subscription: $240 ÷ 12 = $20/month

Those three lines alone add $680 to your monthly outflows. Miss them and your cash flow statement shows a surplus that evaporates four times a year.


A simple weekly and monthly routine that keeps you on track

Consistency beats perfection. A short, repeatable routine is more useful than a detailed review you do once and abandon.

  1. Weekly (15 minutes): Open your bank or app and categorize any uncategorized transactions from the past seven days. Flag anything that looks wrong or unexpected. That’s it. Investopedia’s budget guide calls these short sessions “reps” and notes that they build a durable habit without creating burnout. A weekly spending plan can make this even faster.
  2. Monthly (30 minutes): Complete your cash flow statement for the month just ended. Compare your actual net cash flow to your planned budget. Note any category that ran over. Adjust next month’s plan accordingly.
  3. Quarterly (60 minutes): Review your sinking funds. Are they on track? Revisit your savings goals. Check whether any fixed costs have crept up (insurance renewals, subscription price increases). If a major life event happened (new job, new baby, large purchase), treat this as a full reset.

When to do an immediate review: A job change, a new lease, a major medical expense, or a new loan all shift your cash flow significantly. Don’t wait for the quarterly slot. Run a fresh calculation within the first week of any major financial change.


Common cash flow mistakes and red flags to watch for

Most cash flow errors fall into a few predictable categories. Catching them early saves real money.

Measurement mistakes:

  • Using gross pay instead of net (take-home) pay inflates your inflows
  • Forgetting lumpy annual bills creates a false monthly surplus
  • Ignoring subscriptions and auto-renewals, which LegalClarity notes are among the most common sources of undetected outflows
  • Counting reinvested dividends or unrealized gains as spendable income

Behavioral traps:

  • Reviewing cash flow only when something goes wrong (reactive instead of proactive)
  • Treating a one-month surplus as permanent and expanding spending before the pattern holds
  • Skipping the sinking fund step and then scrambling when annual bills arrive

Red flags that signal a structural problem:

  • Repeated overdrafts or overdraft fees
  • Rising credit card utilization month over month
  • Two or more consecutive months of negative net cash flow

A persistently negative net cash flow signals that either fixed costs are too high or income is insufficient. The first move is to cut fixed costs, not discretionary ones, because fixed cuts repeat every month. The second move is to build a short-term cash reserve, even a small one, to absorb the next unexpected expense without going further into debt.

First-fixes checklist:

  • Tighten discretionary spending by 10–15% for 60 days
  • Create a temporary $500–$1,000 cash reserve before paying extra on debt
  • Call service providers (insurance, internet, phone) and ask for a lower rate

Your copyable monthly cash flow template

Use this template as your starting point. Copy the structure into a Google Sheet, Excel file, or your finance app’s custom categories.

Worked example (using the numbers from Section 3):

How to use this in a spreadsheet:

  • Enter your planned amounts at the start of each month
  • Update actuals weekly during your 15-minute review
  • Add a formula in the Net Cash Flow row: =Total Inflows − Total Outflows
  • Color-code the net row: green for positive, red for negative

For readers who want a deeper look at cash flow optimization beyond the basics, Wealth Assimilation’s cash flow guide covers advanced strategies worth reading once you have the fundamentals in place.


What a short weekly cash flow check actually looks like

The routine described in this guide isn’t theoretical. A 15-minute weekly review, done consistently, surfaces problems before they compound. The monthly net cash flow check takes about 30 minutes and answers one question: did the plan match reality?

What tends to happen in practice is that small automations do the most work. Moving a fixed amount to a sinking fund the day after payday removes the temptation to spend it. Setting a bill reminder two days before a due date eliminates late fees. These aren’t dramatic changes. They’re small, repeatable behaviors that add up over months.

The specific behavior worth copying: when you cancel a subscription, immediately redirect that exact dollar amount to a sinking fund or savings goal. The money was already leaving your account. Redirecting it rather than absorbing it back into discretionary spending is what turns a one-time cut into a permanent improvement.


Valapoint’s Vala app puts this guide on autopilot

Tracking cash flow manually works. But the step most people skip is the weekly review, and that’s exactly where Vala removes the friction.

Valapoint

Vala connects securely to your bank accounts and automatically categorizes every transaction, so your cash flow statement builds itself in real time. Spending leak detection flags recurring charges you may have forgotten. Sinking fund tracking lets you set monthly targets for annual bills and watch them fill. Bill reminders keep due dates visible before they become overdrafts. The personal finance tools inside Vala also include calculators you can use to run your first net cash flow number in minutes.

When choosing a cash flow app, look for: bank-level encryption and read-only account access, automatic categorization with manual override, sinking fund or savings bucket features, and spending alerts you can customize.

Vala’s freemium plan lets you start tracking at no cost. The premium tier unlocks AI-driven insights, shared expense splitting for couples and groups, and advanced goal tracking. You can get set up in about 15 minutes. Try the Vala personal money app and run your first cash flow calculation today.


Sources

These sources back the key claims in this guide and are worth bookmarking for further reference.

This article is general information, not a substitute for advice from a qualified financial advisor. Consult a qualified financial professional about your own circumstances before acting on anything here.

Free AI Budgeting App for Individuals, Couples, and Groups

The best way to get free, hands-on budget management right now is to start with an AI-powered freemium app that connects to all your active accounts for a complete picture. Skip the spreadsheets. Try Vala’s free tier today and get accurate, automated insights within minutes of linking your checking, savings, and primary credit card accounts.

Here is why this fits your situation:

  • Automation does the work. Vala connects to your bank accounts, categorizes every transaction, and flags spending patterns without any manual entry.
  • Shared budgeting is built in. Whether you are splitting costs with a partner or a small group, the free tier handles shared expense tracking out of the box.
  • No cost to start. The freemium model means you get real, useful features before you ever consider paying.

Key Takeaways

A free AI-powered budgeting app covers the core needs of most individuals, couples, and small groups in the U.S., with no cost required to start tracking, splitting, and saving.

Point Details
Start free, start fast Vala’s free tier includes auto-categorization, shared splitting, and alerts with no subscription needed.
Link all active accounts Connecting checking, savings, and your main credit card gives the AI a complete picture for accurate insights. Partial data produces partial insights.
Set one goal first Pick one specific budget target in the first week; one focused goal builds the habit faster than five vague ones.
Check security before linking Confirm read-only connections, data deletion controls, and encryption before connecting any bank account.
Upgrade only when you need it Paid features are worth it when you need predictive forecasting, automation, or unlimited shared groups.

Table of Contents

What do free AI budgeting apps actually give you?

A free tier on an AI-powered app is not a stripped-down demo. Most free tiers include automatic account linking, transaction categorization, basic budget creation, shared expense splitting, and spending alerts. According to SuperMoney’s breakdown of how AI budgeting apps work, these apps use machine learning to connect to your accounts and generate personalized recommendations without any manual data entry.

What typically sits behind a paywall: advanced forecasting, automated recurring transfers, unlimited shared groups, and premium goal optimization tools.

Feature Free Tier Paid Tier
Automatic account linking
Transaction categorization
Basic budget tracking
Shared expense splitting ✓ (limited groups) ✓ (unlimited)
Spending alerts
Predictive forecasting Limited
Automated recurring transfers
Advanced goal optimization

Comparison of free and paid AI budgeting app features

GreenPath Financial Wellness notes that AI budgeting apps are most effective when paired with consistent habits or support from certified counseling, such as NFCC- or HUD-aligned services.


How does AI actually improve your daily budgeting?

AI does four things well in a budgeting app: it categorizes transactions automatically, detects spending patterns over time, sends anomaly alerts when something looks off, and calculates a safe-to-spend figure based on your upcoming bills. Research from Jumpp Finance confirms that AI budgeting tools analyze past transactions and recurring expenses to predict upcoming costs and suggest real-time budget adjustments.

Where AI stops short: it cannot set your personal priorities, weigh a career change against a savings goal, or make judgment calls about trade-offs that only you understand. USA Today’s personal finance coverage makes this clear: AI automates tracking and pattern detection, but it cannot replace human decision-making.

Pro Tip: Treat AI recommendations as suggestions, not directives. When the app flags that you spent more on dining this month, use that as a prompt to decide whether to set a weekly limit, not as an automatic rule to follow.

AI can often suggest specific, small actions—like canceling a forgotten $14/month subscription or capping weekly takeout at $60—that may produce real, immediate results. The insight is only useful when you act on it.

Vala’s approach to AI-personalized budgets goes further by surfacing spending patterns and savings opportunities specific to shared and personal budgets, not just generic category averages.


How does AI actually improve your daily budgeting? — overview diagram

How do you set up a free AI budgeting app in the first week?

Getting started is typically quick. Here is the sequence that gets you useful results fast.

  1. Pick your app and confirm bank support. Check that your primary bank is supported before you sign up. Most apps list compatible institutions on their website or during onboarding.
  2. Link your primary accounts. Connect your checking account, savings account, and main credit card. Partial data produces partial insights, so connecting every active account gives the AI a complete picture. “Read-only” means the app can see your transactions but cannot move money.
  3. Set one concrete goal and one budget category. Pick something specific: save $200 this month, or keep dining under $150. One focused target beats five vague ones.
  4. Enable alerts and invite others. Turn on weekly summary emails and spending alerts. If you are budgeting with a partner or group, send the invite now so shared expenses sync from day one.

Do in the first week:

  • Review your categorized transactions once and correct any miscategorized items.
  • Check the spending pattern summary after 5–7 days.
  • Act on one AI suggestion, even a small one.

Avoid in the first week:

  • Linking accounts and then ignoring the app for two weeks.
  • Setting more than two budget categories before you see how the first one tracks.

What should you check before linking your bank accounts?

Security is the right thing to check before you connect any financial account. Here is what matters for U.S. users:

  • Bank-level encryption. Look for strong encryption standards such as 256-bit AES or equivalent language in the app’s security documentation.
  • Read-only connections. Apps that use Plaid-type integrations connect to your institution without the ability to initiate transfers. Confirm this before linking.
  • Independent security audit compliance (e.g., SOC 2). Apps that undergo recognized security audits demonstrate higher standards of data protection.
  • Data deletion controls. A trustworthy app lets you delete your data and revoke account access at any time. Check the privacy policy for a clear deletion process.
  • Purpose limitation. The privacy policy should state that your transaction data is used for your budgeting, not sold to third parties.

Before you link any account, open the app’s privacy policy and search for “data deletion” and “third-party sharing.” If either section is vague or missing, that is a signal to look elsewhere.

For guidance beyond the app itself, NFCC-certified and HUD-approved counselors offer free or low-cost financial counseling across the U.S. and can help you turn app insights into a real financial plan.


When is the free tier enough, and when should you upgrade?

For most individuals and couples just starting out, the free tier covers everything you need for the first three to six months. Three clear signs it is time to consider paid:

  • You are splitting costs across more than one group regularly. Free tiers typically cap shared groups. If you manage household expenses with a partner and also split costs with roommates or friends, you will hit that limit quickly.
  • You want predictive forecasting. If you need the app to project next month’s cash flow based on recurring bills and income patterns, that feature is almost always paid.
  • You want automated recurring transfers. Manually moving money to savings every payday works, but automation removes the friction entirely, and that feature lives in paid tiers.

Pro Tip: Before upgrading, list the two or three paid features you would actually use. If you cannot name them specifically, the free tier is still the right choice.

For individuals on a tight budget, the free tier plus a free AI-enabled spreadsheet template covers most planning needs without any subscription cost.


Why starting with a freemium AI budgeting app makes sense

The biggest barrier to consistent budgeting is not knowledge. It is friction. A freemium AI app removes that friction by doing the categorization, pattern detection, and alerting automatically. You get to focus on the decisions, not the data entry.

Small wins matter more than perfect systems. Catching one unnecessary subscription, staying under your dining budget for two weeks, or simply knowing your actual monthly spending for the first time, these are the habits that compound. The app makes them visible. You make them stick.


Vala is a strong free starting point for individuals, couples, and groups

Vala gives you real budgeting power without a subscription. The free tier includes automatic transaction categorization, shared expense splitting, safe-to-spend alerts, and goal tracking, all backed by bank-level encryption and read-only account connections.

Valapoint

For individuals who want to track spending and catch money leaks, the Vala personal finance app is the place to start. For couples and small groups, shared expense splitting is available on the free tier from day one. Vala also supports users who want to connect their budgeting to NFCC- or HUD-aligned counseling resources for deeper financial guidance.

Want to explore the full toolkit? Vala’s personal finance tools include budget calculators, savings trackers, and debt tools that complement the app’s automated insights.


Useful resources and trusted partners

  • How AI Personalizes Budgets for Smarter Money Management — Vala Blog: deeper reading on AI categorization and personalized spending insights.
  • Vala Blog: Budgeting Tips and Money Management Guides — full library of budgeting and expense tracking articles.
  • GreenPath Financial Wellness: AI Budgeting & Credit Apps — consumer guidance on using AI apps alongside certified financial counseling.
  • SuperMoney: How AI Budgeting Apps Work — plain-language explanation of how these apps connect to accounts and generate insights.
  • USA Today: Can AI Replace Budgeting? — balanced look at what AI can and cannot do in personal finance.
  • AI Excel Budget Template — partner resource for users who want a spreadsheet export or offline planning option alongside their app.

This article is general information, not a substitute for advice from a qualified financial advisor. Consult a qualified financial professional about your own circumstances before acting on anything here.

Sources